Hugo is a fast and modern static site generator written in Go and designed to make website creation fun again. It builds pages when you create or update your content. Websites built with Hugo are extremely fast and secure. Hugo takes a source directory of files and templates and uses these as input to create a complete website.
Hugo sites can be hosted anywhere, including Netlify, Heroku, GoDaddy, DreamHost, GitHub Pages, GitLab Pages, Surge, Aerobatic, Firebase, Google Cloud Storage, Amazon S3, Rackspace, Azure, and CloudFront and work well with CDNs. Hugo sites run without the need for a database or dependencies on expensive runtimes like Ruby, Python, or PHP.
In this tutorial, I’d show you how to build your first Hugo site and deploy to Netlify. Let’s roll :)
Hugo Features
Hugo is the fastest tool of its kind. At <1 ms per page, the average site builds in less than a second. Watch this video here to see how fast Hugo is
Hugo supports unlimited content types, taxonomies, menus, dynamic API-driven content, and more, all without plugins.
We love the beautiful simplicity of markdown’s syntax, but there are times when we want more flexibility. Hugo shortcodes allow for both beauty and flexibility.
Hugo ships with pre-made templates to make quick work of SEO, commenting, analytics and other functions. One line of code and you’re done.
Hugo provides full i18n support for multi-language sites with the same straightforward development experience Hugo users love in single-language sites.
Hugo allows you to output your content in multiple formats, including JSON or AMP and makes it easy to create your own.
All features can be found here
Getting Started
For this tutorial, we’re going to build a Simple Blog with Hugo.
PS: I would be using a windows machine in this tutorial. Hence all steps would be based on windows, but I added installation guides for other operating systems.
I’ve also created a repository with starter files found here. Use the installation guide to get Hugo running on your machine and fork the starter files. Ensure you follow the steps.
Prerequisites
Git
Code Editor
Steps
Install Hugo
Fork the starter repository here
Create a new site
Deploy to Netlify
Installation guide
To start using Hugo, you need first to install it.
Hugo was written in Go, but you don’t need to install Go to enjoy Hugo. You only need a precompiled binary!
Hugo currently provides pre-built binaries for the following:
macOS (Darwin) for x64, i386, and ARM architectures
Windows
Linux
OpenBSD
FreeBSD
Installing on Mac
Follow the video below to install Hugo on your macOS or read the Installation guide. There are several techniques for installing Hugo on mac, so I won’t be going through them. BTW, I’m using a windows machine, so I possibly don't know how to guide you :)
Installing on Windows
Follow the video below to install Hugo on your windows machine or read the Installation guide. This video is a complete guide, but please let me know in comments if you have installation issues.
Installing on Linux
To install the “extended” Sass/SCSS:
snap install hugo --channel=extended
To install the non-extended version without Sass/SCSS support:
snap install hugo
- Using the Debian Package for Ubuntu.
This installs the “extended” Sass/SCSS version.
sudo apt-get install hugo
- For Arch Linux
sudo pacman -Syu hugo
- For Fedora, Red Hat and CentOS
sudo dnf install hugo
Installing on OpenBSD
doas pkg_add hugo
Creating a new site
You can fork the starter repository. It contains the finished work with Theme and custom posts. Creating a site with Hugo is quite simple, follow the following steps.
- Create a new site with name Hugo101
hugo new site Hugo10
Now you should have a new folder Hugo101 with subfolders:
├── archetypes
├── assets
├── config
├── content
├── data
├── layouts
├── static
└── themes
Full directory structure explanation can be found here
Additional resource:
- Add a new theme. All Hugo themes can be found here. For this tutorial, we’d be using the Hugo Base16 theme by Hylke Visser.
This video would show you how to install and use themes on Hugo. Installing is very simple; you need to find the theme you like and download it into the themes subdirectory. If you’re using the starter file, I’ve done that already.
- After installing the theme or cloning the starter file, start the Hugo server
hugo server -D
Now your new site should be available at localhost:1313.
- To add a new post
hugo new post/my-first-post.md
This would be added in /contents/post
- Some posts parameters would be added at the top of the file. I’ve added some additional parameters you might need.
---
title: "my first post"
date: 2018-11-05T13:22:14+24:00
draft: false
tags: ["markdown", "GitHub", "website"]
categories: ["hugo", "base16"]
 ---
- To build files, run
hugo
Now your directory would have a new subfolder public; this is the final build. Hugo takes a source directory of files and templates and uses these as input to create a complete website. The public is the complete website and is what you’d deploy.
├── archetypes
├── assets
├── config
├── content
├── data
├── layouts
├── public
├── static
└── themes
- Configure Hugo for deployment
We would deploy to Netlify in the next section of this tutorial, but before that, we need to configure Hugo for Netlify.
Create a new file in your project's root; If you’re using the starter file, I’ve added this already.
touch netlify.toml
Paste this in it: (This is just configuring how Hugo should work with Netlify)
[build]
 publish = "public"
 command = "hugo --gc --minify"

[context.production.environment]
 HUGO_VERSION = "0.54.0"
 HUGO_ENV = "production"
 HUGO_ENABLEGITINFO = "true"

[context.split1]
 command = "hugo --gc --minify --enableGitInfo"

[context.split1.environment]
 HUGO_VERSION = "0.54.0"
 HUGO_ENV = "production"

[context.deploy-preview]
 command = "hugo --gc --minify --buildFuture -b $DEPLOY_PRIME_URL"

[context.deploy-preview.environment]
 HUGO_VERSION = "0.54.0"

[context.branch-deploy]
 command = "hugo --gc --minify -b $DEPLOY_PRIME_URL"

[context.branch-deploy.environment]
 HUGO_VERSION = "0.54.0"

[context.next.environment]
 HUGO_ENABLEGITINFO = "true"
Deploying to Netlify
Netlify is an all-in-one workflow that combines global deployment, continuous integration, automatic HTTPS and many other features.
Ensure you have a forked version of the starter files or a version of your own project hosted on GitHub
Create a Netlify account
Visit app.netlify.com and select your preferred signup method.
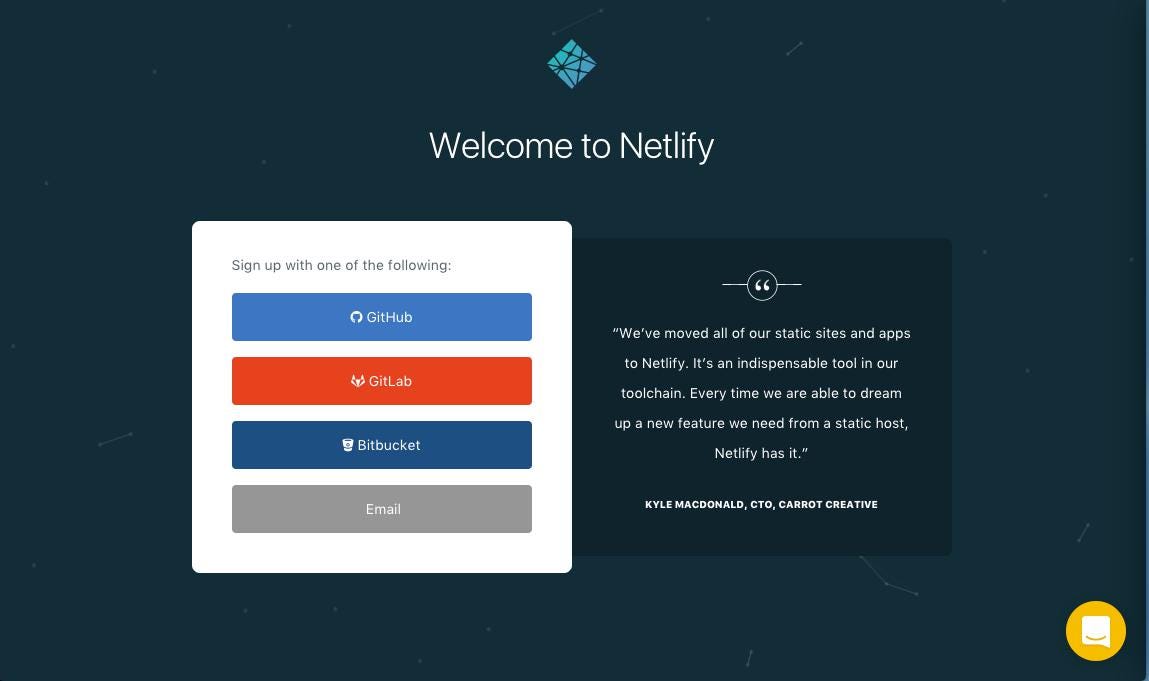
Create a New Site with Continuous Deployment
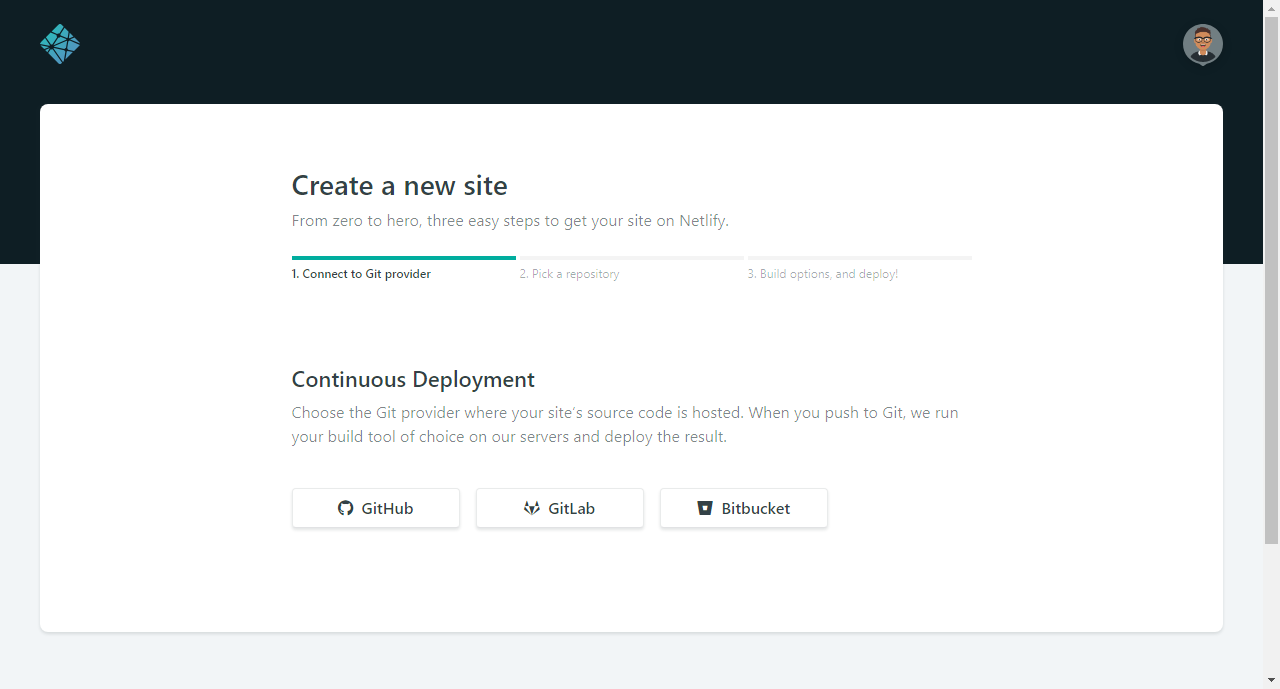
Select the “New site from git.” button
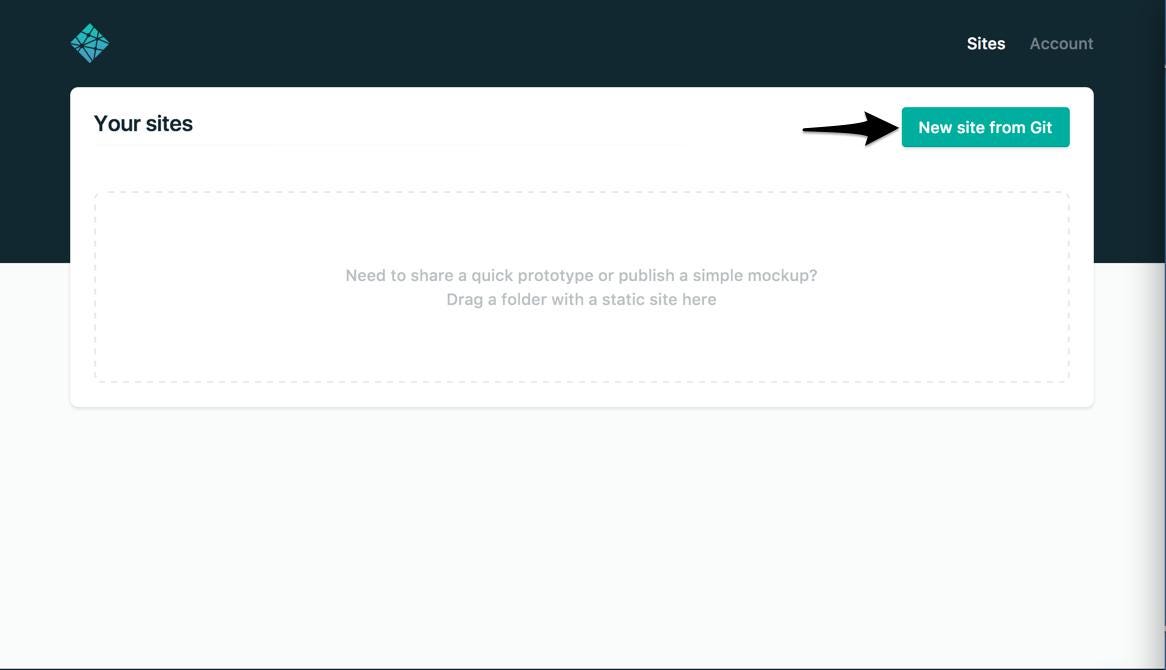
Select your git provider
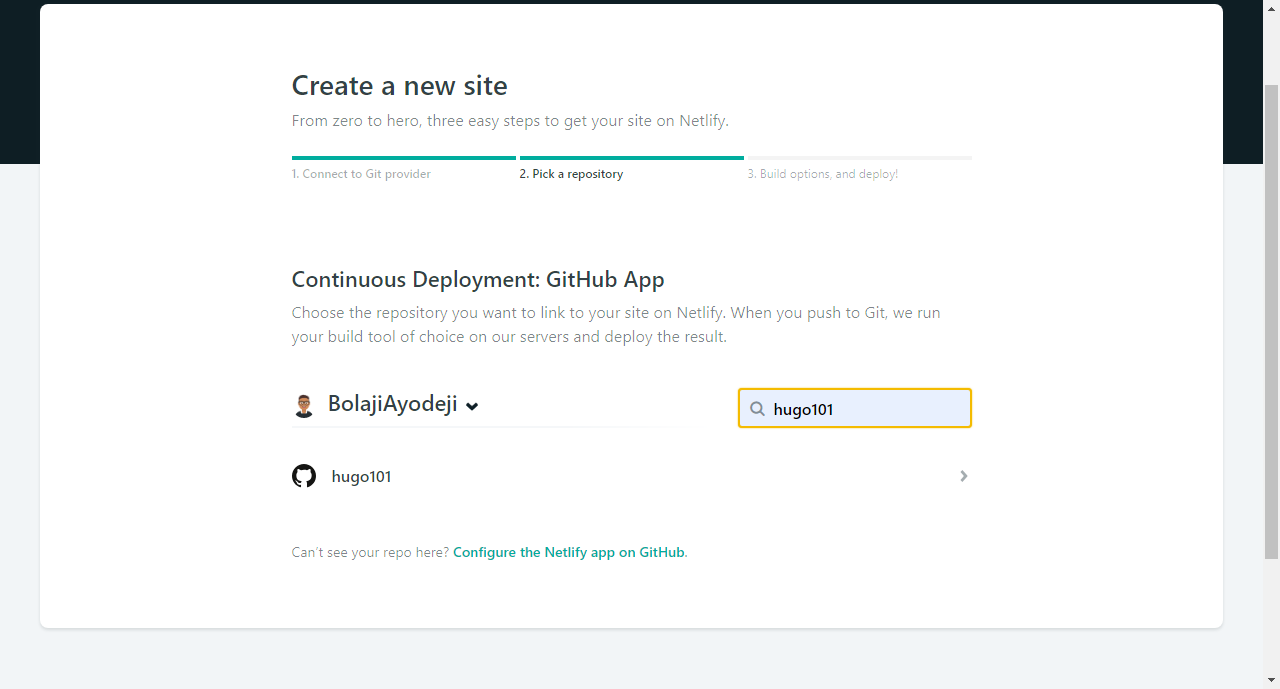
Select the repository you want to use for continuous deployment.
For this tutorial, I assume its Hugo101; else you can filter through your repositories in real-time.
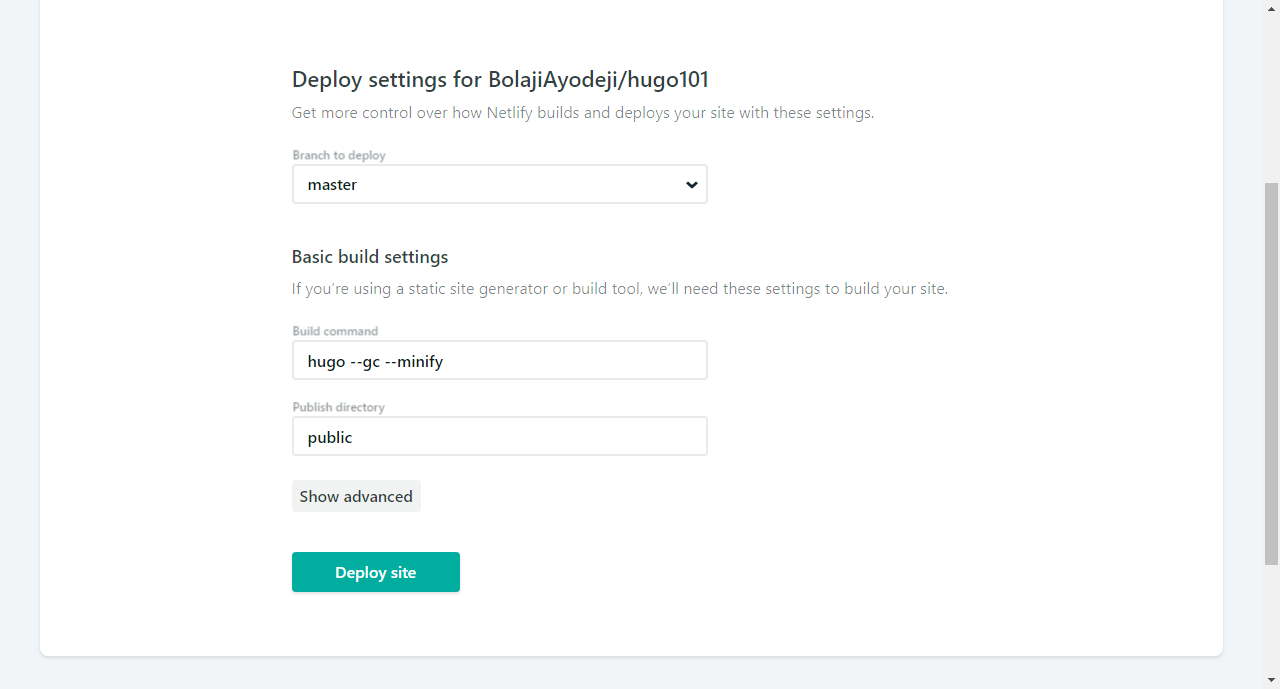
Deploy settings
Here you select the branch you wanted to be published, your build command, and your publish directory (Directory that contains the built static files). The publish directory for Hugo is public. The following steps assume you are publishing from the master branch.
Build and Deploy Site
In the Netlify console, select “Deploy site” and wait for it to build
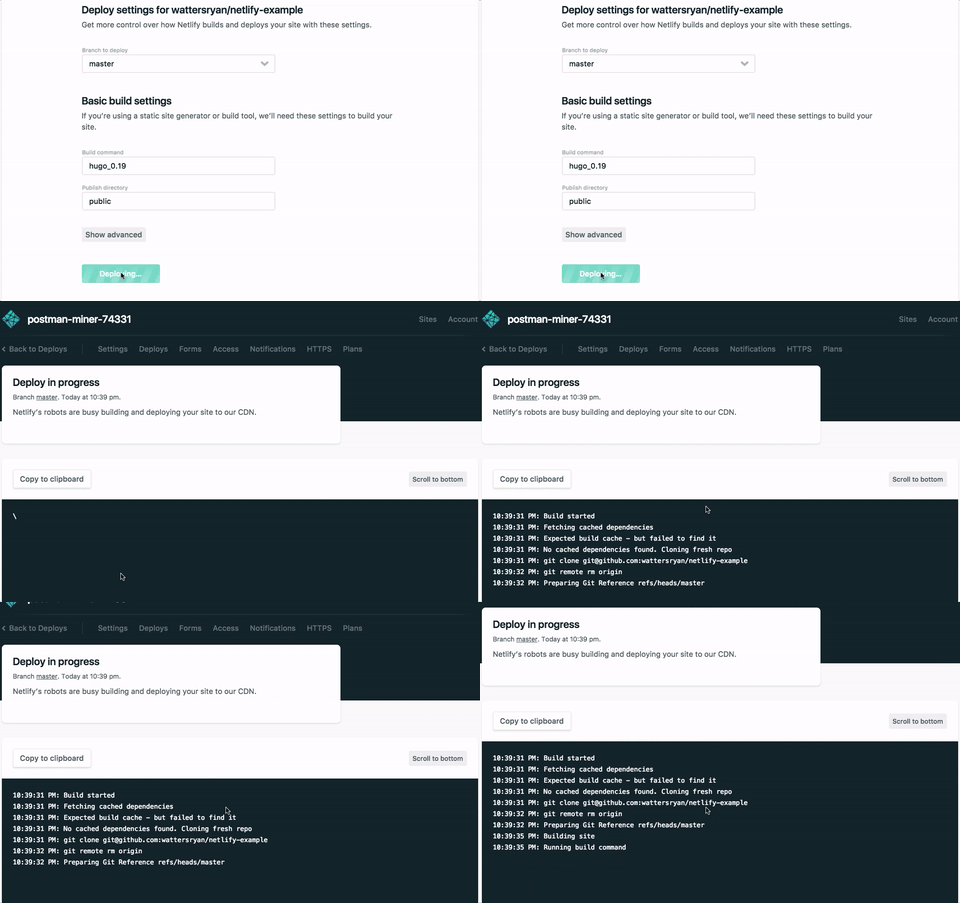
Once the build is finished, you should now see a “Hero Card” at the top of your screen, letting you know the deployment is successful. You’ll see that Netlify automatically generates the URL. You can update the URL in “Settings.” Visit the live site.
Now every time you push changes to your hosted git repository, Netlify will rebuild and redeploy your site. You can add your own changes to the starter files and tweak as you wish.
Conclusion
Hugo is the world’s fastest framework for building websites. It is one of the most popular open-source static site generators. With its amazing speed and flexibility, Hugo makes building websites fun again. (Hugo docs)
Hugo is open-source and completely free, you can contribute to Hugo here
This is just a beginners guide, there’s still more to Hugo, head out and read the Hugo docs to learn more. Below is a list of useful resources you might need.
Credits
About the author
undefined or mostly null.
Comments
Join the discussionHey Balaji, I have been working on the same Hugo stuff with the Fuji Theme. By the way, how do you integrate comments - say via disqus plugin? Any thoughts?
You can add a Disqus embed iframe code as seen here.
Bolaji Ayodeji Thanks Balaji. Will check this out. Guess the features/usage may vary based on the theme.
Can we just fork and deploy like creating Jekyll on Github?
Yes, you can fork the repo and deploy
Web Engineering
In this series, I will share articles related to best practices for building and deploying applications on the web with the JavaScript and Python programming languages.