How to Create File Archives Using the Linux Tape Archive (TAR) Command
undefined or mostly null.
We manage many files and directories on our computer, and most times, it's a lot. You can organize and sort these files in folders for easier access and management. However, what do you do when you have to share these files with another user or computer?
In this article, I'll show you how to combine files or directories in an archive, compress these archives (reducing the final archive file size) alongside how to extract the collected files from the archive using the CLI.
Prerequisites
Before you begin this tutorial, you'll need the following:
- A shell running on your computer (CommandPromt, Bash, Zsh e.t.c)
- Bunch of files and directories on your computer. If you don't have some, you can create some files and directories (if you want to) with the command below:
mkdir folder{1..10}
touch file{1..10}
- How about a small smile? 😊
Introduction to CLI
As opposed to the GUI (Graphical User Interface), which provides users with a user interface with which they can interact with a computer, the CLI (Command Line Interface) allows users to input in some commands meant to initiate some action on the computer in the form of text via a terminal. These commands will run via a shell with the desired result displayed back on the terminal.
One fantastic feature of the operating system is the Command Line Interface (CLI), which allows users to interact with their computer from a shell. This shell is a REPL (Read, Evaluate, Print, Loop) environment where users can enter a command, and the shell runs it and returns a result.
How to Create an Archive (File or Directory) with Tar
Tar (an abbrevation for Tape Archive) is a Linux command used to create a .tar, .tar.gz, or .tar.bz2 archive file (also known as "tarballs").
You can combine files or directories into an archive with the command below like so:
tar -cf archive-name.tar /path/to/file-or-directory
You should now see a file called archive-name.tar containing the files or directories in /path/to/file-or-directory.
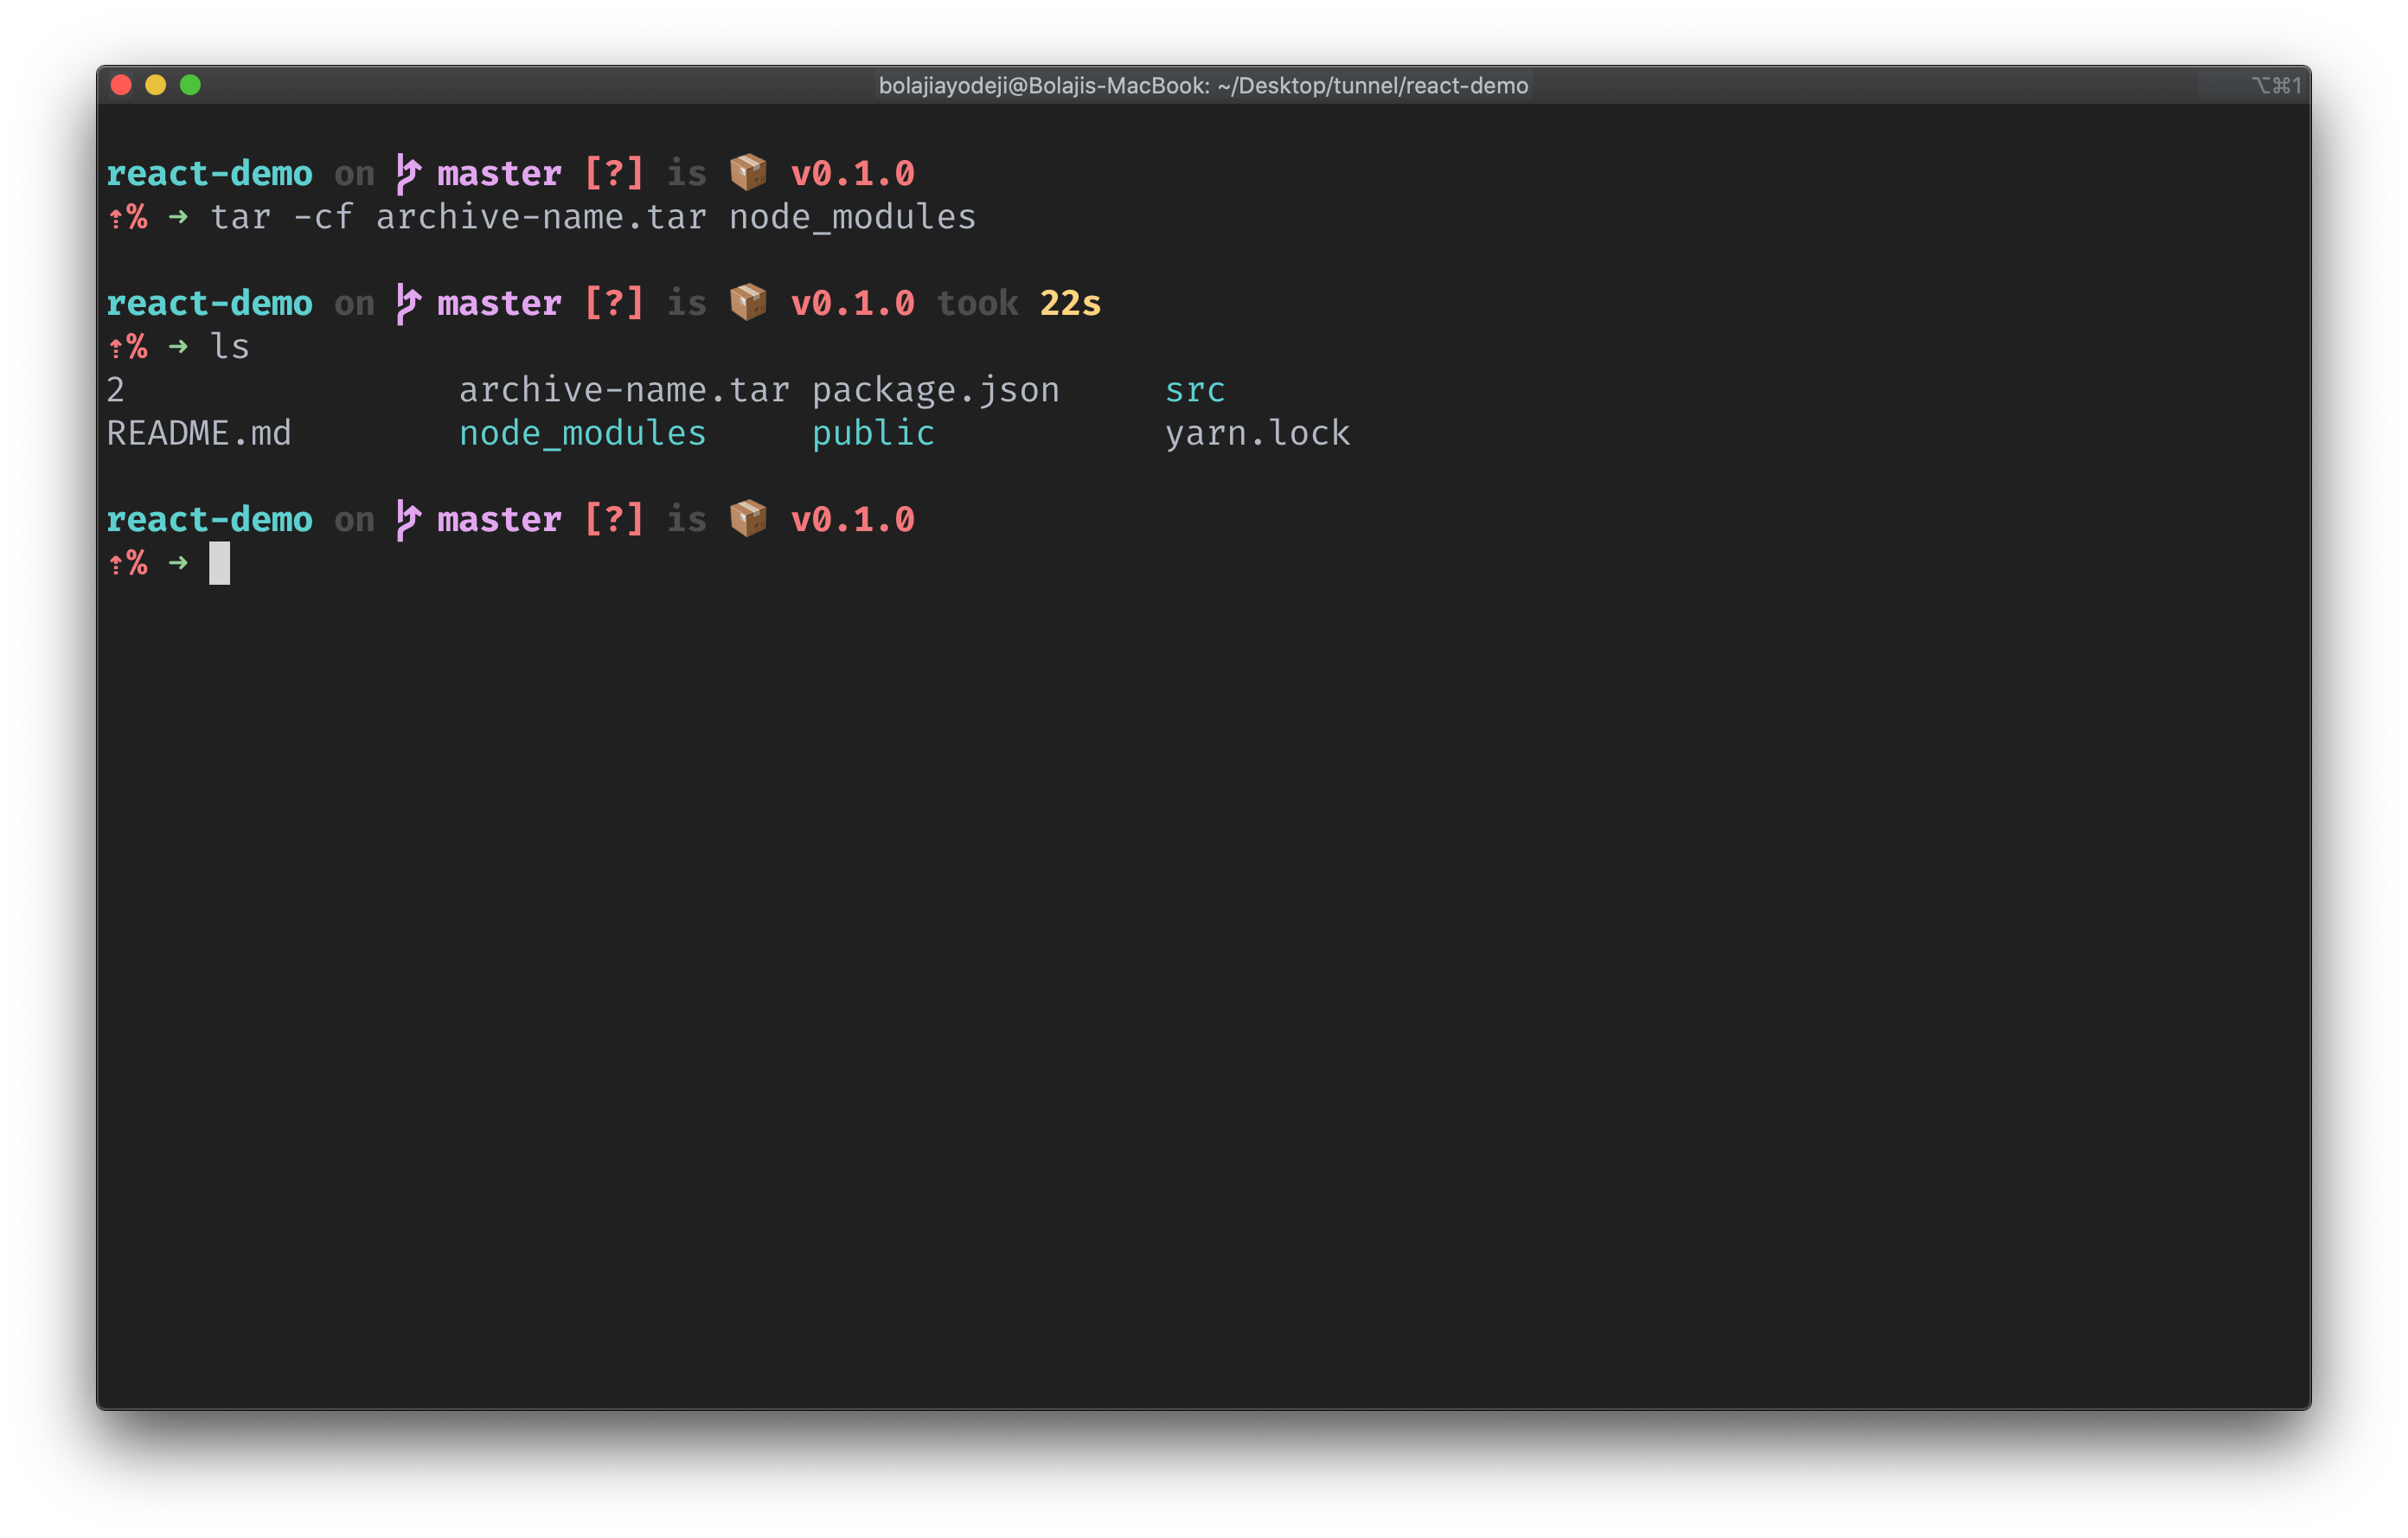
Here's a breakdown of the command we used:
taris the tape archive command.-cis the flag that creates the archive file.-fis the flag that allows you to specify the filename for the archive.
Let's run ls -lshS to list the files in our current directory with their file sizes in a readable format and sort the files from biggest to smallest.
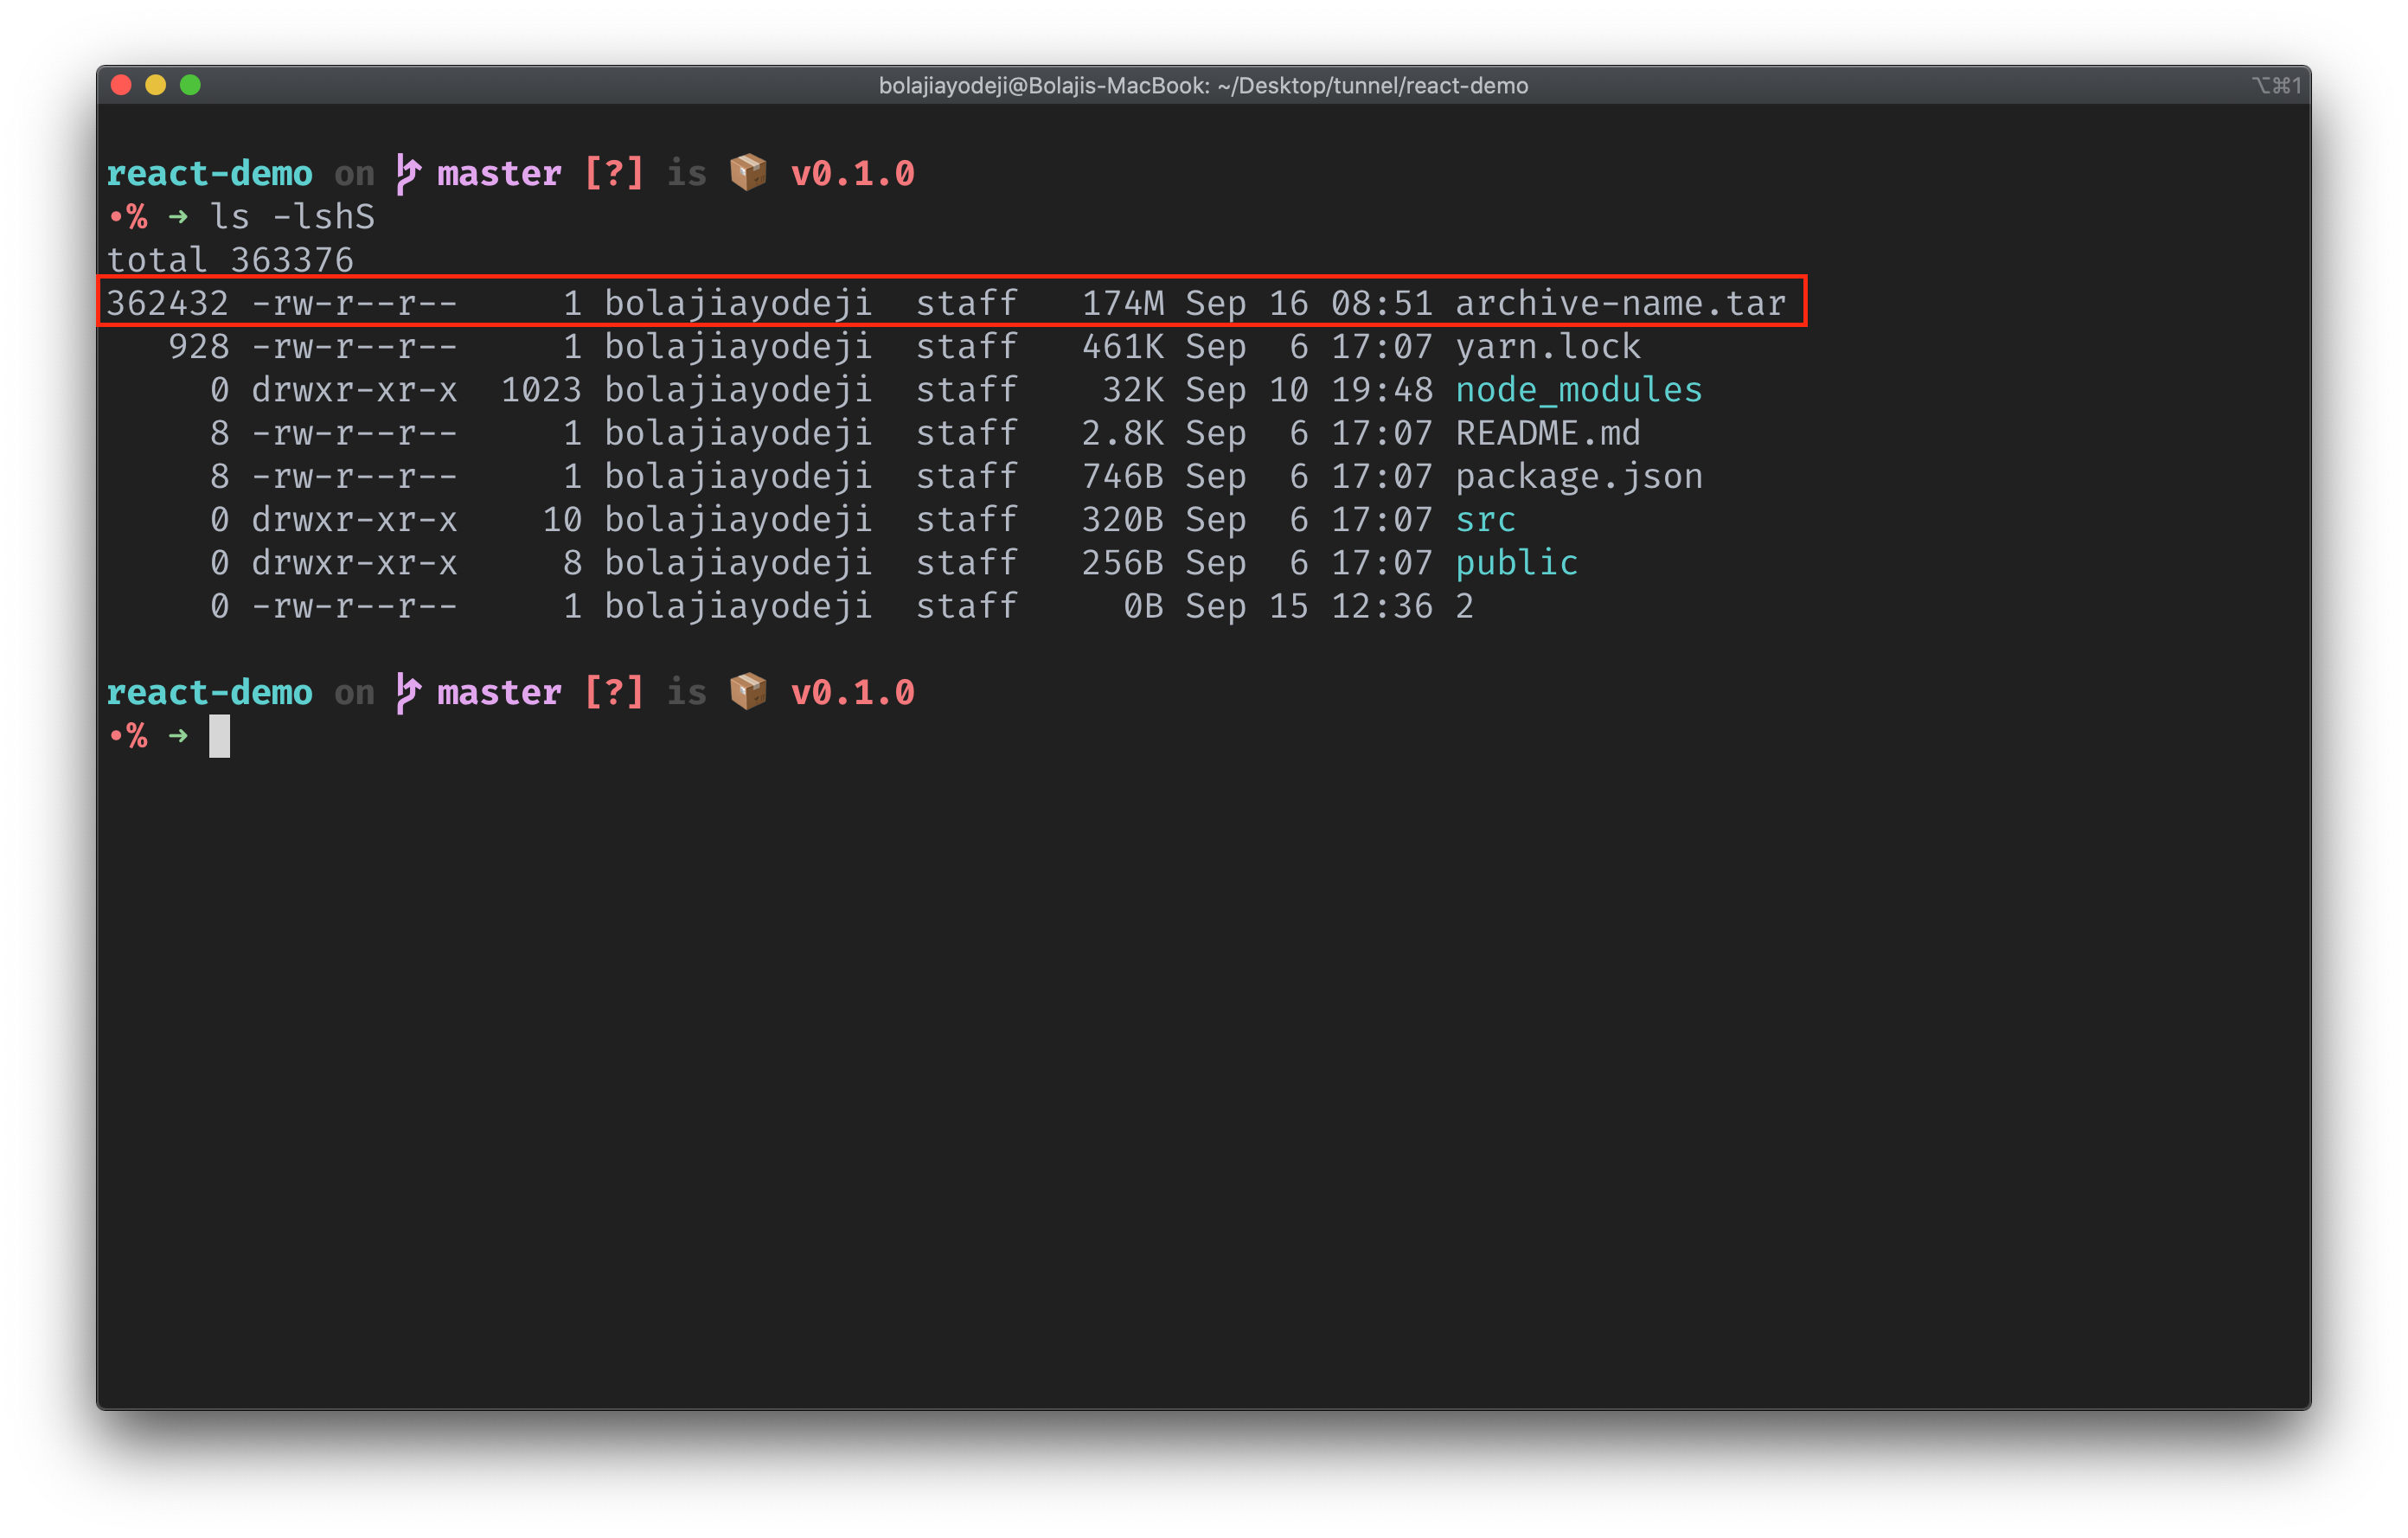
The contents of the node_modules directory with the initial 32K size compressed into the archive will result in a 174M size.
How to Create an Archive and Compress with GZIP
By default, we want our archive files to be compressed and produce lesser file sizes (I do, don't you? 😌); however, the previous command only collected the files into the archive. To compress your final archive, you'll append the -z flag, which will use GZIP to automatically compress the archive and produce a .tar.gz file.
gzip is a file format and a software application used for file compression and decompression. The program was created by Jean-loup Gailly and Mark Adler as a free software replacement for the compress program used in early Unix systems, and intended for use by GNU ~ Wikepedia
Let's test this with the same node_modules folder like so:
tar -zcf archive-name.tar.gz node_modules
You should now see a file called archive-name.tar.gz containing the files and directories in node_modules.
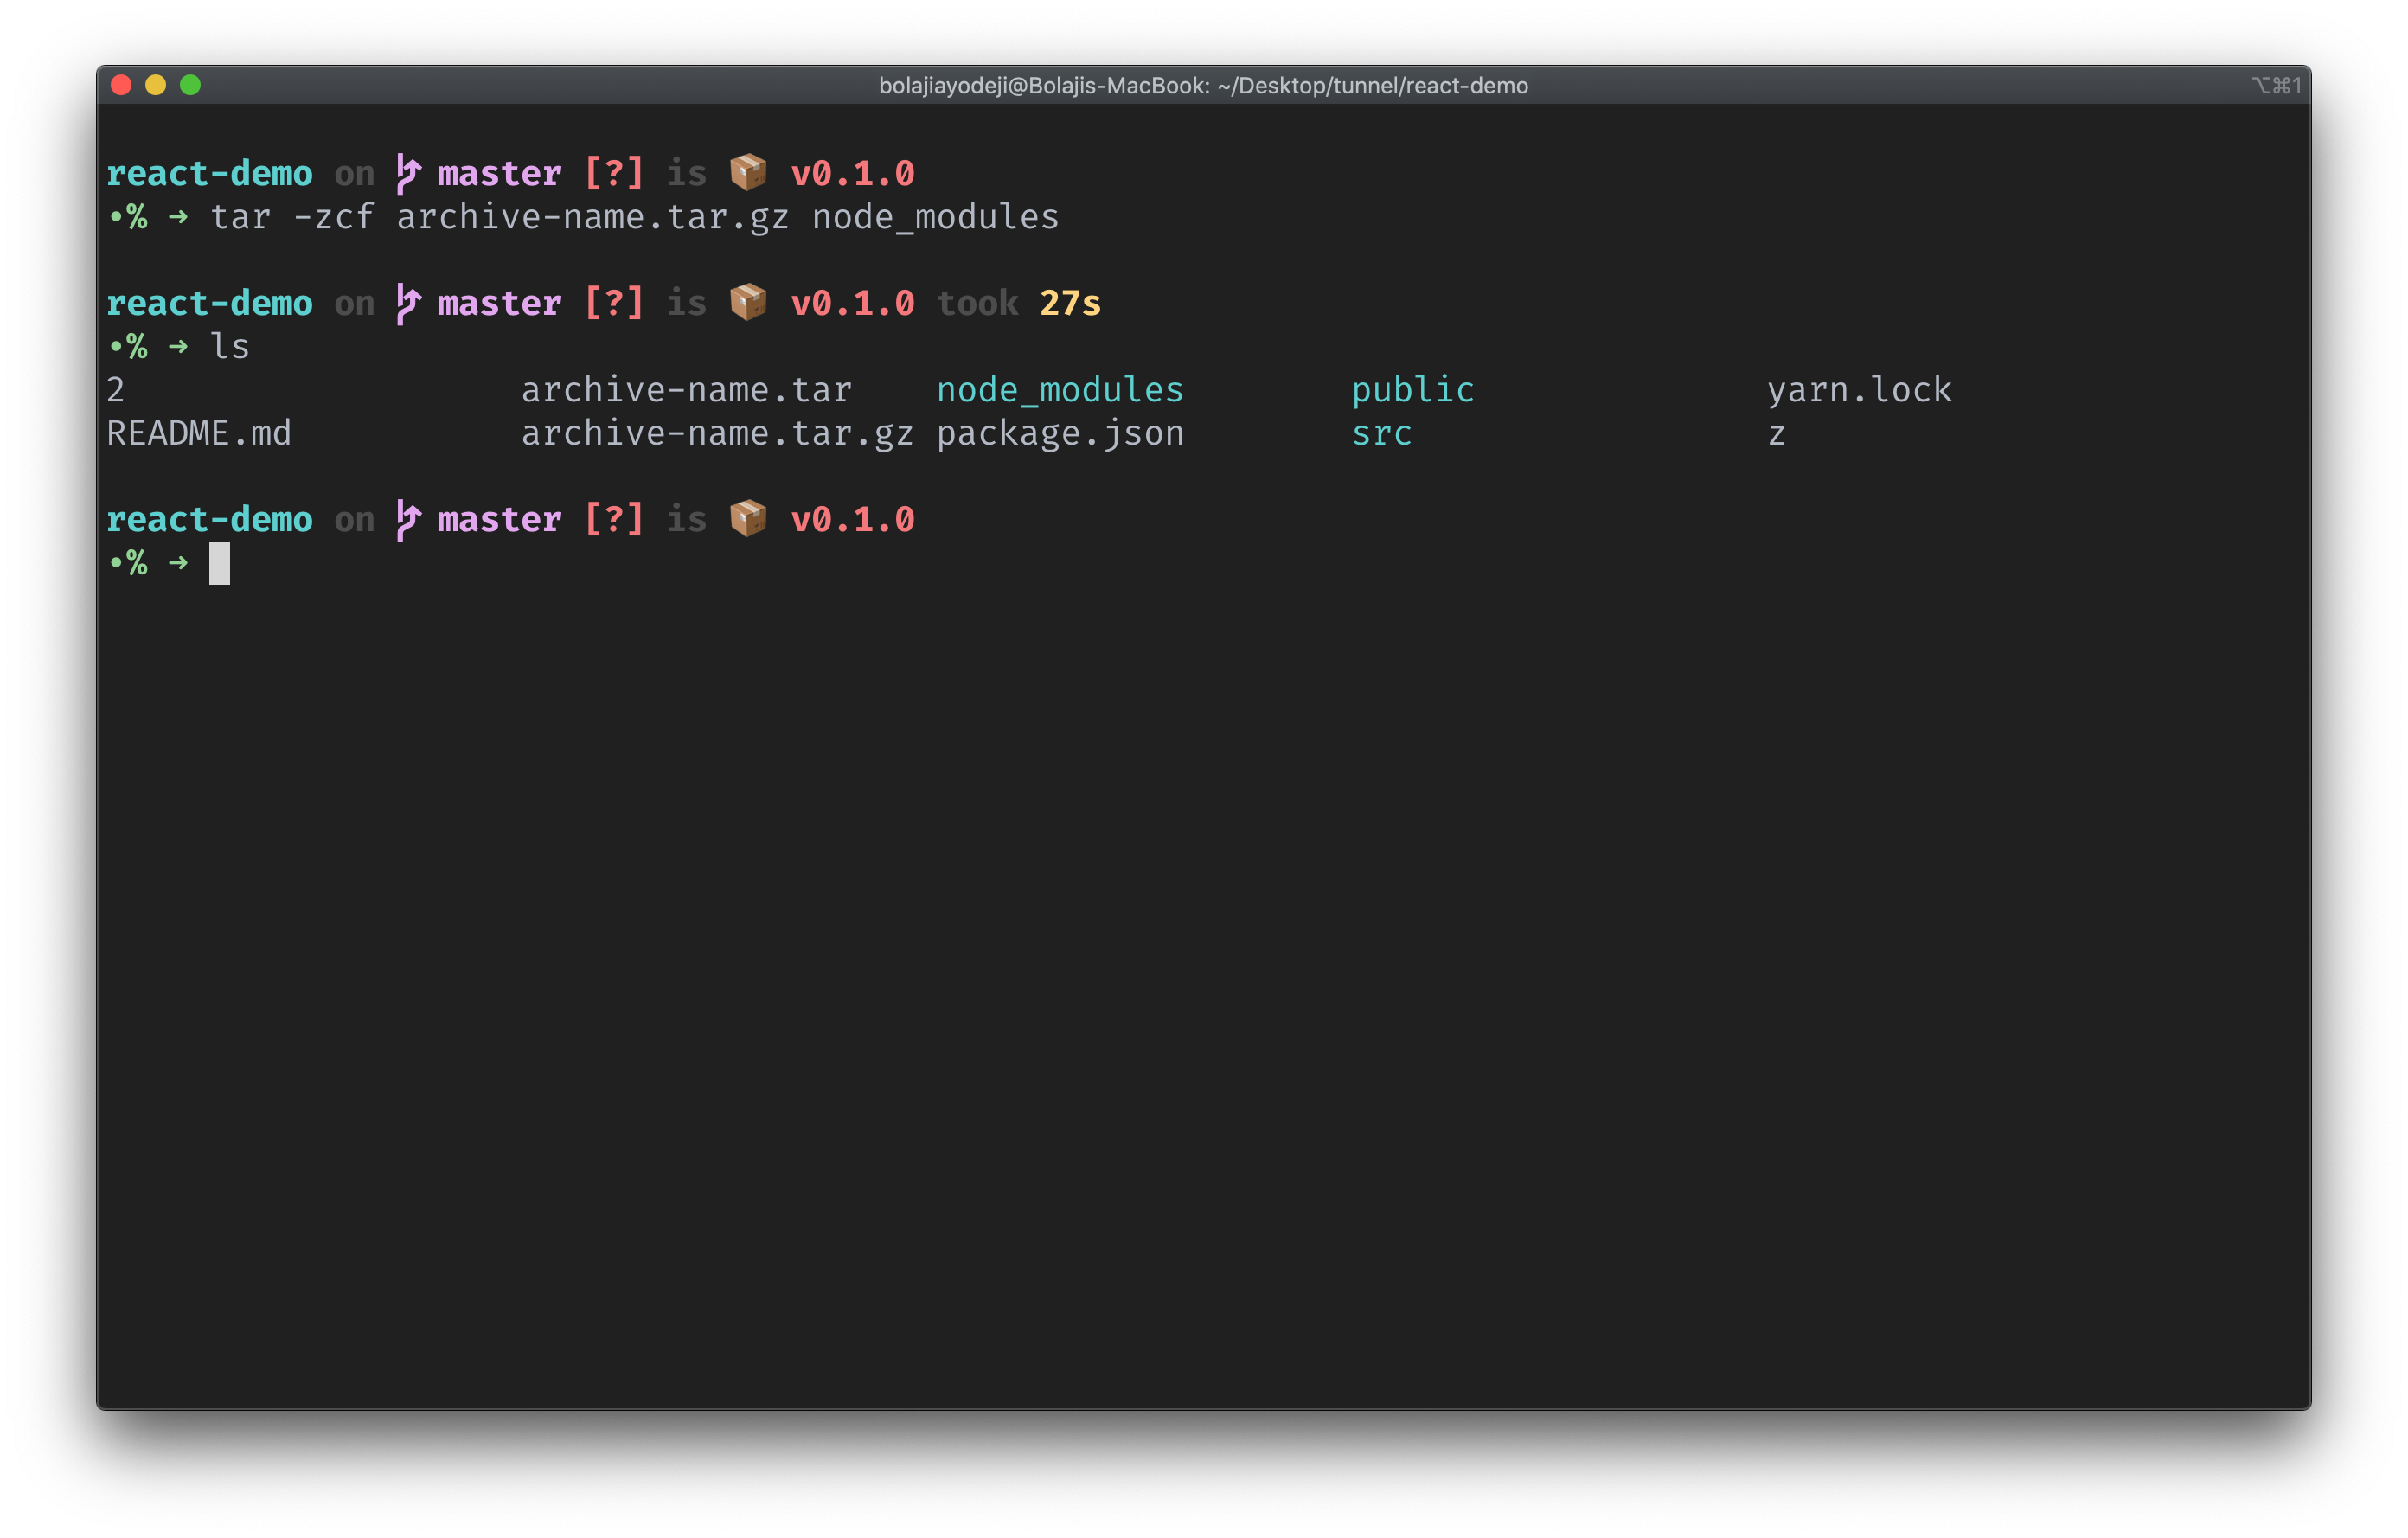
Let's run ls -lshS to list the files in our current directory with their file sizes in a readable format and sort the files from biggest to smallest.
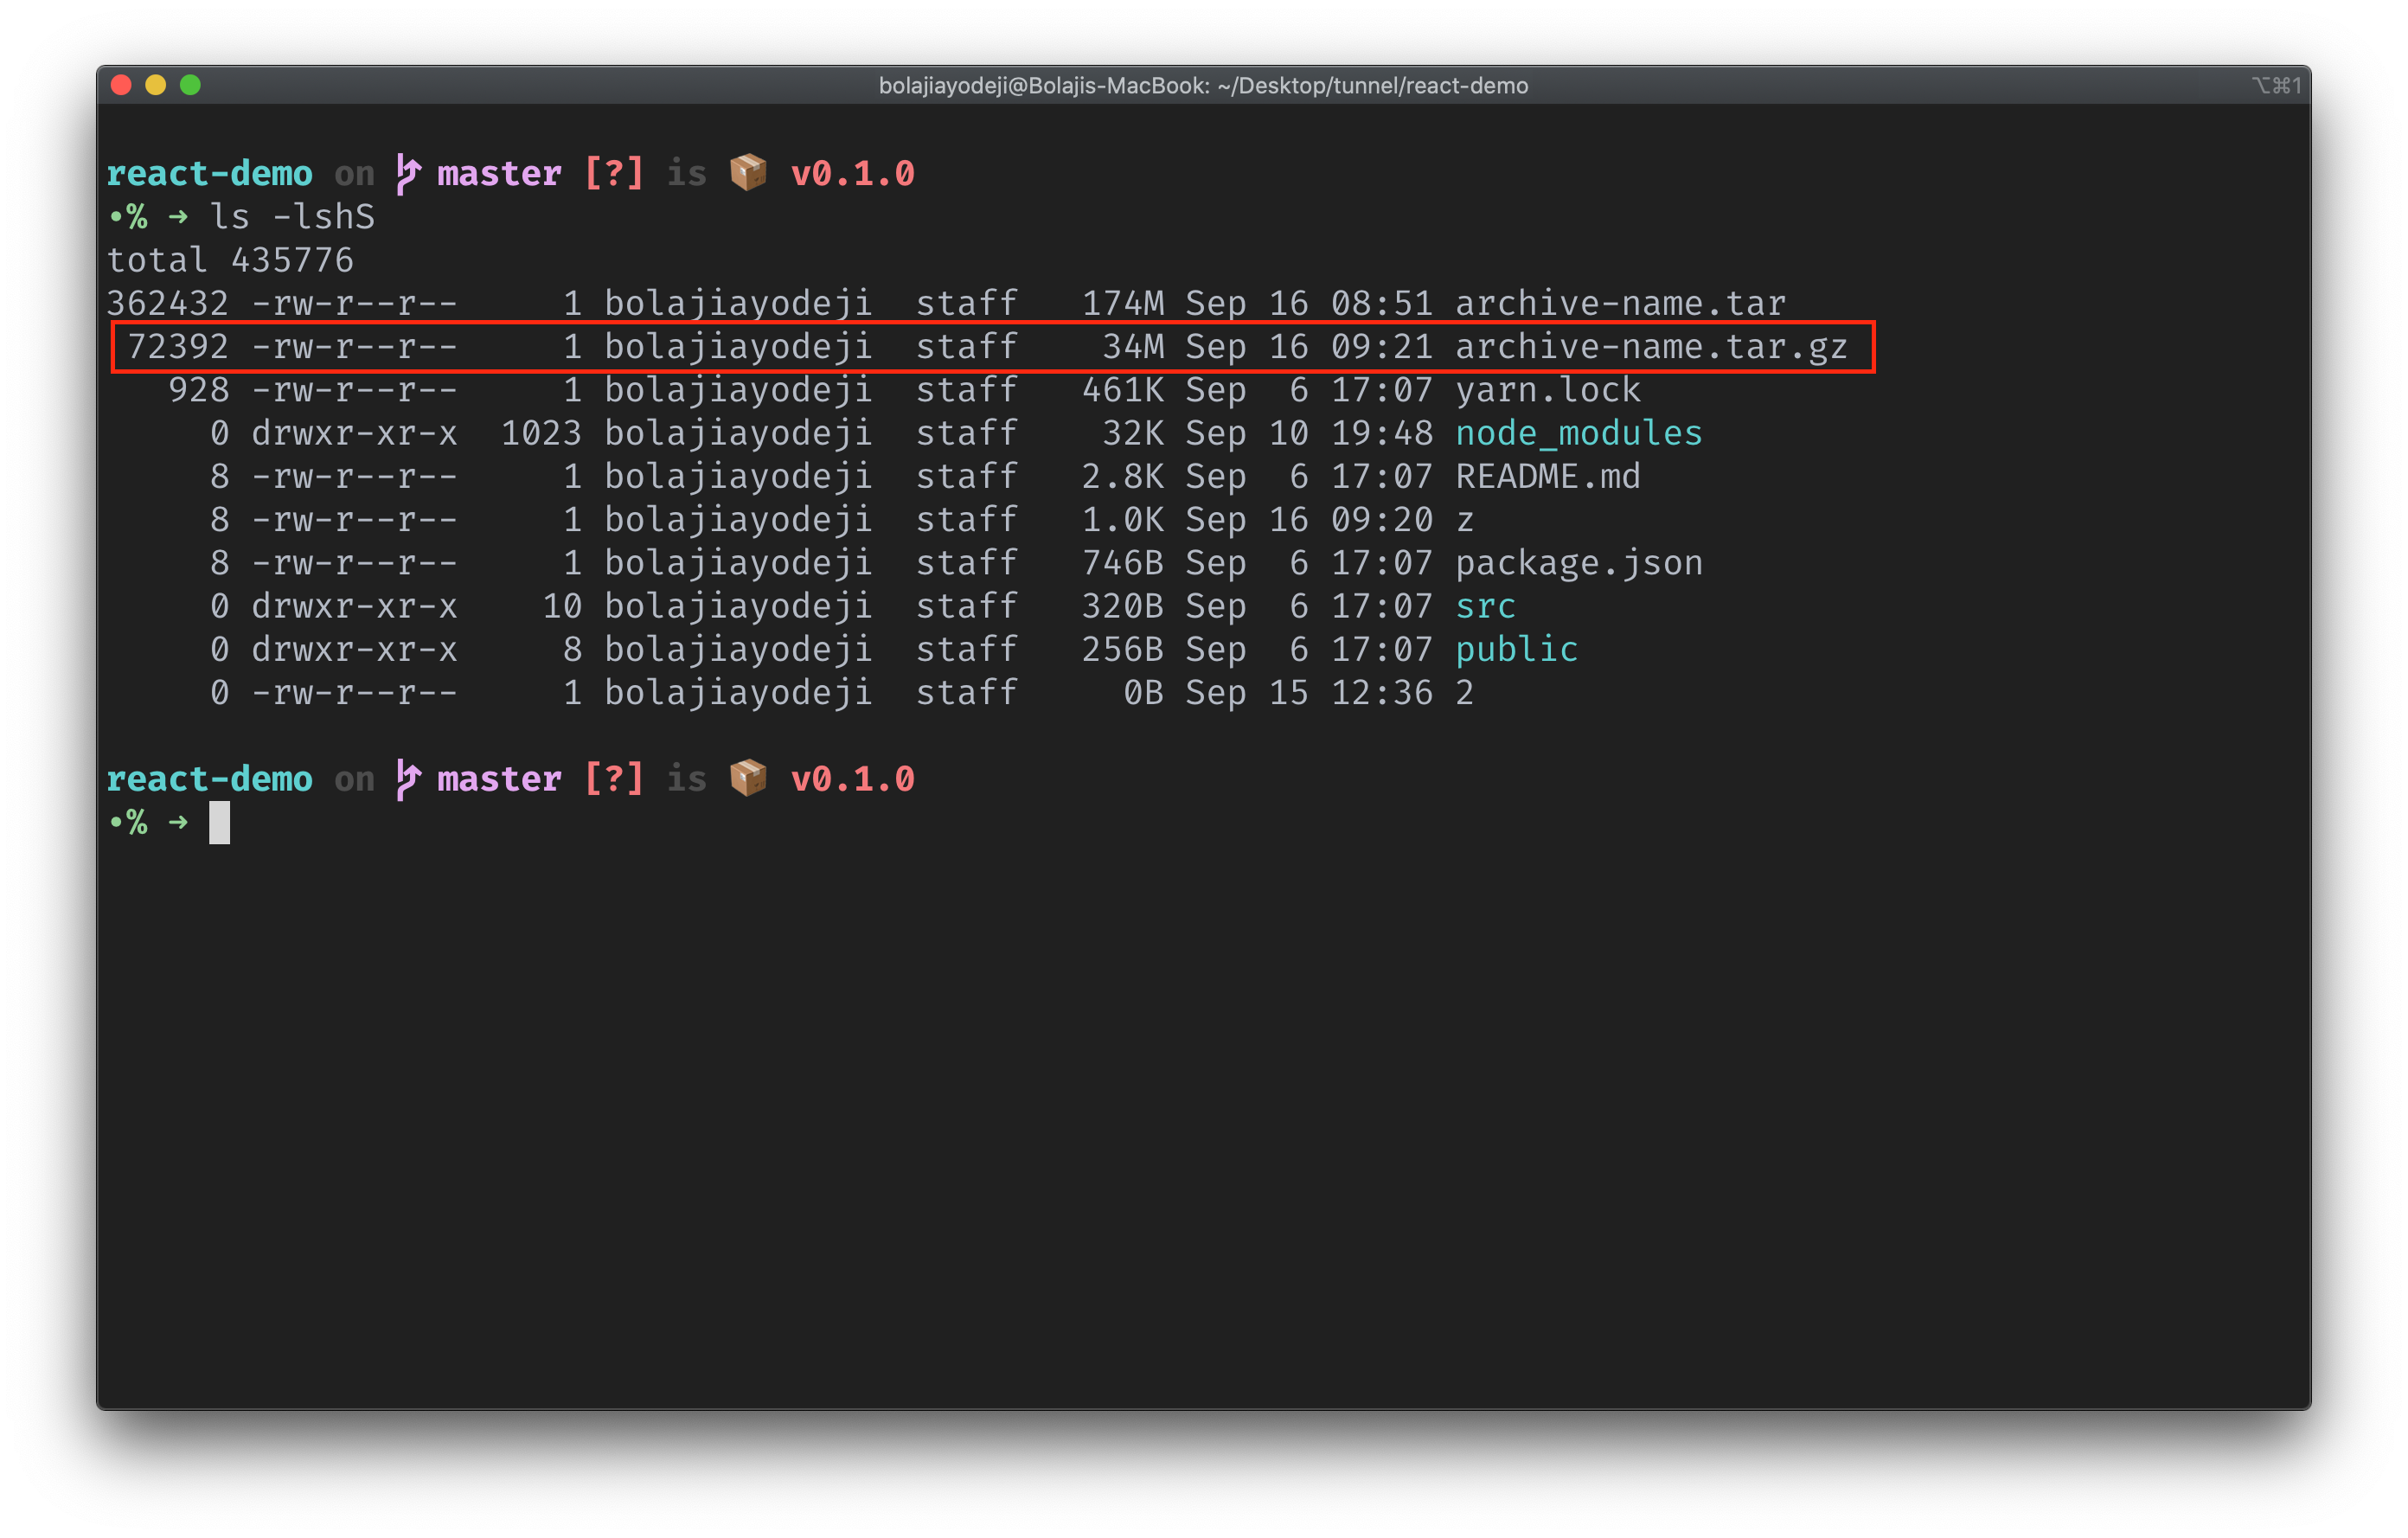
The contents of the node_modules directory with the initial 32K size compressed into the archive will result in a 34M size.
Notice that the archive-name.tar.gz is significantly smaller than archive-name.tar? This is because we used gzip compression.
Here's a breakdown of the command we used:
taris the tape archive command.-zis the flag that compresses the archive with gzip.-cis the flag that creates the archive file.-fis the flag that allows you to specify the filename for the archive.
How to Create an Archive and Compress with BZIP2
GZIP is the most frequently used compression method; however, there's a BZIP2 method that compresses more than GZIP but takes more time to execute. GZIP is faster, but it generally compresses a bit less (larger file) while BZIP2 is slower, but it compresses a bit more (smaller file).
bzip2 is a free and open-source file compression program that uses the Burrows-Wheeler algorithm. It only compresses single files and is not a file archiver. It is developed by Julian Seward and maintained by Federico Mena. Seward made the first public release of bzip2, version 0.15, in July 1996. ~ Wikipedia
Let's test this with the same node_modules folder like so:
tar -jcf archive-name.tar.bz2 node_modules
You should now see a file called archive-name.tar.bz2 containing the files and directories in node_modules.
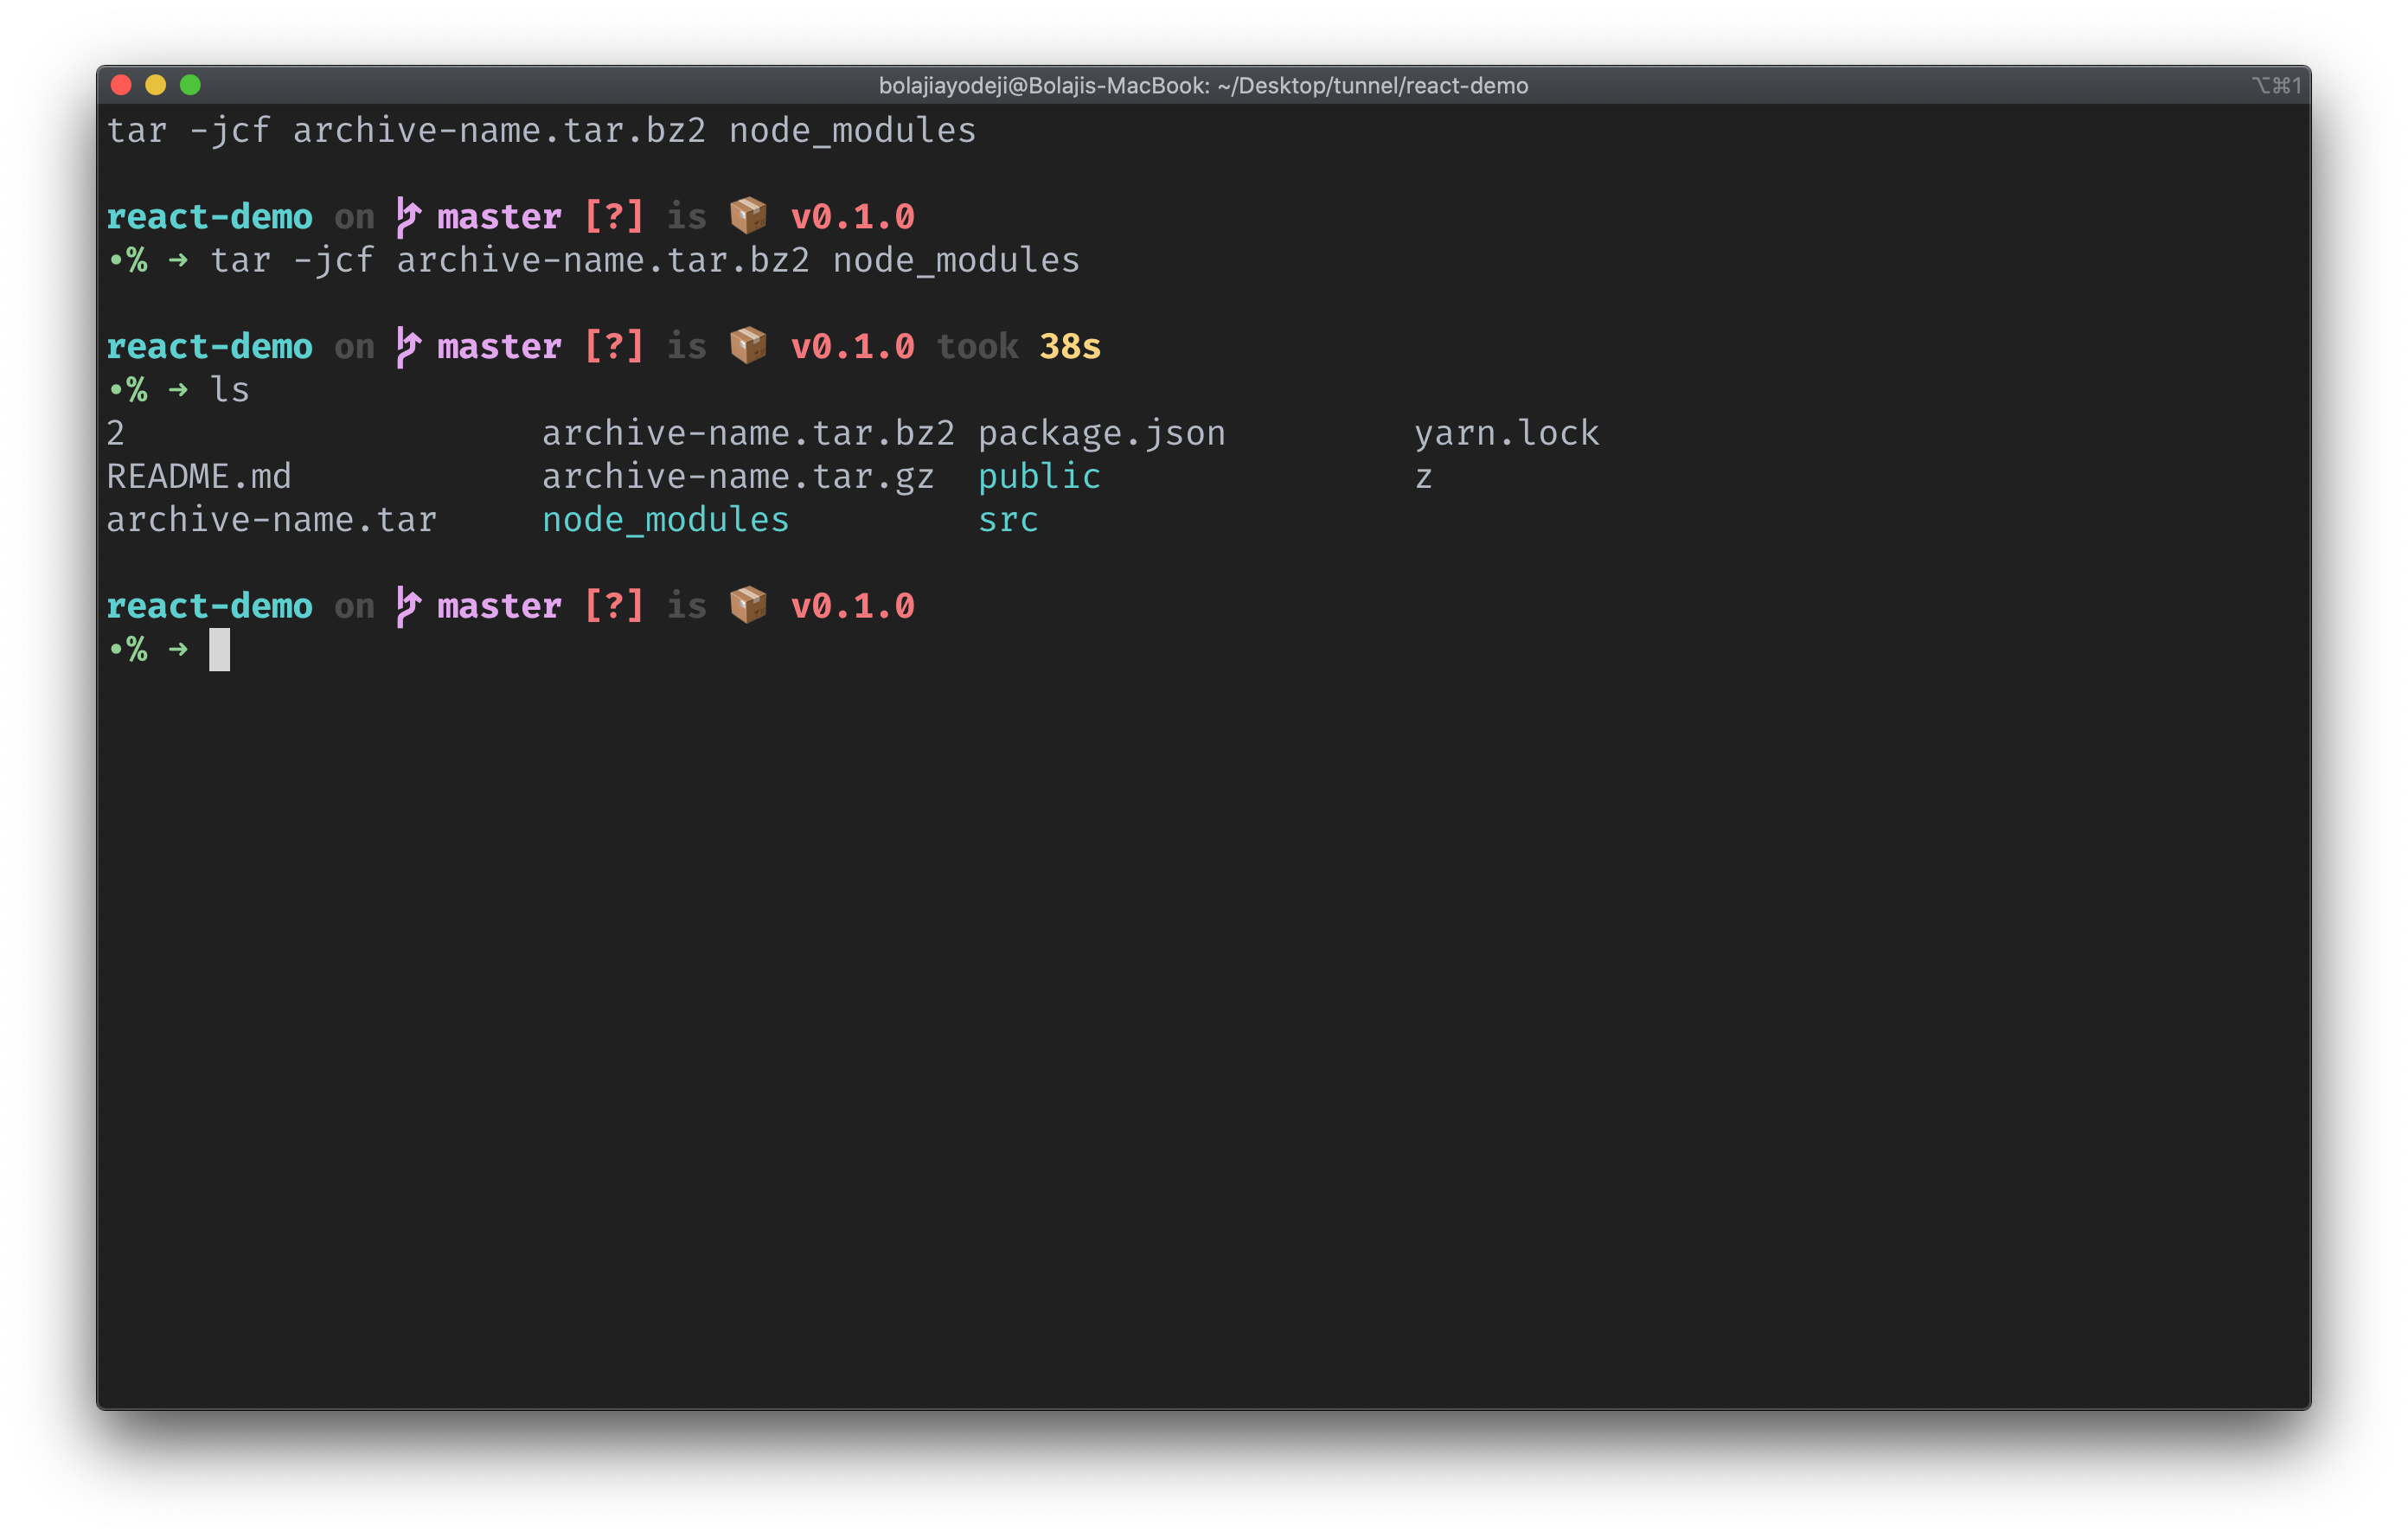
Let's run ls -lshS to list the files in our current directory with their file sizes in a readable format and sort the files from biggest to smallest.
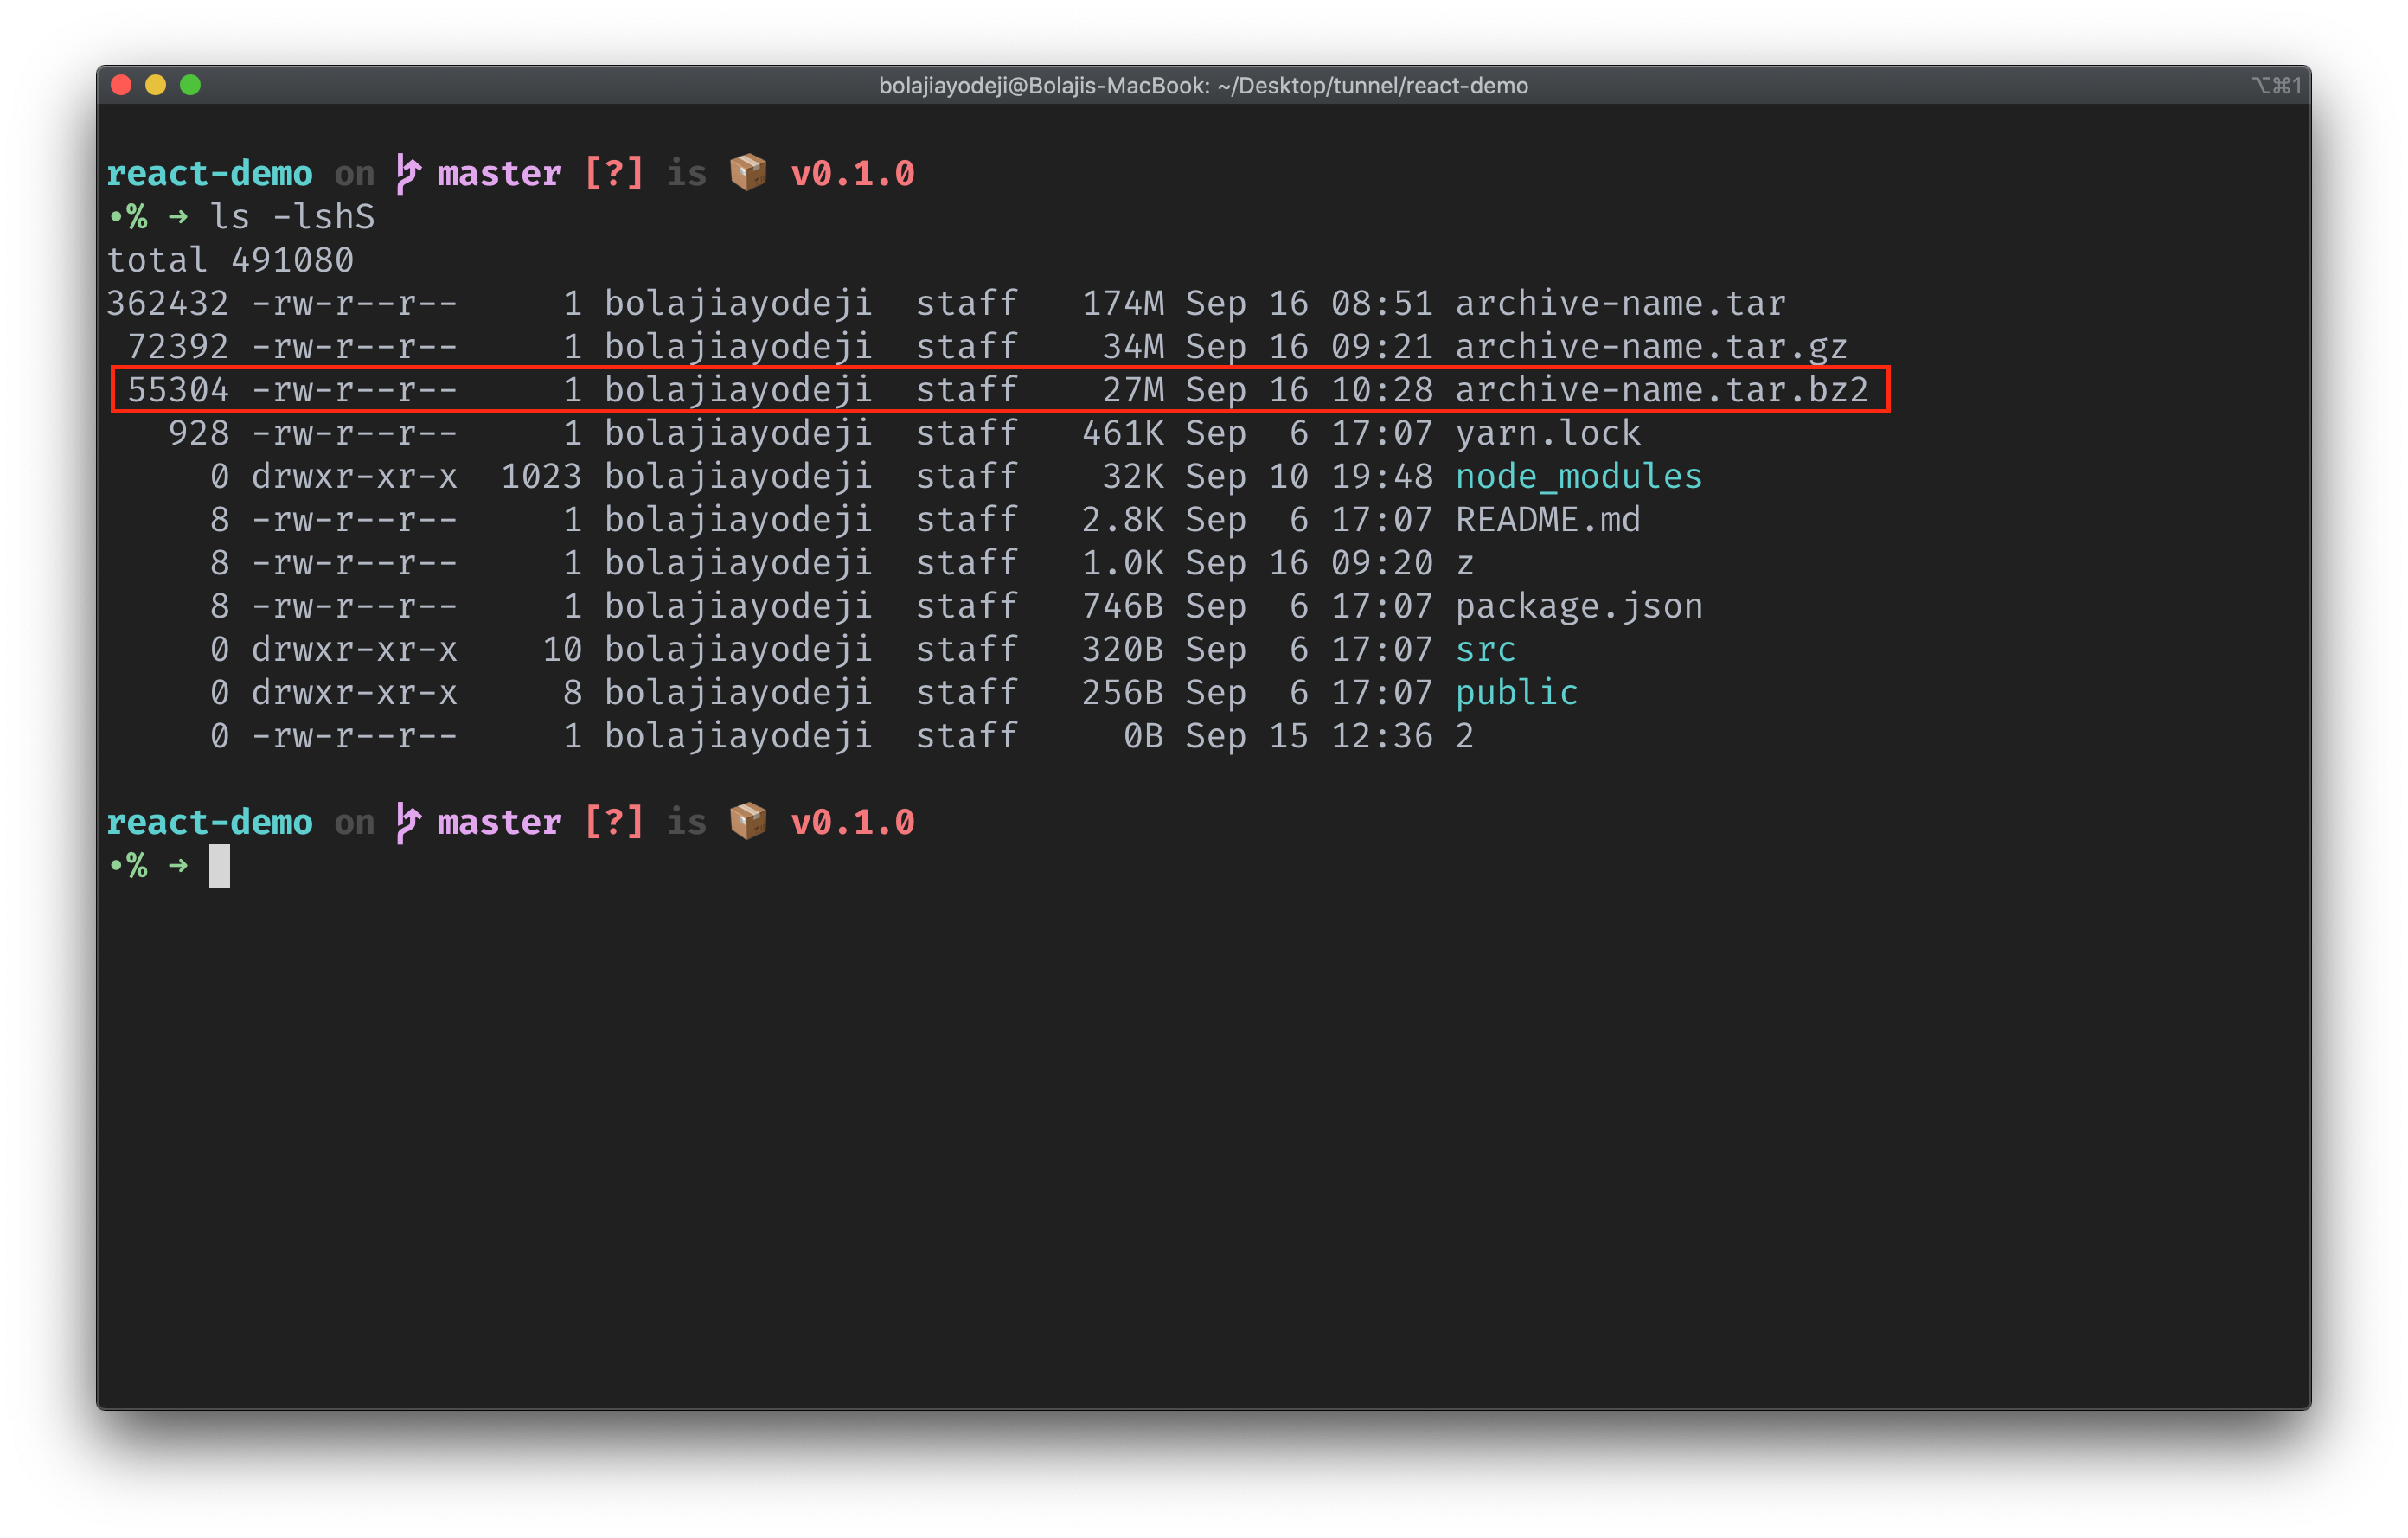
The contents of the node_modules directory with the initial 32K size compressed into the archive will result in a 27M size.
Notice that the archive-name.tar.bz2 is significantly smaller than archive-name.tar.gz? This is because we used bzip2 compression.
Here's a breakdown of the command we used:
taris the tape archive command.-jis the flag that compresses the archive with bzip2.-cis the flag that creates the archive file.-fis the flag that allows you to specify the filename for the archive.
How to Compress Multiple Files or Directories at Once
You can compress multiple files or directories at once using the same command and specifying the paths of the files or directories with a space separating each path.
tar -cf archive-name.tar /path/to/file /path/to/directory /path/to/file-or-directory
How to List the Contents of an Archive File
You can list the content of an archive-name.tar, archive-name.tar.gz, or archive-name.tar.bz2 file by adding the -t flag to their respective tar command.
If you're familiar with Vim, you can easily list out the contents using
vim archive-name.tar. However, let's learn how to do this with theTarcommand.
Uncompressed Archive
tar -tf archive-name.tar
Here's a breakdown of the command we used:
taris the tape archive command.-tis the flag that lists the content of the archive-fis the flag that allows you to specify the filename for the archive.
Compressed Archive (GZIP)
tar -ztf archive-name.tar.gz
Here's a breakdown of the command we used:
taris the tape archive command.-zis the flag that compresses the archive with gzip.-tis the flag that lists the content of the archive-fis the flag that allows you to specify the filename for the archive.
Compressed Archive (BZIP2)
tar -jtf archive-name.tar.bz2
Here's a breakdown of the command we used:
taris the tape archive command.-jis the flag that compresses the archive with bzip2.-tis the flag that lists the content of the archive-fis the flag that allows you to specify the filename for the archive.
How to Extract the Contents of an Archive File
Now you've learned how to create an archive file, compress, and list out its content. Let's extract the archive file (which should be your final destination, yeah?).
tar -xf archive-name.tar
By default, the archive content will be extracted into the current working directory. You can then specify a directory to extract to by appending an additional -C flag and the destination path like so:
tar -xf archive-name.tar -C /destination-path/
Here's a breakdown of the command we used:
taris the tape archive command.-xis the flag that extracts the file.-fis the flag that allows you to specify the filename for the archive.-Cis the flag that specifies the destination folder to extract the archive.
How to Display Archive Progress
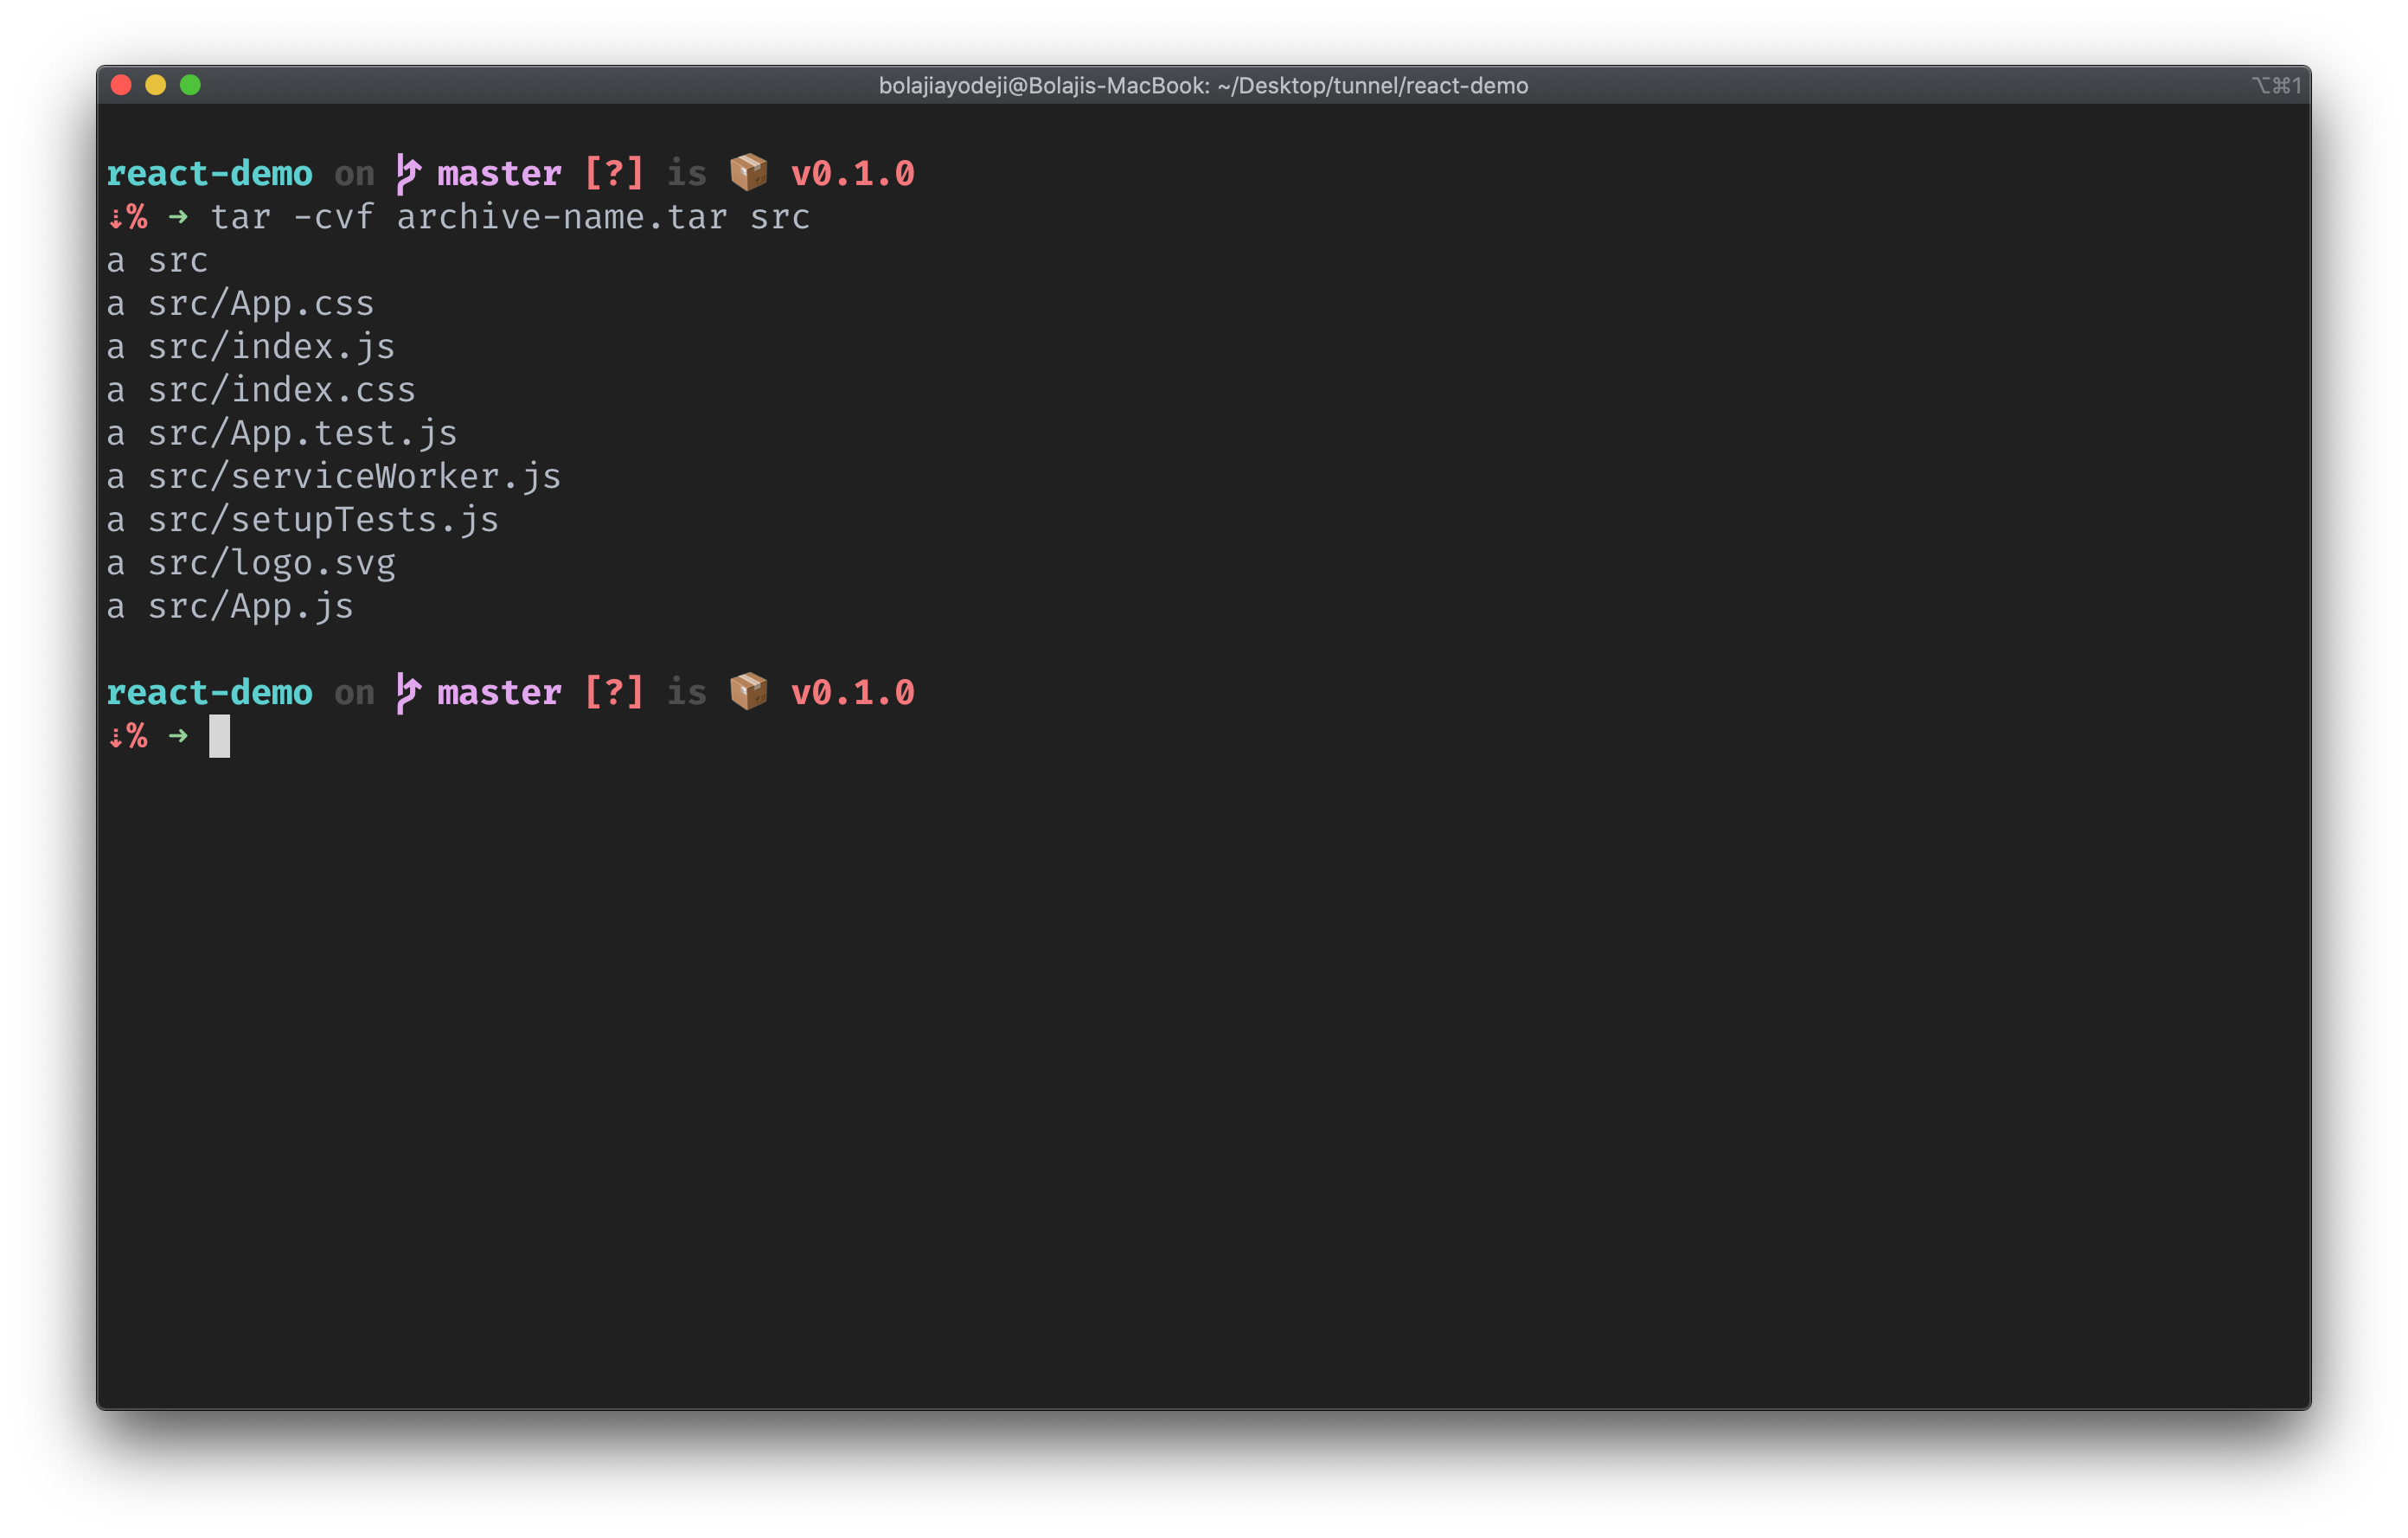
Want to see the progress of the archive process? You can add the -v verbose mode flag, which will display the archive progress in the terminal while creating the archive.
Let's test this like so:
tar -cvf archive-name.tar /path/to/file-or-directory
Conclusion
If you're continually using or contributing to open-source, you'll come across many .tar.gz files, which is mostly used to bundle and compress the installable file of the project. With this article, I hope you'll harness these files effectively, like the boss that you are.
If you forget any command or are unsure about what to do, you can run tar --help or man tar which will display a manual with all possible options for the tar command.
Here are some useful Tar flags for your reference:
| Flag | Meaning | ||
| -c | Creates the archive | ||
| -f | List the content is the archive | ||
| -z | Compress the archive with GZIP | ||
| -j | Compress the archive with BZIP2 | ||
| -v | Show archive progress in verbose mode | ||
| -x | Extract the content of an archive | ||
| -C | Specify the archive extraction destination path |
Thanks for reading! 💙