
Building an Ecommerce Store with Nextjs and Commerce Layer Demo Store
undefined or mostly null.
Have you ever wanted to learn how to build an ecommerce website as a developer? Look no further! In this article, I’ll walk you through the process of building a sleek, modern, and user-friendly conference swag digital store using composable commerce APIs, micro-frontends, and the Commerce Layer Nextjs Demo Store project. With the help of this powerful tool, you'll be able to create a visually appealing and functional international ecommerce website that is optimized for success. I'll show you step-by-step how to set up your store, add commerce data, and deploy your website in no time. Let’s get started!
Prerequisites
- Some JavaScript, command-line, and API knowledge are required.
- A working programming IDE (I use vscode; you can also try it).
- A stable internet connection.
- Optionally, you can study these data models to understand the key Commerce Layer API entities, their mutual relationships, and common usage.
Introduction to Composable Commerce
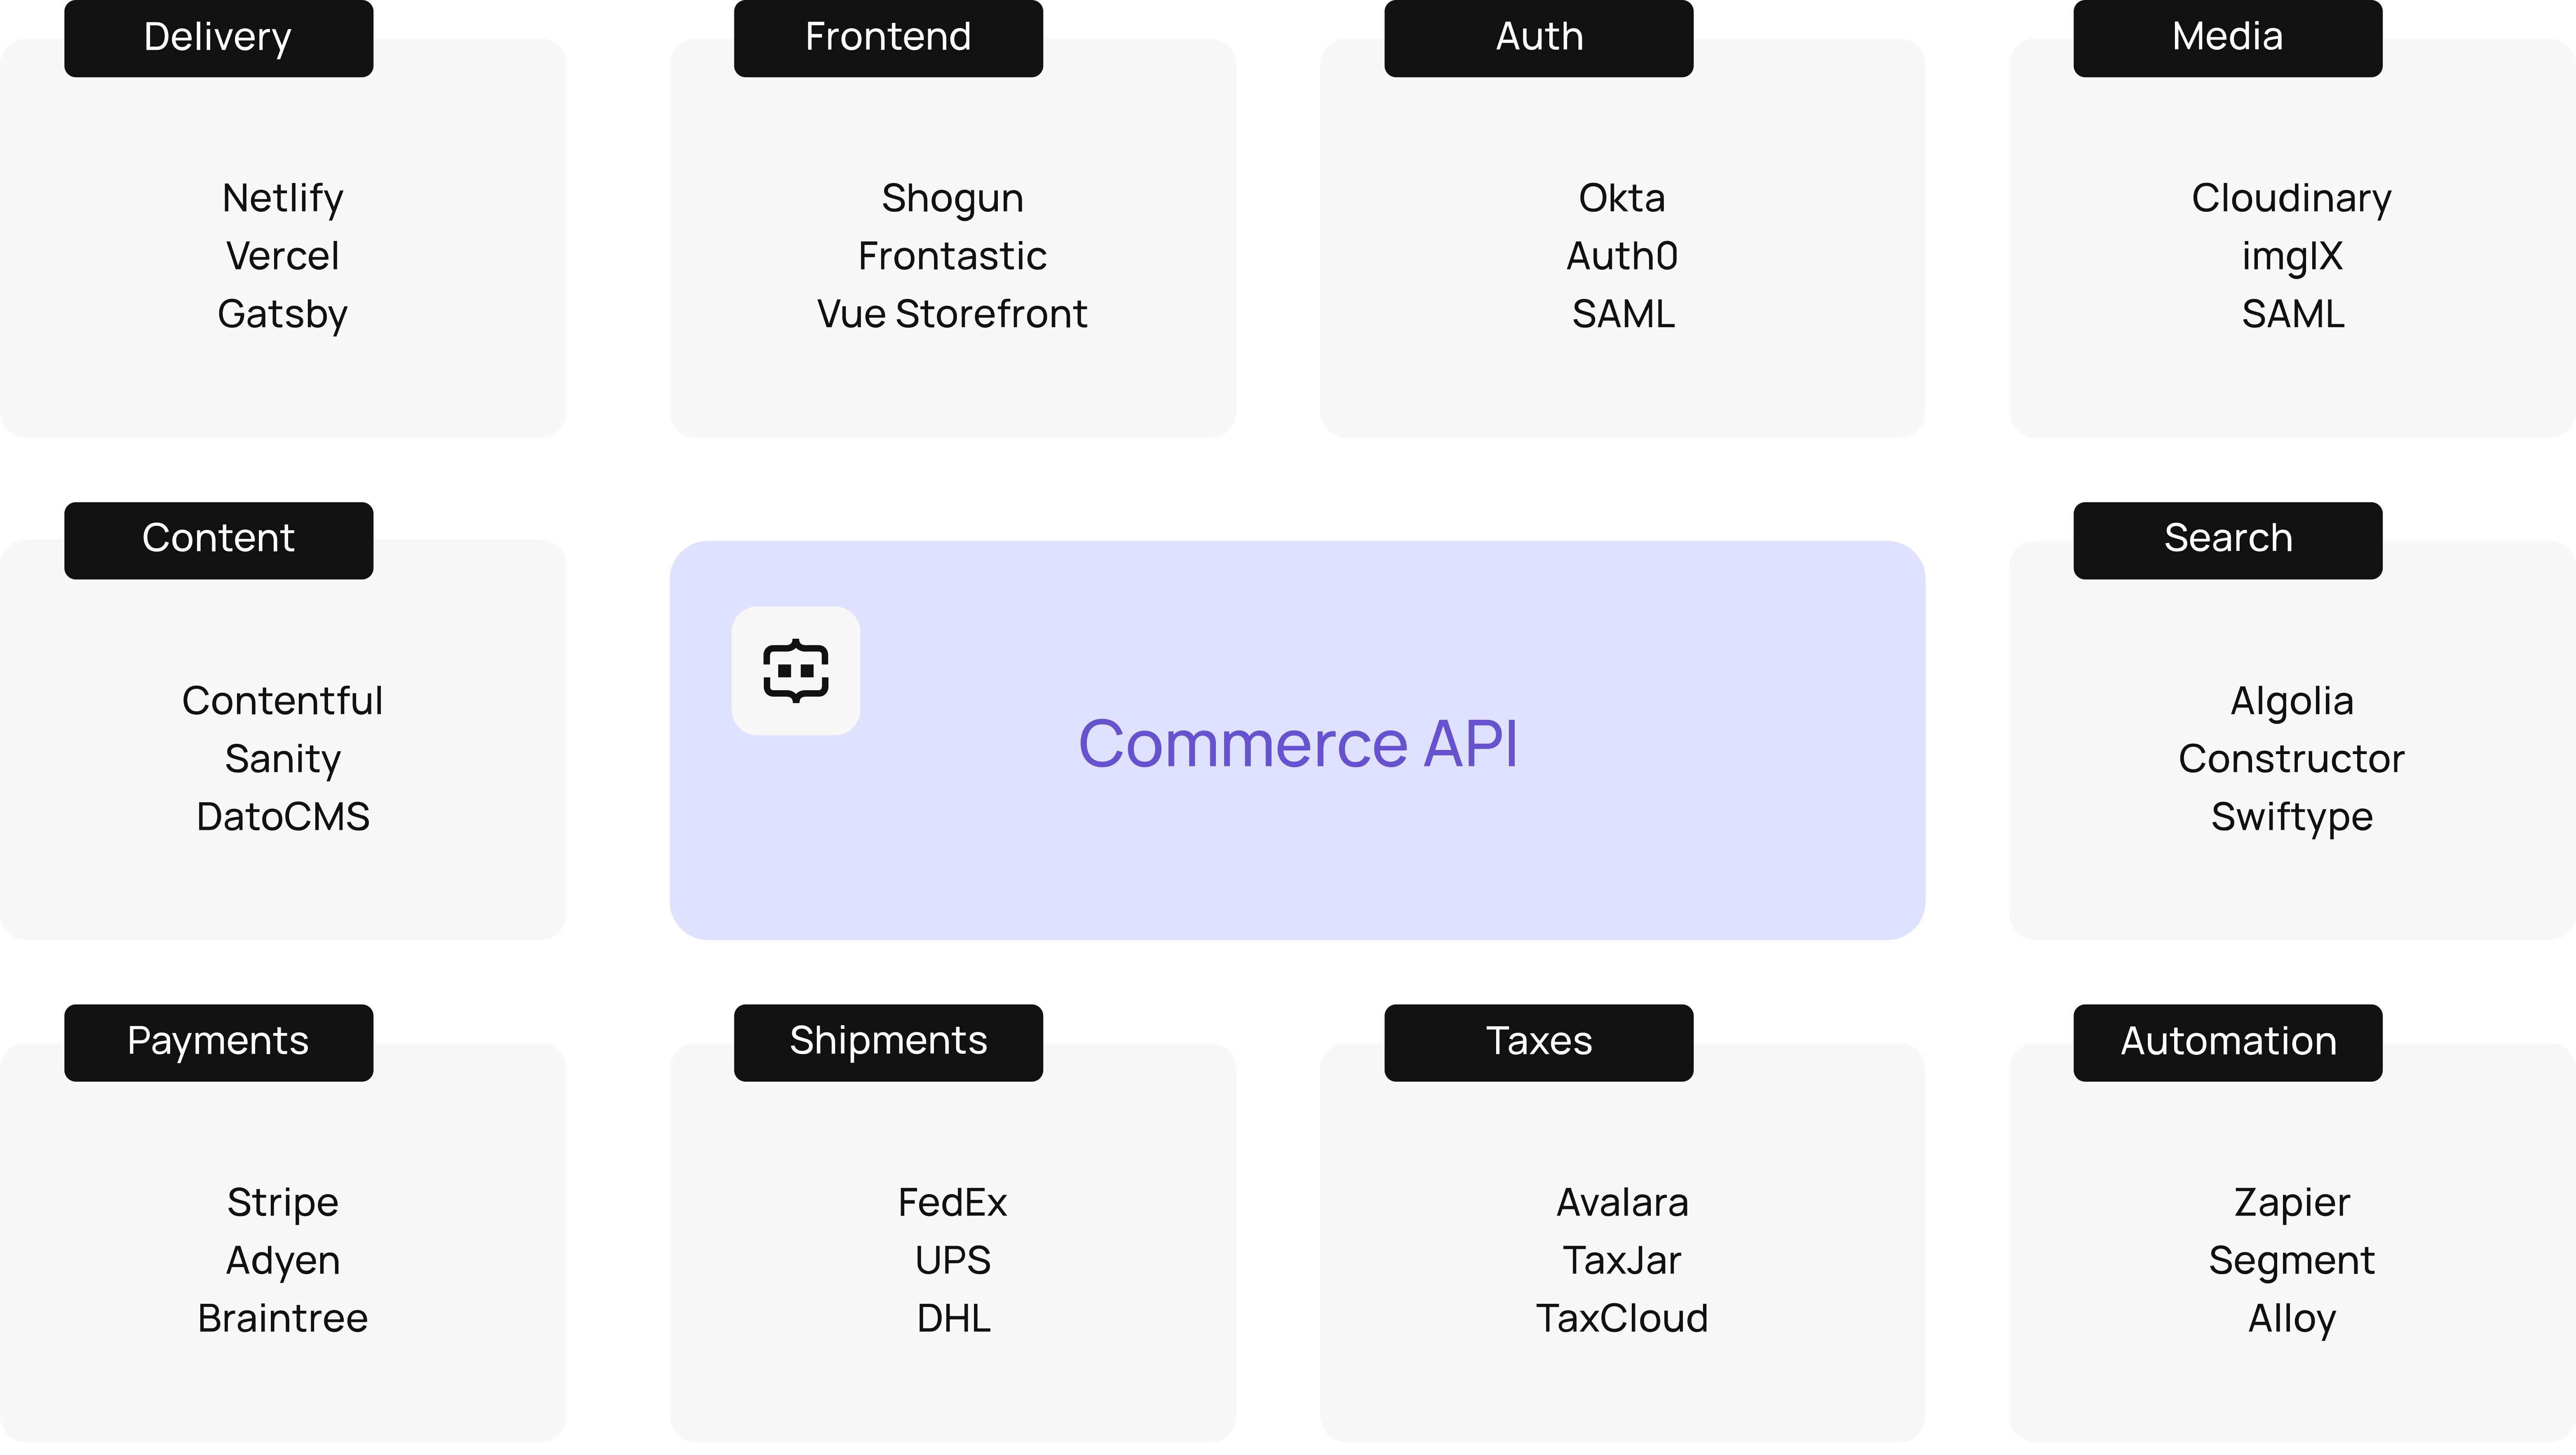
Before we proceed, let’s understand what the concept “composable” means. Before now, ecommerce websites were built with a monolithic architecture where all components (frontend, backend, content, and commerce data) were coupled into one system. Over time, this approach posed different weaknesses related to speed, flexibility, scalability, security, modularity, etc. Most importantly, it became difficult for different sub-teams in an engineering team to effectively build in development and collaborate on the product—leading to a poor developer experience. All these weaknesses directly affect the sales and customer retention part of an ecommerce business, which shouldn’t be the case. Hence, there was the rise of a better approach that allows for an independent and agnostic setup for all teams (frontend, backend, content, etc.) and effective product development flow. This approach, called “composable commerce,” allowed for a better developer experience, more room for creativity and innovation from each team, more room for adapting to new market opportunities, and eventually, customer satisfaction, increased revenue, and customer retention.
Composable commerce allows developers to review, select, and utilize various available commerce solutions as required to satisfy specific business needs in the different sub-teams of the engineering team. Developers can compose their development stack by selecting best-of-breed tools from API-first solutions, headless solutions, composable microservices, or even microfrontends. If any of these terms are unfamiliar, you can do a quick Google search to learn more about them. Generally, a composable commerce solution includes:
- The front-end presentation layer decoupled from the backend logic.
- Individual components (autonomously developed, deployed, and managed) targeted toward specific business requirements.
- APIs connecting each of these individual components.
- Integration with reliable API-first external services.
- SAAS and cloud computing services.
- Real-time data shared between applications with webhooks.
- Possibilities to build an independent and agnostic internal application on top of the existing data and composable architecture.
The beauty of the composable commerce architecture is that you can distribute your ecommerce service anywhere your customer wants them (either on mobile, web, smart devices, CLIs, etc.) so long the envisaged sales channel allows API mechanisms. For brands and developers, the options are numerous; for example, you can go as easy as making a static HTML website shoppable using a dropin library to power certain transactional functionalities or building a fully functional ecommerce website with commerce platforms like Commerce Layer and dev tools like the Demo Store project (which we will do in this article!).
Getting Started
The Demo Store project is a static ecommerce solution with no third-party services required, so you can easily tailor your own with different levels of customization. As such, even content is stored as JSON files. The Demo Store comes with:
- A full product catalog management with taxonomies and taxons.
- Single product variants management.
- Multi-language capabilities to make selling internationally easier.
- A built-in search engine with a faceted search (filtered search).
- An extensive set of features provided out of the box by Commerce Layer APIs (multiple currency price lists, inventory models that support multiple stock locations and fulfillment strategies, market-specific payment gateways, delivery options, carrier accounts, etc.).
In the sections below, I’d show you how to set up and configure your own ecommerce store using the demo store project. Ready? Let’s go!
Get your API Credentials
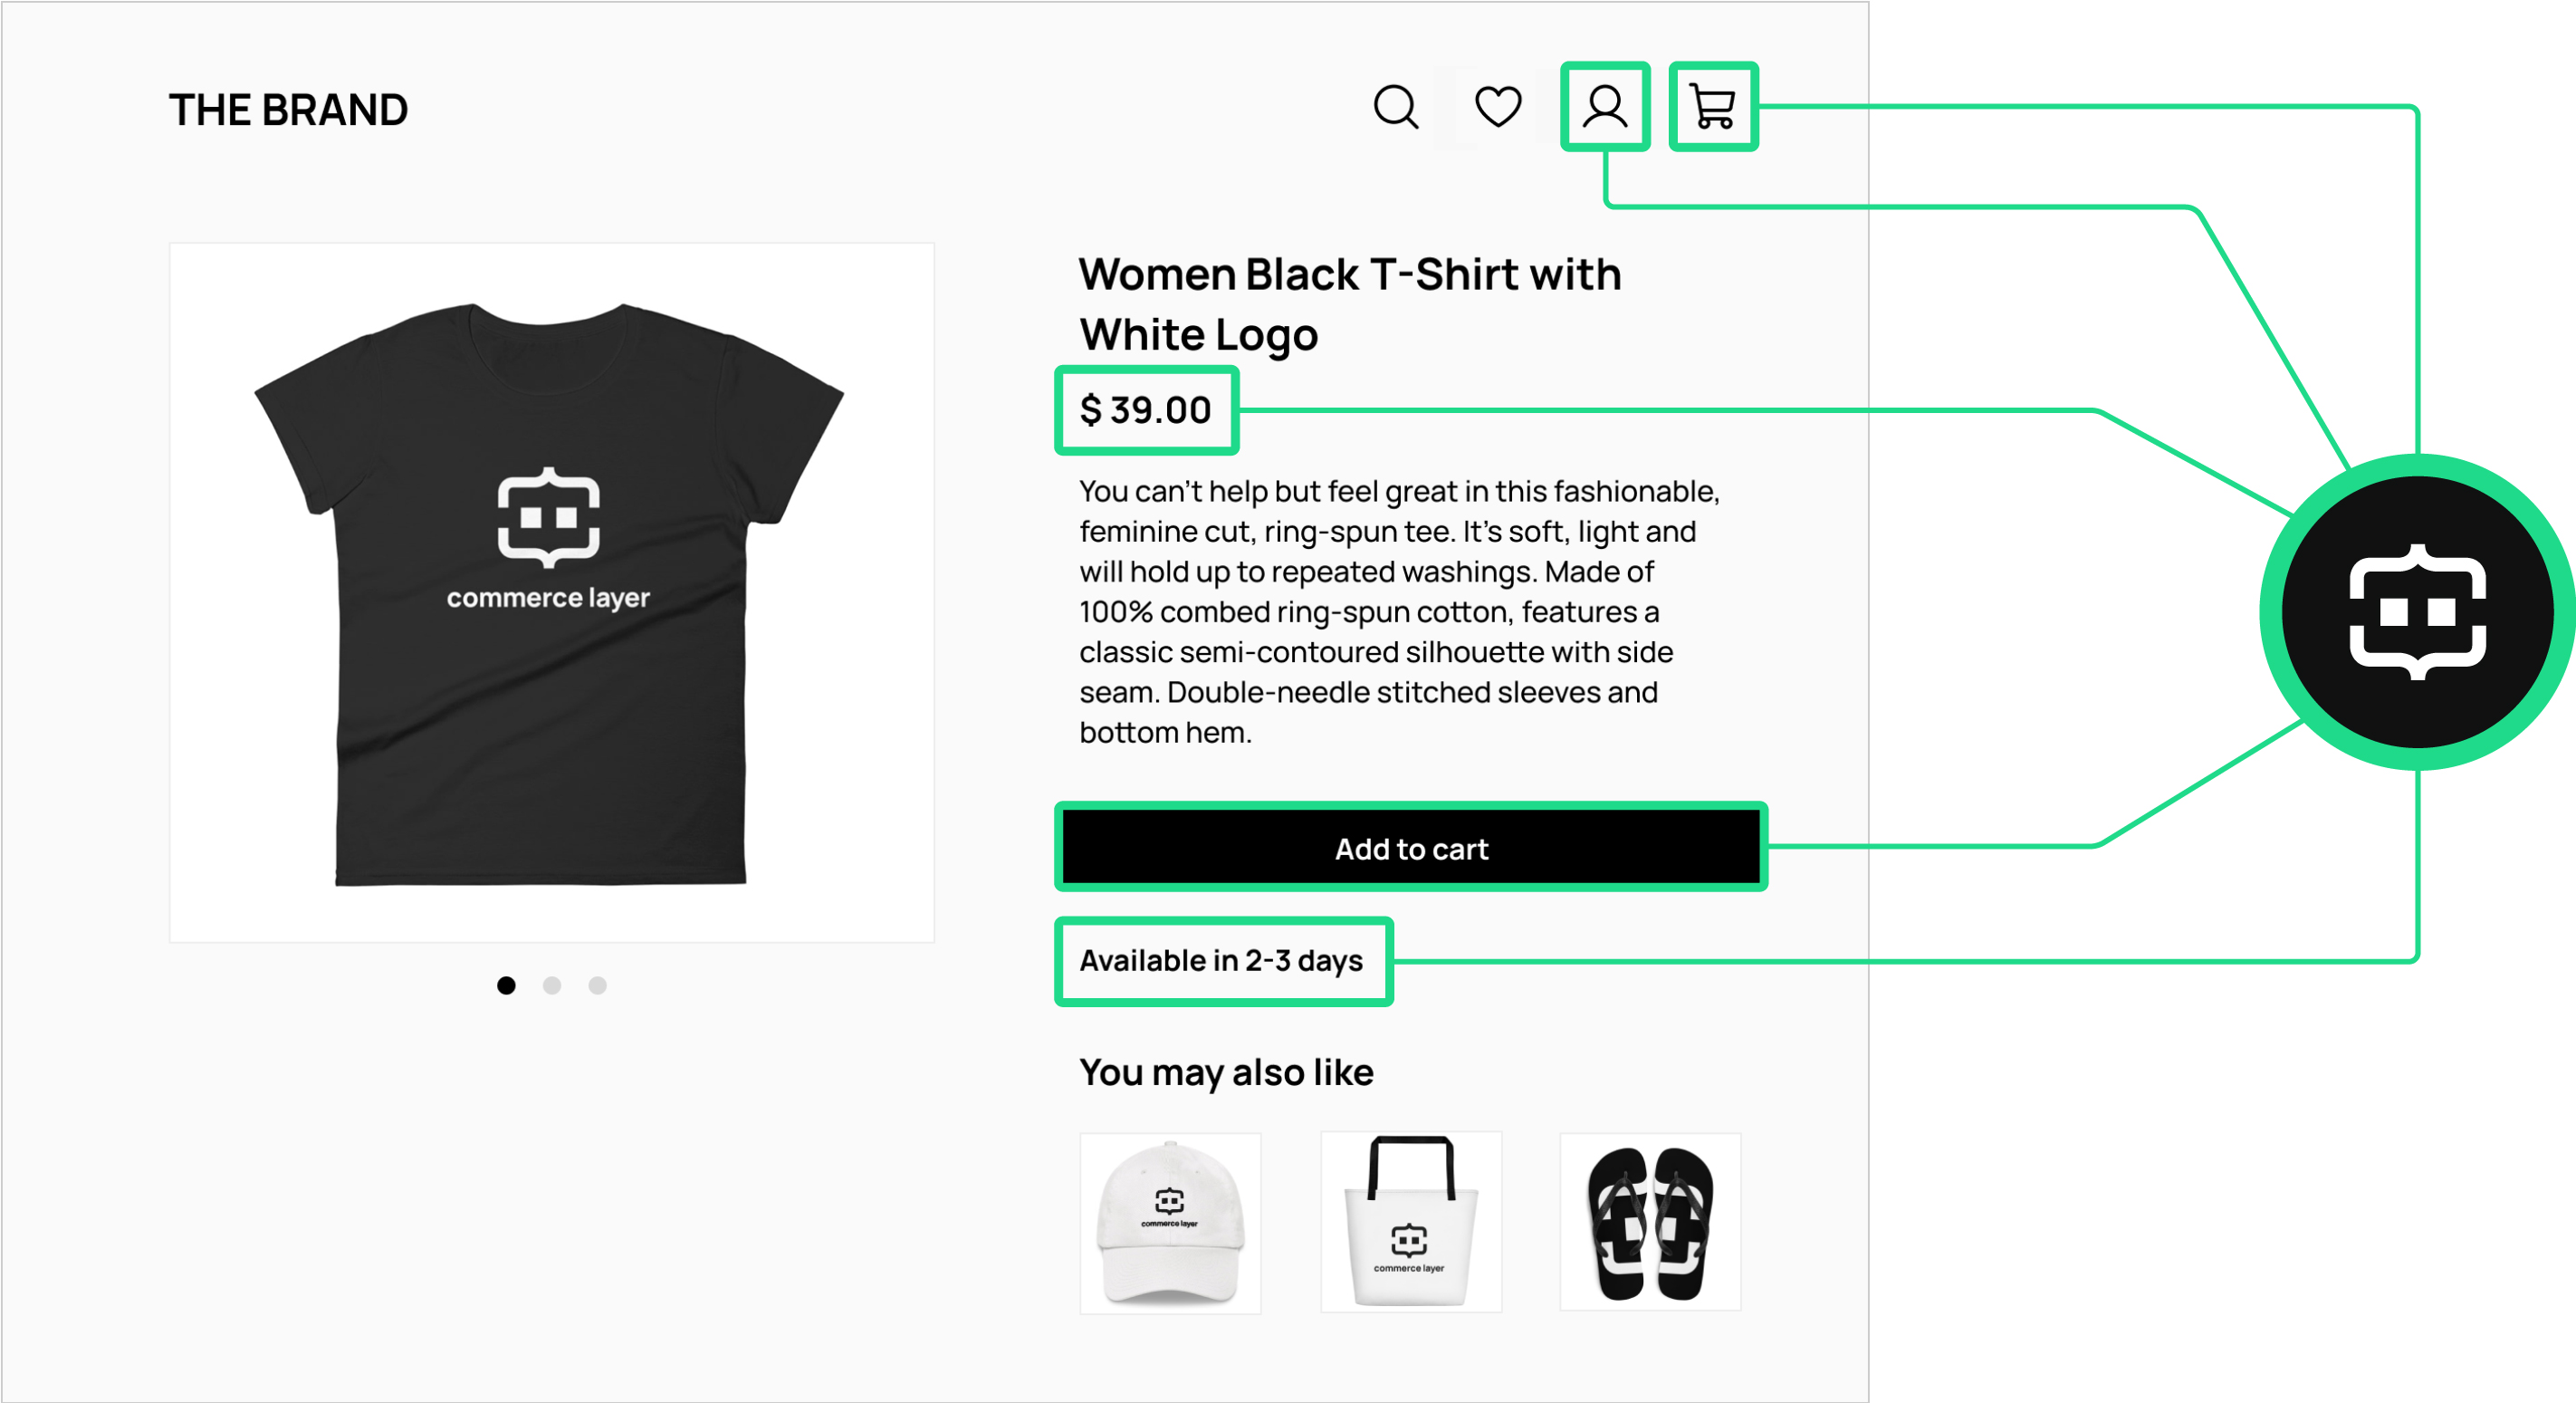
The demo store project is powered by Commerce Layer— a composable commerce API for developers and brands that you can use to build an international ecommerce website to process millions of orders. All the amazing API resources, Nextjs, TypeScript, and other tools were used in building the Demo Store ecommerce project. You can explore these Postman collections to test specific resources and see how they all work. To get started, all requests to Commerce Layer API must be authenticated with an OAuth2 bearer token. You need to execute an authorization flow using a valid application type as the client to get an access token. Each application type has its usage, authentication flow, and permissions. The application type can be authenticated with different authorization grant flows using the available authorization grant types as described in the table below:

Kindly create a Commerce Layer account here, follow the onboarding tutorial to create an organization, and read this guide to learn how to create a sales_channel and integration application type. When you are done creating them, save your organization slug, base endpoint, and the generated CLIENT_ID and clientSecret credential—we will use this to configure the demo store and seed some demo data shortly.
Install and Configure the Demo Store
The Demo Store project is a GitHub template that uses the demo-store-core repository as a git submodule. This will retain the features, look, and feel of the default Demo Store. With this, you won't have to care about the whole source code but instead focus on your data/content and easily get free updates with almost no risk just by running the git submodule update --remote && npm install command. Kindly follow the steps below to get started:
→ Click on the "Use this template" button from the demo-store's homepage on GitHub, as seen in the screenshot below.

→ Run the following commands to clone the forked repository to your local computer and install the required dependencies:
git clone <your-repository-url> my-new-demo-store
cd my-new-demo-store
git submodule update --init
npm install
→ Run the following commands to copy all the required environment variables and data files into your demo store:
cp -r ./demo-store-core/packages/website/data/json ./data/json

cp -r ./demo-store-core/packages/website/locales ./data/locales

cp -r ./demo-store-core/packages/website/config ./config
→ Create a .env.local file and add the following variables, including your previously created sales_channel application credentials (Client ID and Base endpoint):
SITE_URL=http://localhost:3000
NEXT_PUBLIC_CL_CLIENT_ID=coF7ofOKxTlbYfN...
NEXT_PUBLIC_CL_ENDPOINT=https://your-demo-store.commercelayer.io

NEXT_PUBLIC_JSON_DATA_FOLDER=../../../data/json/
NEXT_PUBLIC_LOCALES_DATA_FOLDER=../../../data/locales/
NEXT_PUBLIC_CONFIG_FOLDER=../../../config/
Seed Organization with Demo Data
To create an ecommerce store, you need to add some commerce resources to your organization. Suppose this is your first time doing something like this. In that case, you can easily seed your organization automatically with demo data and use that to learn about the key commerce resources required. When you’re ready, you can add the actual data for your ecommerce store. Kindly follow the steps below to seed your newly created Commerce Layer organization:
→ Install the Commerce Layer CLI using the command (this will give you access to the cl command):
npm install -g @commercelayer/cli

or

yarn global add @commercelayer/cli
→ Install the seeder plugin and the imports plugin using the command:
cl plugins:install seeder
cl plugins:install imports
→ Log into the CLI with your previously created integration application credentials like so:
cl applications:login \
  --clientId Oy5F2TbPYhOZsxy1tQd9ZVZ... \
  --clientSecret 1ZHNJUgn_1lh1mel06gGDqa... \
  --organization your-demo-store \
  --alias cli-admin
→ Run the command below to populate your organization with all the resources you need to build a multi-market ecommerce with Commerce Layer (this includes markets, SKUs, prices, inventory, stock locations, etc.):
npm run seeder:seed -ws --if-present
→ If the command above fails with errors (usually because of unstable internet), you can seed your organization with sample data using the command (but this process will take a bit more time):
cl seeder:seed -b custom -n demo_store_full -u ./demo-store-core/packages/setup/
→ The data/json/countries.json file contains a list of available countries for your ecommerce store. Choose the countries you want to start with and replace all findings of "market": xxxxx with the valid market scopes from your organization (you can find these in the sales_channel application you created earlier).
→ Now, you can start the development server and visit http://localhost:3000 to preview your ecommerce store like so:
npm run dev
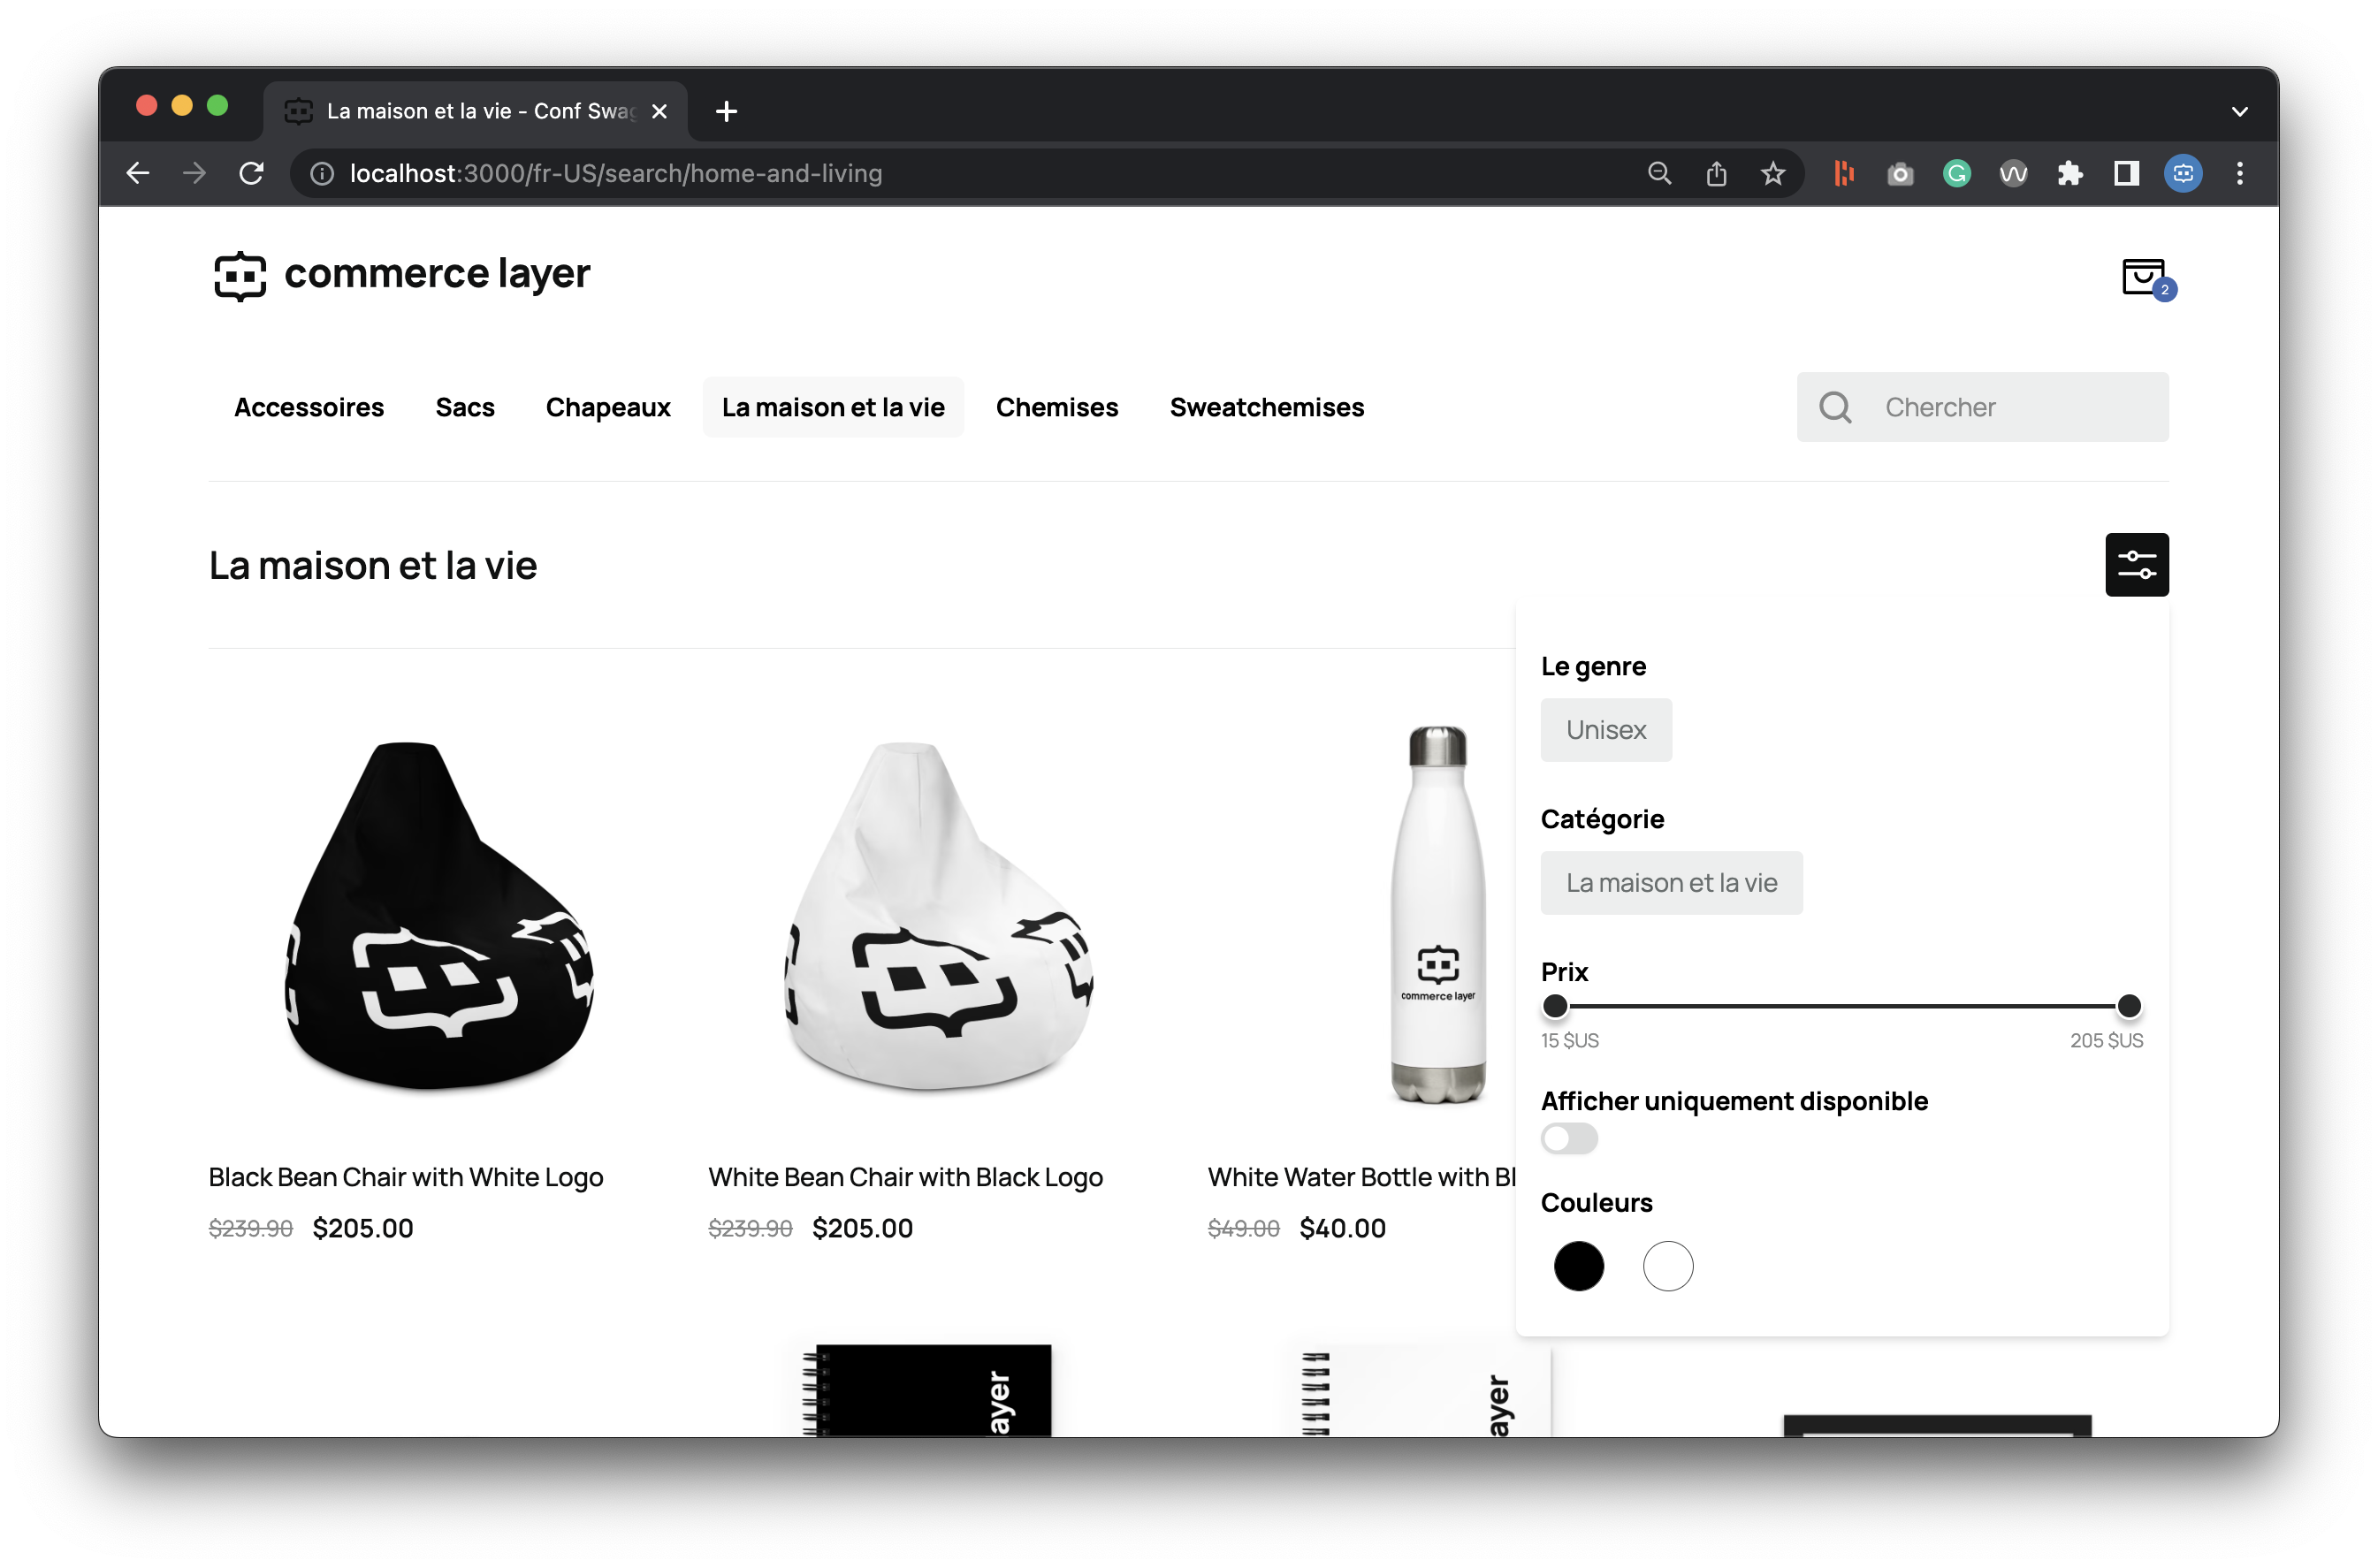
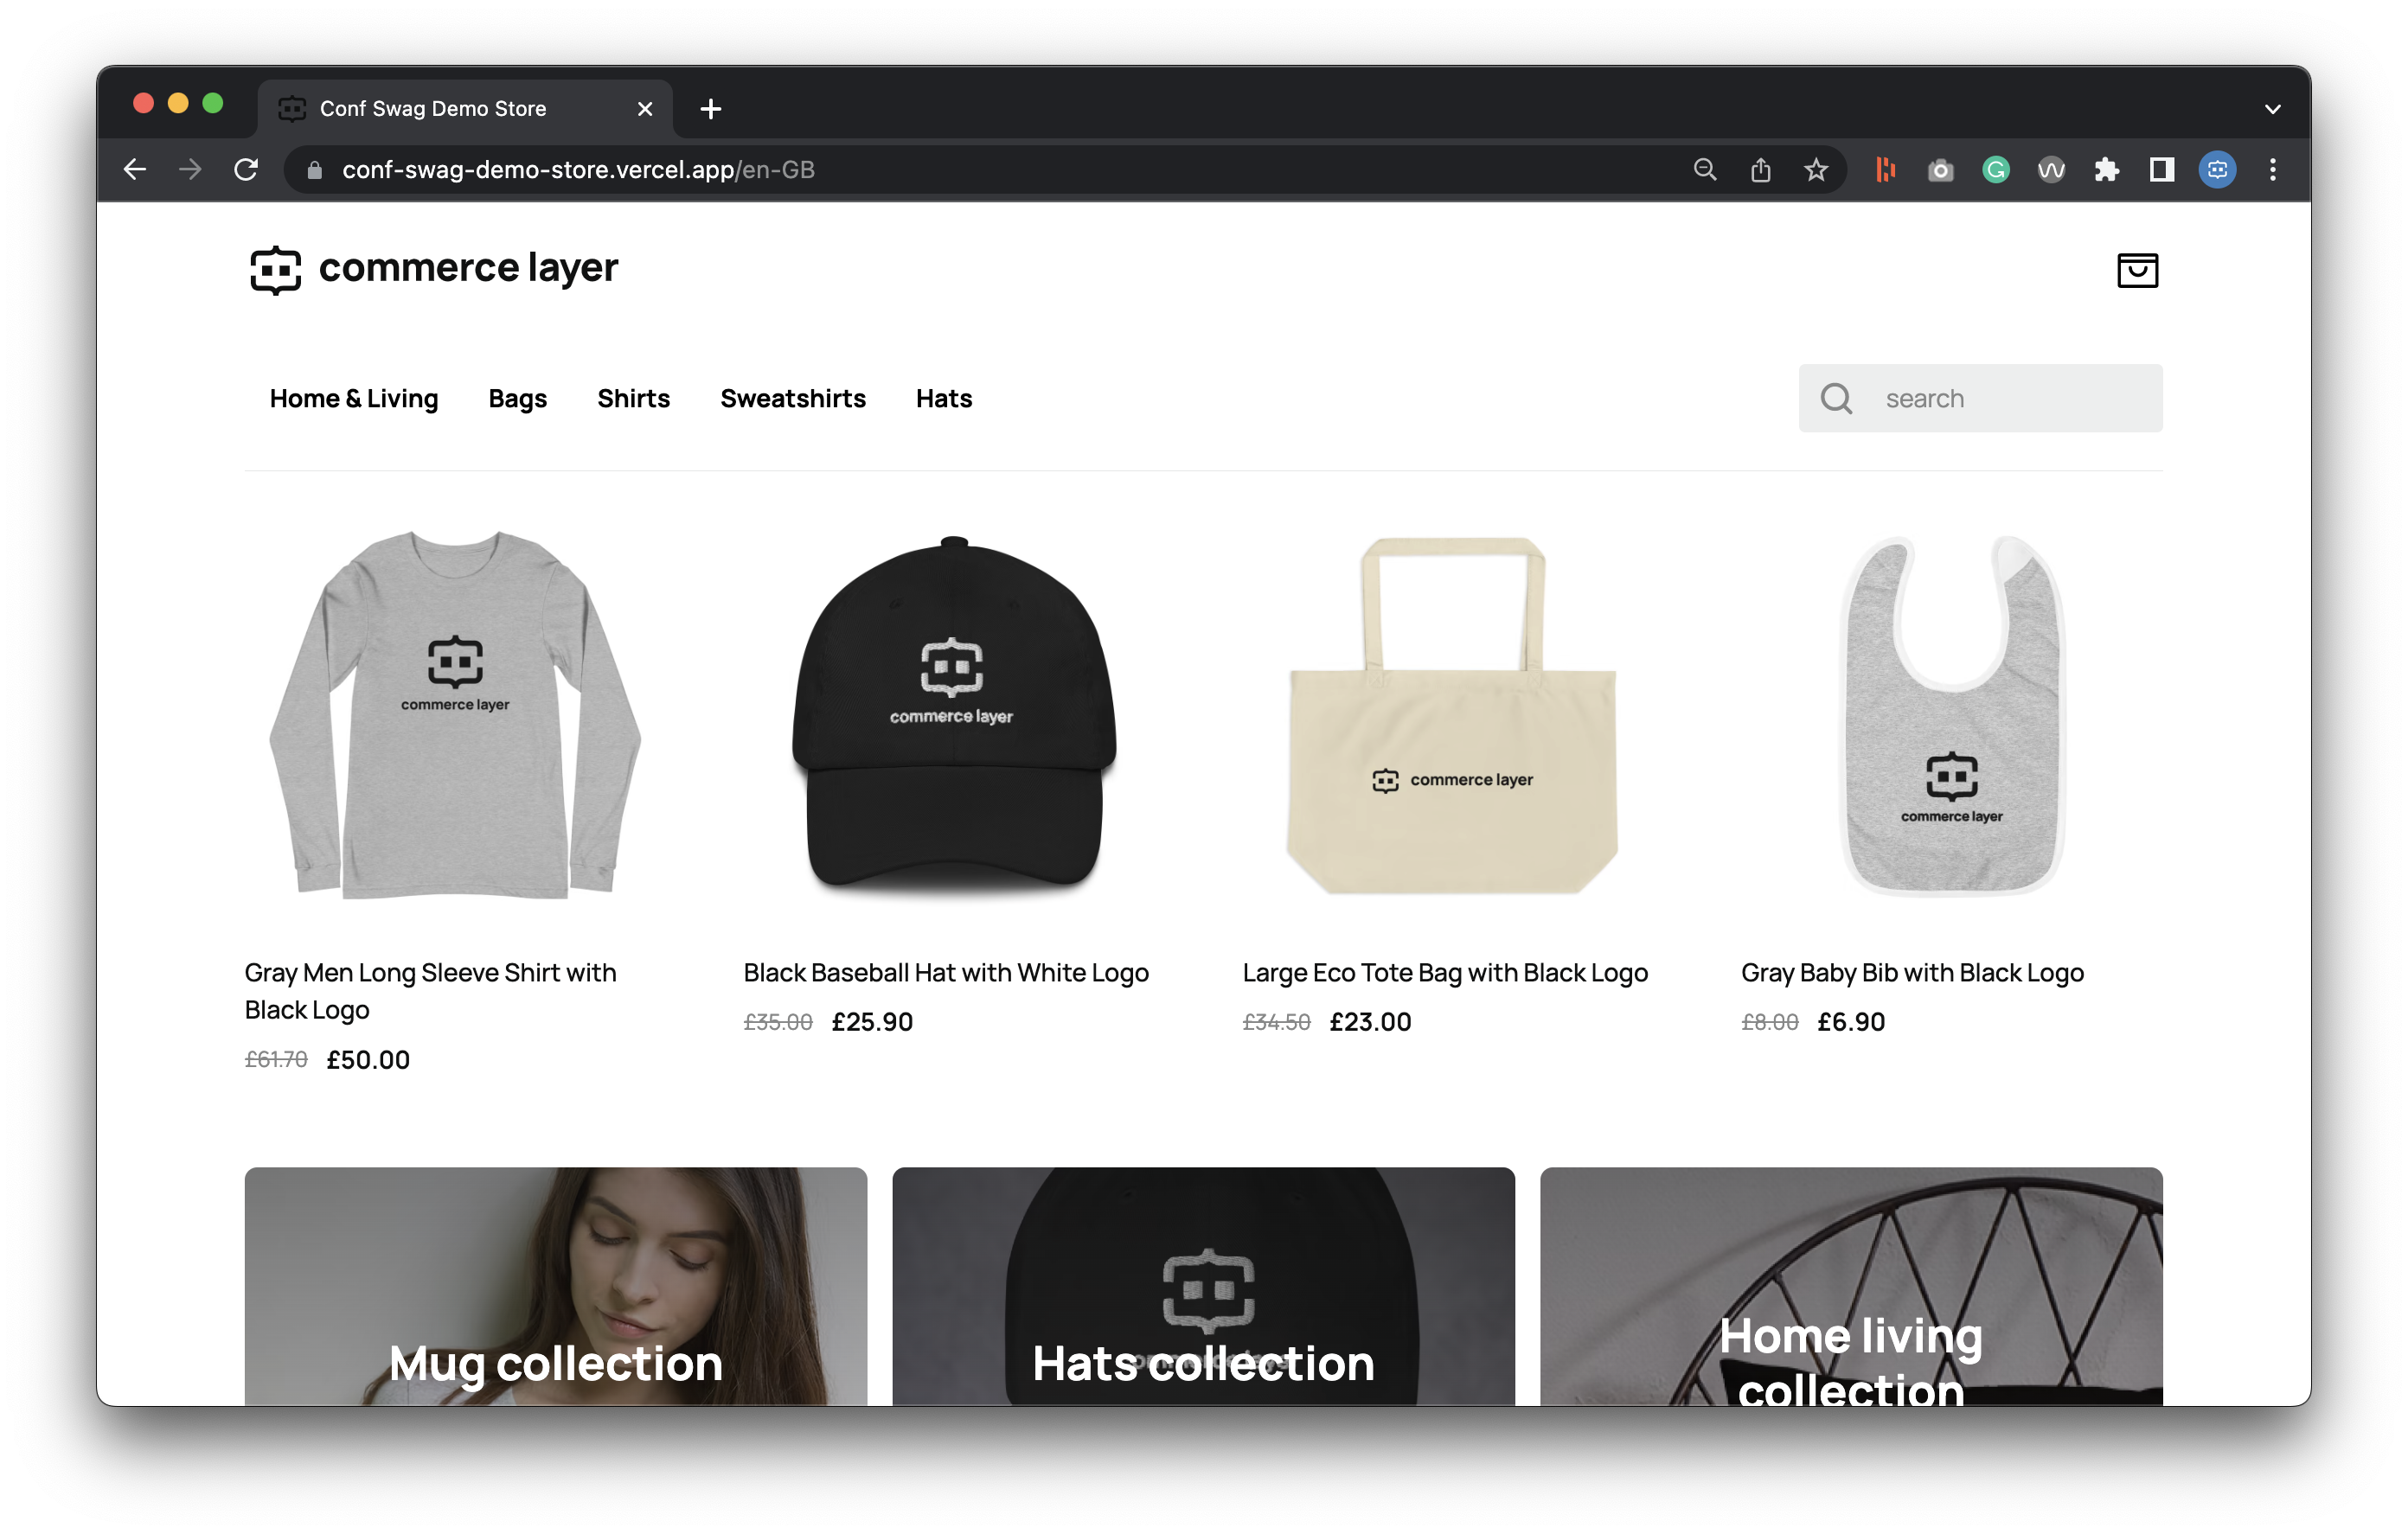
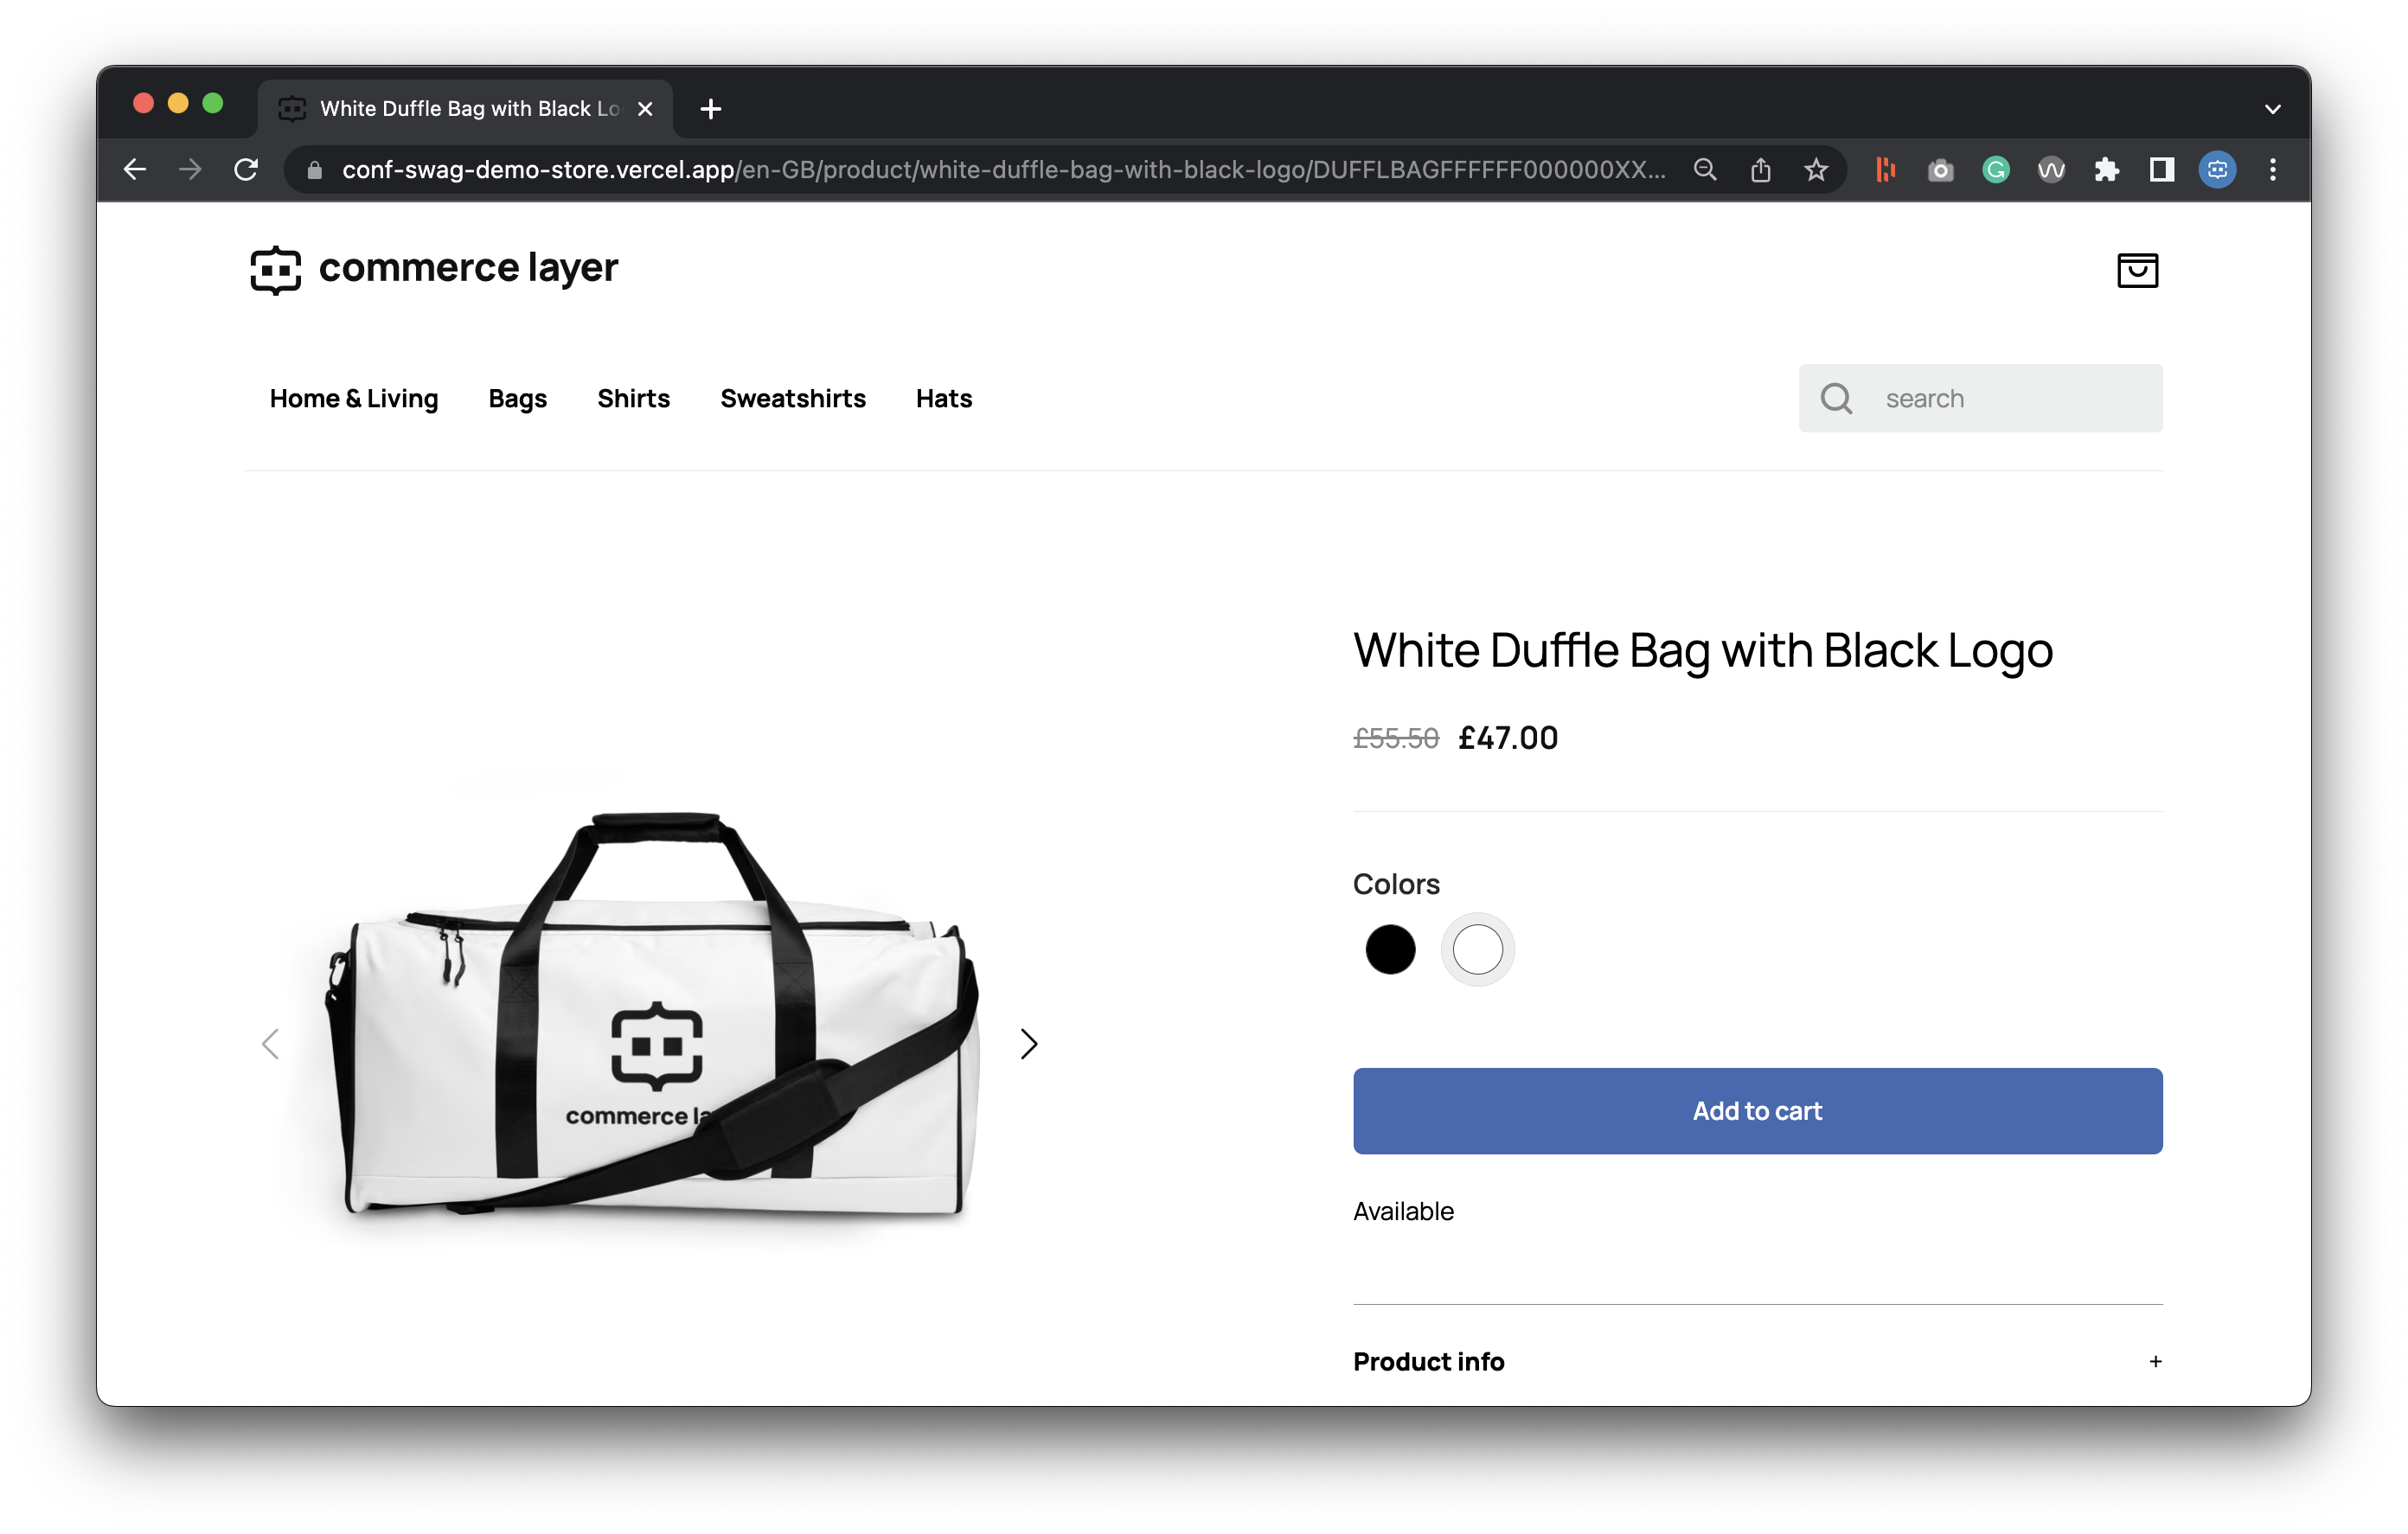
You must first select a country when you visit the homepage. When you select the United States, for example, you will be redirected to the http://localhost:3000/en-US/ path, which will return a shopping experience from the United States market in Commerce Layer with English content translations. Changing the language to French, for example, will redirect to a http://localhost:3000/fr-US page. Changing the country to Italy will return a shopping experience from the Europe market in Commerce Layer and redirect to a http://localhost:3000/fr-IT page. You can play around with it for other countries and languages.
This is a fully-functional international ecommerce website with a multi-market setup, facet search, cart, and checkout in just a few minutes and fewer development efforts. Also, if you already have an existing CMS with content, you can still use that to generate the required content JSON file (we will show you how in a follow-up tutorial 😉). Now, you can go ahead and make transactional changes for each market in Commerce Layer, and your demo store will return the right experience to your users. Isn’t this cool?
In the next section, you will learn how to do more by customizing your store and adding more translations, pages, countries, and other commerce resources.
Customizing your Demo Store
The Demo Store project is built around three main data elements stored as JSON files to decouple them from any third-party services you might want to add yourself. To customize your store, you'll have to create and manage these files.
The content JSON files are located in the
data/json/directory with different structured text and image content (here is a sample from the finished code).The locale JSON files are located in the
data/locales/directory with a collection of language translation files (here is a sample from the finished code with french and Italian translations).The configuration files are located in the
config/directory with some JS files that change the behavior of search facets and variants swatching for products with multiple variants (which in turn means the existence of multiple SKUs).
When you are done with any change, always ensure to check that everything is correct by running the command:
npm run test:data
You can look at the finished code to see all the extra pages and translation changes added to the demo conference swag ecommerce website. Alternatively, if you need to fully customize your store (behavior, UI, UX, etc.), then all you have to do is fork the demo-store-core repository, which contains the source code, follow the instructions to set things up locally and configure it as earlier discussed.
Deploying the Demo Store
There are two things you need to do before you deploy your store using your favorite hosting platforms (e.g., Netlify, Vercel, GitHub Pages, Cloudflare Pages, etc.):
Add all the environment variables you currently have in
.env.localto the deployment service you'll use to run the build.Decide if you want to use static site generation (SSG) or server-side rendering (SSR) in production.
The next sections will outline the steps required for each option.
Static site generation (SSG)
→ Add this in addition to other variables in your env file:
NEXT_PUBLIC_DATA_FETCHING=ssg
→ Run npm run export to create a static optimized production build of your application.
→ Copy the folder in demo-store-core/packages/website/out to your preferred static hosting.
Server-side rendering (SSR)
→ Add this in addition to other variables in your env file:
NEXT_PUBLIC_DATA_FETCHING=ssr
→ Set the output directory in your deployment service to demo-store-core/packages/website/.next.
→ Set npm run build as your build command to create an optimized production build of your application.
CI/CD Deployment
You can use the same steps and options if you set up CI/CD deployment directly from a GitHub or GitLab repository. For example, you can create a netlify.toml file for Netlify with SSG like so:
[build]
  command="npm run export"
  publish="demo-store-core/packages/website/out"

[build.processing]
  skip_processing = true

[build.environment]
  NEXT_PUBLIC_JSON_DATA_FOLDER="../../../data/json/"
  NEXT_PUBLIC_LOCALES_DATA_FOLDER="../../../data/locales/"
  NEXT_PUBLIC_CONFIG_FOLDER="../../../config/"

[template.environment]
  SITE_URL="https://your-demo-store.netlify.app"
  NEXT_PUBLIC_CL_CLIENT_ID="coF7ofOKxTlbYfNNe..."
  NEXT_PUBLIC_CL_ENDPOINT="https://your-demo-store.commercelayer.io"
Or a vercel.json file for Vercel with SSR like so:
{
  "version": 2,
  "buildCommand": "npm run build",
  "outputDirectory": "demo-store-core/packages/website/.next",
  "build": {
    "env": {
      "ENABLE_EXPERIMENTAL_COREPACK": "1",
      "NEXT_PUBLIC_DATA_FETCHING": "ssr",
      "NEXT_PUBLIC_JSON_DATA_FOLDER": "../../../data/json/",
      "NEXT_PUBLIC_LOCALES_DATA_FOLDER": "../../../data/locales/",
      "NEXT_PUBLIC_CONFIG_FOLDER": "../../../config/",
      "SITE_URL": "https://conf-swag-demo-store.vercel.app",
      "NEXT_PUBLIC_CL_CLIENT_ID": "coF7ofOKxTlbYfNNe...",
      "NEXT_PUBLIC_CL_ENDPOINT": "https://your-demo-store.commercelayer.io"
    }
  }
}
PS: If you use this option, please make sure that your Commerce Layer API credentials are private. The API credentials in the netlify.toml or vercel.json files should only be added to a private repository. You should always add API credentials directly to your deployment service. I added mine to the repository just for educational purposes.
Conclusion
And that’s a wrap!
I hope you’ve found this tutorial useful and have learned how composable commerce and international websites work. Feel free to expand your knowledge by researching more, customizing your ecommerce store, integrating with other third-party services, adding more commerce data to your Commerce Layer organization, and exploring Commerce Layer’s other suite of developer tools. You can go ahead and use this project to start selling conference swags or any products and receive orders for free (courtesy of the Commerce Layer free Developer plan) 😃.
I’d also love to see what you build with this, so please feel free to share what you’ve built and let me know what you think about the tutorial in the comment section or in Commerce Layer's Slack community!