Table of contents
- Prerequisites
- What's a Machine Learning Model?
- Building a Machine Learning Model with Python
- Serializing a Machine Learning Model
- Building the Web Application with Flask
- Deploying to the Cloud
- 1. Set up Git in your working directory and push your code to a hosting service like GitHub.
- 2. Download and install the Heroku CLI using the command:
- 3. If you haven't already, log in to your Heroku account and follow the prompts to create a new SSH public key using the command:
- 4. Create a Procfile and add the following:
- 5. Create a requirements.txt file in the webapp directory and add the following:
- 6. Deploy your application to Heroku with Git using the commands below:
- Conclusion
One essential and last phase of the CRISP-DM data framework is deployment. The key focus in this phase is the usability of the developed model by intended users or customers. Depending on the type of solution and use case, this can involve deploying and integrating the model on any medium like the web, a mobile application, a hardware embedded system, etc. While this "sounds easy", many junior ML engineers find it daunting to deploy their projects on the web for their intended users to test and for their solutions to solve their users' problems.
In this tutorial, I will introduce model deployment by showing you the basic steps and processes of deploying a model on a web application built with Python and Flask. Then, I'll share an already-built model and show you how you can export yours (if you have any). We will build the app, integrate the model, and deploy it to Heroku with Git and GitHub. I'd also share some alternative tools and frameworks to consider based on your use case.
Sounds like something you want to learn? Then read on :)
Prerequisites
- A working computer running on any operating system.
- Some HTML, CSS, JavaScript, and Python knowledge.
- Basic knowledge of navigating around the command-line.
- A smile on your face :)
What's a Machine Learning Model?
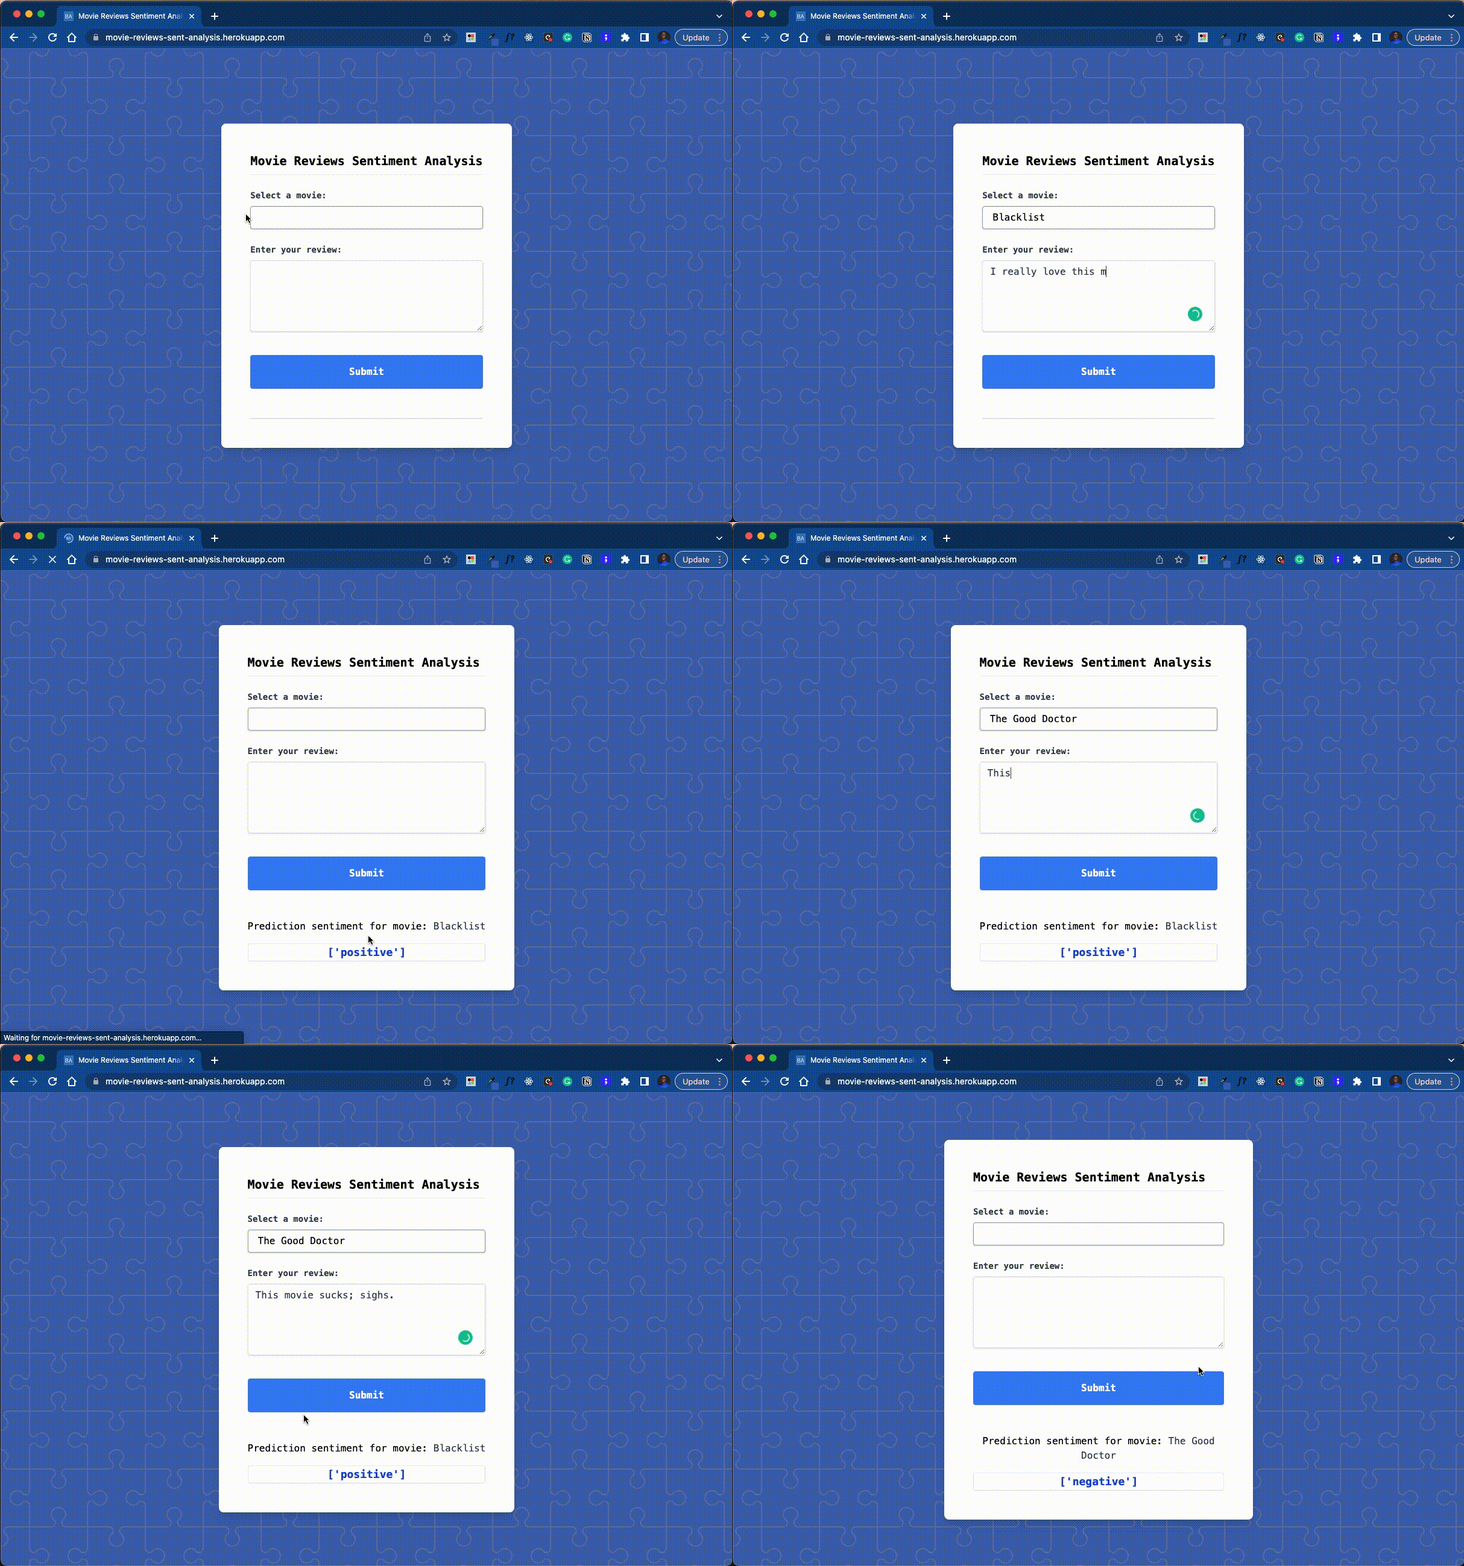
A machine learning model is a file that has been trained using specific data to recognize certain types of similar patterns and make informed predictions. You provide a model with a set of data and train it with some algorithms. When you introduce a new set of data, the model will use learned knowledge to recognize the new data set. This is typically what happens with Face recognition security systems, where the device recognizes your face as a human face, not an object. Another example is a recommendation system, like in the demo I built for this tutorial. You will provide the model with multiple words associated with an output class (either positive or negative). The model will then learn from them so that when you provide a new sentence, the model can determine if it is positive or negative.


There are three paradigms used to develop models, namely:
- Supervised Learning (this is a type of ML where an algorithm is given a large input dataset with corresponding output or event/class, usually prepared in consultation with the subject matter domain expert).
- Unsupervised Learning (this is a type of ML where an algorithm is given some input dataset without the desired output or event/class and subject matter domain expert consultation).
- Reinforcement Learning (this is a type of ML algorithm that maps situations to actions that result in the highest possible reward).
You can learn more by clicking on the links of each category.
Building a Machine Learning Model with Python
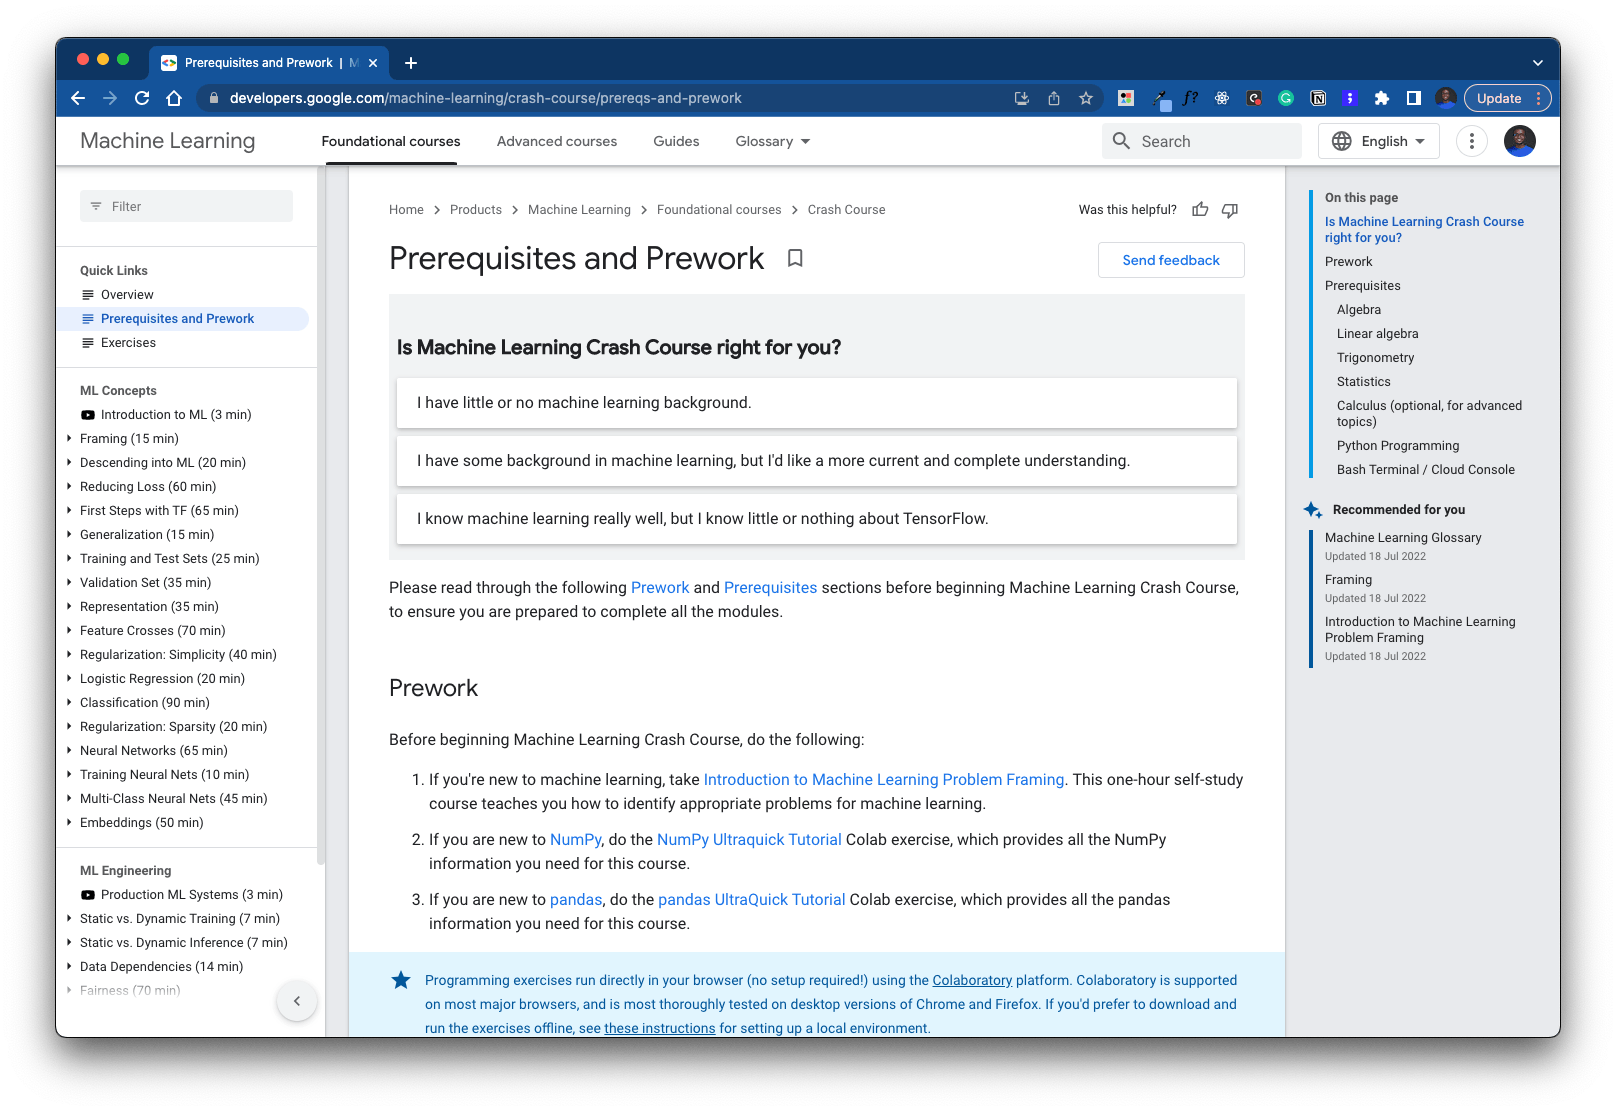
You can build machine learning models with Python and other frameworks. To get started, I recommend you take this Machine Learning crash course from Google that will teach you the fundamental machine learning concepts with a series of video lectures, real-world case studies, and hands-on practice exercises.

Serializing a Machine Learning Model
Serialization is the process of converting an object to a stream of bytes which is then stored or transmitted to memory or a file. You can learn more in this Wikipedia article.
Now I'll assume you have learned how to build stuff with Machine Learning, or you have already created some model(s) that you would like to integrate with a user interface and deploy to the web. The first step you need to do is to export and save your model in a file format so you can use it while integrating with other technologies. Doing this will serialize your machine learning algorithms and save the serialized format to a file you can de-serialize later. There are several ways to do this based on the algorithms/frameworks used in developing your model or the requirements of your model. Some tools or file formats you can use include Pickle (Pkl format), Joblib (Pkl or Joblib format), Tensorflow Keras (H5 or JSON format), etc.
Building the Web Application with Flask

I built a basic machine learning model to predict whether a movie review is positive or negative. I used four classification models (Support Vector Machine, Decision Tree, Naive Bayes, and Logistic Regression) and then evaluated each of them to find the one with the best accuracy. I then optimized the model with GridSearchCV and serialized it to a .pkl file using Pickle like so:
import pickle

filename = 'movie_reviews_sentiment_analysis.pkl'

# Save model (serialize)
pickle.dump(svc_grid, open(filename, 'wb'))

# Load model (de-serialize)
pickle.load(open(filename, 'rb'))
You can view the notebook for the machine model here:
Now that we have a working model, let's build a basic web application using Flask, HTML, CSS, and some JavaScript in the following sections.
Project Folder Directory Setup
Create a new directory on your computer and create the following subfolders, files, and subfiles. If you want to use the same model and files I used, you can fetch everything from this repository on GitHub.
├── data
  ├── dataset.csv (the dataset for your model)
  ├── <any other required data files>
├── webapp
  ├── model
     ├── movie_reviews_sentiment_analysis.pkl
     ├── vectorizer.pkl
  ├── static
     ├── main.css
     ├── main.js
  ├── templates
     ├── main.html
  ├── app.py
├── <your model notebook>.ipynb
Flask Installation and Setup
Flask is a lightweight Python micro framework for building web applications (if you want to learn more about Flask, you can check this out). To get started, we will install Python, Flask, and Pickle using PIP if you haven't already, like so:
pip install python3

pip install flask

pip install pickle
Create the Required Flask Templates
Add the following markup code with some Tailwind styling to the main.html file in webapp/templates to create a form with a <select> field, a <textarea> field, and a submit button:
<!DOCTYPE html>
<html lang="en">
  <head>
    <meta charset="UTF-8" />
    <meta http-equiv="X-UA-Compatible" content="IE=edge" />
    <meta name="viewport" content="width=device-width, initial-scale=1.0" />
    <title>Movie Reviews Sentiment Analysis</title>
    <link
      href="https://unpkg.com/tailwindcss@^2/dist/tailwind.min.css"
      rel="stylesheet"
    />
    <link rel="stylesheet" href="{{ url_for('static',filename='main.css') }}" />
  </head>

  <body class="font-mono">
    <div class="flex items-center justify-center h-screen">
      <div class="p-12 max-w-lg bg-white rounded-lg overflow-hidden shadow-lg">
        <div class="font-bold text-xl mb-2">
          Movie Reviews Sentiment Analysis
        </div>
        <hr />
        <br />

        <form id="review-form" action="{{ url_for('main') }}" method="POST">
          <label class="block text-gray-700 text-sm font-bold mb-2" for="movie">
            Select a movie:
          </label>
          <select
            id="movie"
            name="movie"
            class="block appearance-none w-full bg-white border border-gray-400 hover:border-gray-500 px-4 py-2 pr-8 rounded shadow leading-tight focus:outline-none focus:shadow-outline"
            required
          >
            <option></option>
            <option value="The Good Doctor">The Good Doctor</option>
            <option value="Money Heist">Money Heist</option>
            <option value="Blacklist">Blacklist</option>
            <option value="The Return of Kibi">The Return of Kibi</option>
            <option value="The Imitation Game">The Imitation Game</option>
            <option value="The Dark Knight">The Dark Knight</option>
            <option value="Blindspot">Blindspot</option>
            <option value="Ozark">Ozark</option>
            <option value="Vincenzo">Vincenzo</option>
          </select>

          <br />

          <label
            class="block text-gray-700 text-sm font-bold mb-2"
            for="review"
          >
            Enter your review:
          </label>
          <textarea
            name="review"
            id="review"
            class="shadow appearance-none border rounded w-full py-2  px-3 text-gray-700 leading-tight focus:outline-none focus:shadow-outline"
            rows="5"
            required
          ></textarea>

          <br />

          <input
            type="submit"
            value="Submit"
            class="w-full bg-blue-500 text-white font-bold mt-8 p-4 rounded focus:outline-none focus:shadow-outline"
          />
        </form>

        <div class="result mt-12" align="center">
          <span id="predict_text">{{ predict_text }}</span>
          <span id="selected_movie" class="text-gray-700">{{ movie }}</span>
          <p class="text-blue-700 text-lg font-bold border rounded mt-4">
            {{ result }}
          </p>
        </div>
      </div>
    </div>

    <script
      src="{{ url_for('static',filename='main.js') }}"
      type="text/javascript"
    ></script>
  </body>
</html>
Each input element has an ID with the name of the feature required by the model. The
form has a POST method set, and upon successful form submission, the data is sent to
main.py file for processing. The last section displays the results from the processing done in
main.py. The variables in {{ }} represents the dynamic data to be expected upon
successful form submission.
For some extra fancy background, add the following code to the main.css file in webapp/static:
body {
  background-color: #4267b2;
  background-image: url("data:image/svg+xml,%3Csvg xmlns='http://www.w3.org/2000/svg' width='192' height='192' viewBox='0 0 192 192'%3E%3Cpath fill='%239C92AC' fill-opacity='0.4' d='M192 15v2a11 11 0 0 0-11 11c0 1.94 1.16 4.75 2.53 6.11l2.36 2.36a6.93 6.93 0 0 1 1.22 7.56l-.43.84a8.08 8.08 0 0 1-6.66 4.13H145v35.02a6.1 6.1 0 0 0 3.03 4.87l.84.43c1.58.79 4 .4 5.24-.85l2.36-2.36a12.04 12.04 0 0 1 7.51-3.11 13 13 0 1 1 .02 26 12 12 0 0 1-7.53-3.11l-2.36-2.36a4.93 4.93 0 0 0-5.24-.85l-.84.43a6.1 6.1 0 0 0-3.03 4.87V143h35.02a8.08 8.08 0 0 1 6.66 4.13l.43.84a6.91 6.91 0 0 1-1.22 7.56l-2.36 2.36A10.06 10.06 0 0 0 181 164a11 11 0 0 0 11 11v2a13 13 0 0 1-13-13 12 12 0 0 1 3.11-7.53l2.36-2.36a4.93 4.93 0 0 0 .85-5.24l-.43-.84a6.1 6.1 0 0 0-4.87-3.03H145v35.02a8.08 8.08 0 0 1-4.13 6.66l-.84.43a6.91 6.91 0 0 1-7.56-1.22l-2.36-2.36A10.06 10.06 0 0 0 124 181a11 11 0 0 0-11 11h-2a13 13 0 0 1 13-13c2.47 0 5.79 1.37 7.53 3.11l2.36 2.36a4.94 4.94 0 0 0 5.24.85l.84-.43a6.1 6.1 0 0 0 3.03-4.87V145h-35.02a8.08 8.08 0 0 1-6.66-4.13l-.43-.84a6.91 6.91 0 0 1 1.22-7.56l2.36-2.36A10.06 10.06 0 0 0 107 124a11 11 0 0 0-22 0c0 1.94 1.16 4.75 2.53 6.11l2.36 2.36a6.93 6.93 0 0 1 1.22 7.56l-.43.84a8.08 8.08 0 0 1-6.66 4.13H49v35.02a6.1 6.1 0 0 0 3.03 4.87l.84.43c1.58.79 4 .4 5.24-.85l2.36-2.36a12.04 12.04 0 0 1 7.51-3.11A13 13 0 0 1 81 192h-2a11 11 0 0 0-11-11c-1.94 0-4.75 1.16-6.11 2.53l-2.36 2.36a6.93 6.93 0 0 1-7.56 1.22l-.84-.43a8.08 8.08 0 0 1-4.13-6.66V145H11.98a6.1 6.1 0 0 0-4.87 3.03l-.43.84c-.79 1.58-.4 4 .85 5.24l2.36 2.36a12.04 12.04 0 0 1 3.11 7.51A13 13 0 0 1 0 177v-2a11 11 0 0 0 11-11c0-1.94-1.16-4.75-2.53-6.11l-2.36-2.36a6.93 6.93 0 0 1-1.22-7.56l.43-.84a8.08 8.08 0 0 1 6.66-4.13H47v-35.02a6.1 6.1 0 0 0-3.03-4.87l-.84-.43c-1.59-.8-4-.4-5.24.85l-2.36 2.36A12 12 0 0 1 28 109a13 13 0 1 1 0-26c2.47 0 5.79 1.37 7.53 3.11l2.36 2.36a4.94 4.94 0 0 0 5.24.85l.84-.43A6.1 6.1 0 0 0 47 84.02V49H11.98a8.08 8.08 0 0 1-6.66-4.13l-.43-.84a6.91 6.91 0 0 1 1.22-7.56l2.36-2.36A10.06 10.06 0 0 0 11 28 11 11 0 0 0 0 17v-2a13 13 0 0 1 13 13c0 2.47-1.37 5.79-3.11 7.53l-2.36 2.36a4.94 4.94 0 0 0-.85 5.24l.43.84A6.1 6.1 0 0 0 11.98 47H47V11.98a8.08 8.08 0 0 1 4.13-6.66l.84-.43a6.91 6.91 0 0 1 7.56 1.22l2.36 2.36A10.06 10.06 0 0 0 68 11 11 11 0 0 0 79 0h2a13 13 0 0 1-13 13 12 12 0 0 1-7.53-3.11l-2.36-2.36a4.93 4.93 0 0 0-5.24-.85l-.84.43A6.1 6.1 0 0 0 49 11.98V47h35.02a8.08 8.08 0 0 1 6.66 4.13l.43.84a6.91 6.91 0 0 1-1.22 7.56l-2.36 2.36A10.06 10.06 0 0 0 85 68a11 11 0 0 0 22 0c0-1.94-1.16-4.75-2.53-6.11l-2.36-2.36a6.93 6.93 0 0 1-1.22-7.56l.43-.84a8.08 8.08 0 0 1 6.66-4.13H143V11.98a6.1 6.1 0 0 0-3.03-4.87l-.84-.43c-1.59-.8-4-.4-5.24.85l-2.36 2.36A12 12 0 0 1 124 13a13 13 0 0 1-13-13h2a11 11 0 0 0 11 11c1.94 0 4.75-1.16 6.11-2.53l2.36-2.36a6.93 6.93 0 0 1 7.56-1.22l.84.43a8.08 8.08 0 0 1 4.13 6.66V47h35.02a6.1 6.1 0 0 0 4.87-3.03l.43-.84c.8-1.59.4-4-.85-5.24l-2.36-2.36A12 12 0 0 1 179 28a13 13 0 0 1 13-13zM84.02 143a6.1 6.1 0 0 0 4.87-3.03l.43-.84c.8-1.59.4-4-.85-5.24l-2.36-2.36A12 12 0 0 1 83 124a13 13 0 1 1 26 0c0 2.47-1.37 5.79-3.11 7.53l-2.36 2.36a4.94 4.94 0 0 0-.85 5.24l.43.84a6.1 6.1 0 0 0 4.87 3.03H143v-35.02a8.08 8.08 0 0 1 4.13-6.66l.84-.43a6.91 6.91 0 0 1 7.56 1.22l2.36 2.36A10.06 10.06 0 0 0 164 107a11 11 0 0 0 0-22c-1.94 0-4.75 1.16-6.11 2.53l-2.36 2.36a6.93 6.93 0 0 1-7.56 1.22l-.84-.43a8.08 8.08 0 0 1-4.13-6.66V49h-35.02a6.1 6.1 0 0 0-4.87 3.03l-.43.84c-.79 1.58-.4 4 .85 5.24l2.36 2.36a12.04 12.04 0 0 1 3.11 7.51A13 13 0 1 1 83 68a12 12 0 0 1 3.11-7.53l2.36-2.36a4.93 4.93 0 0 0 .85-5.24l-.43-.84A6.1 6.1 0 0 0 84.02 49H49v35.02a8.08 8.08 0 0 1-4.13 6.66l-.84.43a6.91 6.91 0 0 1-7.56-1.22l-2.36-2.36A10.06 10.06 0 0 0 28 85a11 11 0 0 0 0 22c1.94 0 4.75-1.16 6.11-2.53l2.36-2.36a6.93 6.93 0 0 1 7.56-1.22l.84.43a8.08 8.08 0 0 1 4.13 6.66V143h35.02z'%3E%3C/path%3E%3C/svg%3E");
}
Now, add the code below to the main.js file in webapp/static. This will prevent the form
from storing state from the previous form sessions:
if (window.history.replaceState) {
  window.history.replaceState(null, null, window.location.href);
}
Now you can use the command flask run to start the Flask server on http://127.0.0.1:5000 to preview the UI you have developed so far (PS: ensure you run the command inside the webapp directory).
Model Integration with Python and Flask
In the main.py file located in webapp, add the following Python code:
import flask
import pickle
import pandas as pd

# Use pickle to load in the pre-trained model.
with open(f'model/movie_reviews_sentiment_analysis.pkl', 'rb') as f:
    model = pickle.load(f)

# Use pickle to load in vectorizer.
with open(f'model/vectorizer.pkl', 'rb') as f:
    vectorizer = pickle.load(f)

app = flask.Flask(__name__, template_folder='templates')

@app.route('/', methods=['GET', 'POST'])
def main():
    if flask.request.method == 'GET':
        return(flask.render_template('main.html'))

    if flask.request.method == 'POST':
        review = flask.request.form['review']
        predict_text = "Prediction sentiment for movie: "
        movie = flask.request.form.get("movie")
        prediction = model.predict(vectorizer.transform([review]))
        return(flask.render_template('main.html', predict_text=predict_text, movie=movie, result=prediction))

if __name__ == '__main__':
    app.run()
This code will import the pre-trained model and create a new route with the desired request methods (GET and POST). Then, inside the main() function, we will write the functionality for both requests, make predictions based on the input variables and return the result values to the / route (homepage). With this, our previously developed model can now take in new data from the input fields and return output data.
Deploying to the Cloud
Now, the most crucial part of this tutorial. How do we make the web application we have built accessible to anyone on the web? Well, we deploy it to the web using cloud services. For example, you can deploy to Heroku by following the steps below:
1. Set up Git in your working directory and push your code to a hosting service like GitHub.
2. Download and install the Heroku CLI using the command:
brew tap heroku/brew && brew install heroku

//or

curl https://cli-assets.heroku.com/install.sh | sh
You can download for Windows or use other methods by reading the official docs.
3. If you haven't already, log in to your Heroku account and follow the prompts to create a new SSH public key using the command:
heroku login
4. Create a Procfile and add the following:
web: gunicorn app:app
5. Create a requirements.txt file in the webapp directory and add the following:
flask==2.0.1
pandas==1.2.4
sklearn==0.0
gunicorn==20.1.0
6. Deploy your application to Heroku with Git using the commands below:
git add .
git commit -m "deploy to heroku"
git push heroku main
And that's pretty much it! You can explore the demo using this link. As you may already know, Heroku is shutting down free dynos soon, which means you'd have to pay some $$ to deploy to Heroku. If you want, you can consider alternatives, like Clouddley, Railway, Fly, Deta Cloud, Firebase, etc. All the alternatives have similar deployment steps using their CLIs; for example, you can get up and running with Fly with a few commands.
Conclusion
You can build a web application for your machine learning model using any web framework of your choosing, depending on the technology your model is built with. For Python, you can also consider other frameworks like Django, or if you're building with Tensorflow—a library that lets you create, train, and use trained machine learning models in Javascript, you can use frameworks like Reactjs (web) or React Native (mobile) to deploy your stuff to your end users.
If you want to stick with Python completely, you can also build a REST API using Fast API and consume that in your JavaScript, Reactjs, Vuejs, etc. application (like we just did). @Youngestdev wrote the perfect book for you on how to build Python Web APIs with FastAPI; you should get a copy and read it :winks:. Another exciting alternative is Gradio—the fastest way to demo your machine learning model with a friendly web interface so anyone can use it anywhere. @abdulsamodazeez wrote an insightful piece around how to deploy to Gradio; you should read it.
And that should be all! I hope you've learned something new or found a link to another resource that can help you become a better Machine Learning Engineer. You should use this tutorial as a guide to building a web app for your use case, so be sure to explore the code anytime and rewrite it to suit your needs using your HTML, CSS, JavaScript, and Python knowledge. If you have any further questions, feel free to leave them in the comments, and I'll respond as soon as possible. Cheers! 💙


