


As a software developer, the tools you use daily actually surpass the original languages you write code in. Over the years, I have discovered and used some amazing tools that have improved my productivity and efficiency in developing applications with Reactjs. I thought to share some of them today.
This is no such definite list; all tools listed here are all recommendations based on my experience with them. If you find or know a better tool or one you would recommend, kindly let me and other readers know by leaving a comment.
Introduction to Reactjs
React is a declarative, efficient, and flexible frontend JavaScript library for building user interfaces. It lets you compose a complex user interface from small and isolated pieces of code called “components.”
React was initially developed by Jordan Walke, a software engineer at Facebook, who released an early prototype of React called "FaxJS." It was first deployed on Facebook's News Feed in 2011 and later on Instagram in 2012 and was open-sourced at JSConf US on 29th May 2013. It is maintained by Facebook and a community of developers.
React has grown to be the developer's choice as it has topped several polls and is highly demanded by several companies today.
If you have been considering getting started with learning Reactjs, here are some snippets to show how React code looks like and maybe inspire you to get started as soon as possible.
React components implement a render() method that takes input data and returns what to display.
This would display a heading saying, “Hello, world!”.
ReactDOM.render(
  <h1>Hello, world!</h1>,
  document.getElementById('root')
);
This is a component written like a JavaScript function and would display a heading but accepts a property (your name) before rendering.
function Welcome(props) {
  return <h1>Hello, {props.name}</h1>;
}
This is a component written with JavaScript ES6 class and would display a heading but accepts a property (your name) before rendering.
class Welcome extends React.Component {
  render() {
    return <h1>Hello, {this.props.name}</h1>;
  }
}
This component can then be reused in several pages by passing the name property to the component like so:
<Welcome name="Bolaji" />
{/* Would render a heading with output: Hello, Bolaji*/}

<Welcome name="Hashnode" />
{/* Would render a heading with output: Hello, Hashnode*/}
Here is a sample code sandbox that shows how this logic is used with a user interface. Play around with the code and be creative :).
Want to get started now? I'll recommend you start with the official React Docs and Getting Started with React - An Overview and Walkthrough Tutorial by Tania Rascia. Prefer visuals? Check out ReactforBeginners by Wes Bos (PAID) and Learn React JS - Full Course for Beginners - Tutorial 2019 by FreeCodeCamp (FREE).
The 15 Amazing React Dev Tools
React is a famous JavaScript library with tons of frameworks and tools created around it daily. While the numerous lists of tools provide you with a wide range of options, choosing which tool to use can be daunting for a beginner or intermediate. Below is a list of recommended React Dev Tools you can consider.
PS: All the screenshots used in this article are in Dark mode, my eyes hurt with too much white light, so I view everything in Dark mode (all thanks to NightEye).
1. React Developers Tools
This is the most popular tool as the Reactjs team itself created it. React Developer Tools is a DevTools extension available on Google Chrome and Mozilla Firefox. It allows you to inspect a React tree, including the component hierarchy, props, state, and more. To get started, open the Devtools in your browser and switch to the "⚛️ Components" or "⚛️ Profiler" tab.
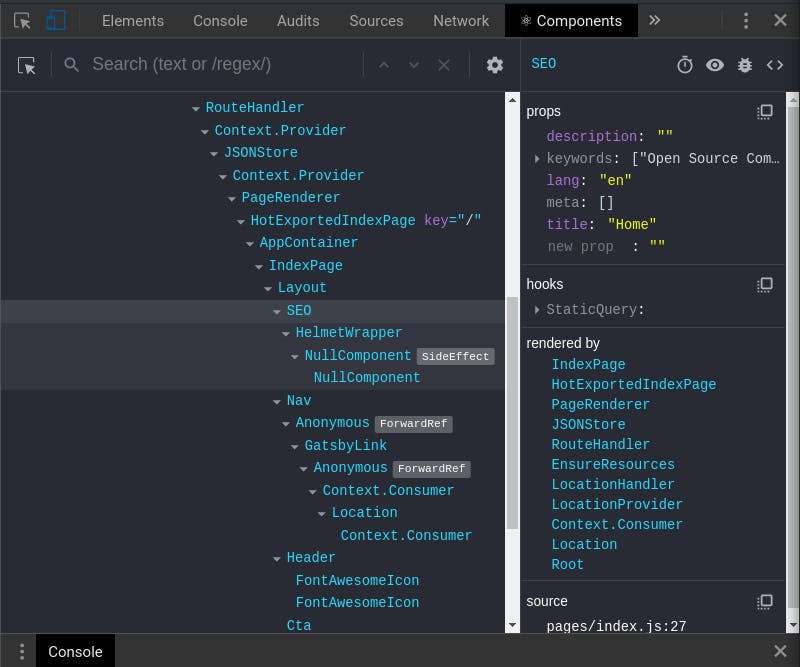
The Components tab shows you the root React components that were rendered on the page, as well as the subcomponents. When you select one of the components in the tree, you can inspect and edit its current props and state in the panel on the right.
The Profiler tab uses the experimental Profiler API to measure how often a React application renders and what the “cost” of rendering is to help identify slow parts of an application and how it can be optimized. Only react-dom 16.5+ supports profiling in Dev mode.
You can also install the standalone shell to support Safari and ReactNative like so:
npm install -g react-devtools@^4
2. React Docs
This is the official documentation of Reactjs and is the best way to get started with learning Reactjs. It contains Installation, Main Concepts, Advanced Guides, API References, Hooks, Testing, Concurrent Mode (Experimental) guides, and more.
3. Scrimba React Bootcamp
Scrimba is the easiest way to learn how to code with interactive screencasts. The Scrimba React Bootcamp provides a comprehensive introduction to React for beginners. This tutorial course contains 57 interactive screencasts and is the perfect starting point for aspiring React developers. You'll learn all the key concepts while building two apps and doing coding challenges along the way, all for FREE!
By the end of this course, you'll have a solid understanding of:
- JSX
- Props and state
- Conditional rendering
- Functional components
- Class components
- Styling components
- Lifecycle methods
- Fetching data from APIs
- Handling events
- Forms in React
- Controlled components
- Writing modern React
- Local dev setup
- React Hooks
4. Create React App
Create React App lets you focus on code, not build tools. It is an officially supported way to create single-page React applications. It offers a modern build setup with no configuration.
npx create-react-app my-project
cd my-project
npm start
This will create a directory called my-project inside the current folder and will generate the initial project structure and install the transitive dependencies:
my-project
├── README.md
├── node_modules
├── package.json
├── .gitignore
├── public
│   ├── favicon.ico
│   ├── index.html
│   └── manifest.json
└── src
    ├── App.css
    ├── App.js
    ├── App.test.js
    ├── index.css
    ├── index.js
    ├── logo.svg
    └── serviceWorker.js
public/index.htmlis the page template;src/index.jsis the JavaScript entry point.
Your application will contain all the essential tools and configurations needed:
- React, JSX, ES6, TypeScript, and Flow syntax support.
- Language extras beyond ES6 like the object spread operator.
- Autoprefixed CSS, so you don’t need -webkit- or other prefixes.
- A fast, interactive unit test runner with built-in support for coverage reporting.
- A live development server that warns about common mistakes.
- A build script to bundle JS, CSS, and images for production, with hashes and sourcemaps.
- An offline-first service worker and a web app manifest, meeting all the Progressive Web App criteria.
- Hassle-free updates for the above tools with a single dependency.
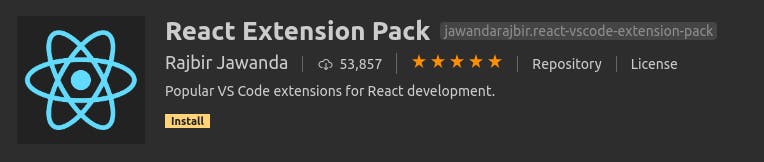
5. React Extension Pack
This is a popular VS Code extensions pack for React development. It contains the following extensions and is constantly updated:
- Reactjs code snippets - Adds code snippets for React development in ES6
- ES Lint - Integrates ESLint into VS Code.
- npm - Run npm scripts from the command palette and validate the installed modules defined in package.json.
- JavaScript (ES6) Snippets - Adds code snippets for JavaScript development in ES6 syntax.
- Search node_modules - Quickly search for node modules in your project.
- NPM IntelliSense - Adds IntelliSense for npm modules in your code.
- Path IntelliSense - Autocompletes filenames in your code.
6. React Cheat Sheet
This cheat sheet is a collection of several React concepts and examples. This guide targets React v15 to v16 from Components, States, Props, Nesting, Lifecycle, Hooks, JSX Patterns, DOM nodes, and more.
7. React Axe
React Axe allows you to test your React application with the axe-core accessibility testing library.
Axe is an accessibility testing engine for websites and other HTML-based user interfaces. It's fast, secure, lightweight, and was built to seamlessly integrate with any existing test environment so you can automate accessibility testing alongside your regular functional testing. ~ Axe Docs
- Install the package
#npm
npm install --save-dev react-axe

#yarn
yarn install --save-dev react-axe
- Initialize the module
import React from 'react';
import ReactDOM from 'react-dom';

if (process.env.NODE_ENV !== 'production') {
  let axe = require('react-axe');
  axe(React, ReactDOM, 1000);
} else {
  ReactDOM.render(<App />, document.getElementById('root'));
}
- Add configuration rules
let config = {
  rules: [
    { id: 'heading-order', enabled: true },
    { id: 'label-title-only', enabled: true },
    { id: 'link-in-text-block', enabled: true },
    { id: 'region', enabled: true },
    { id: 'skip-link', enabled: true }
  ]
};

axe(React, ReactDOM, 1000, config);
- Check the available Axe core configuration rules and add based on your needs.
I wrote extensively about the Axe Library in my past article; you might want to check it out.
8. Storybook
While React allows you to build components in a declarative way, visualizing these components become dependant on the app itself and its dependencies.
Storybook is a user interface development environment and playground for UI components. The tool enables developers to create components independently and showcase components interactively in an isolated development environment. ~ Docs
Storybook runs outside of the main app so users can develop UI components in isolation without worrying about app-specific dependencies and requirements.

- Install Storybook
npx -p @storybook/cli sb init
- Run Storybook
npm run storybook
An exciting part of Story is the Addons, which enable advanced functionality and unlock new workflows.
- Knobs: Interact with component inputs dynamically in the Storybook UI
- Actions: Get UI feedback when an action is performed on an interactive element.
- Source: View a story’s source code to see how it works and paste it into your app.
- Docs: Document component usage and properties in Markdown
- Viewport: Build responsive components by adjusting Storybook’s viewport size and orientation
- Storyshots: Take a code snapshot of every story automatically with Jest
- Backgrounds: Switch backgrounds to view components in different settings
- Accessibility: Test component compliance with web accessibility standards
- Console: Show console output like logs, errors, and warnings in the Storybook
- Links: Link stories together to build demos and prototypes with your UI components
And many more created by the community. Learn more about Storybook here
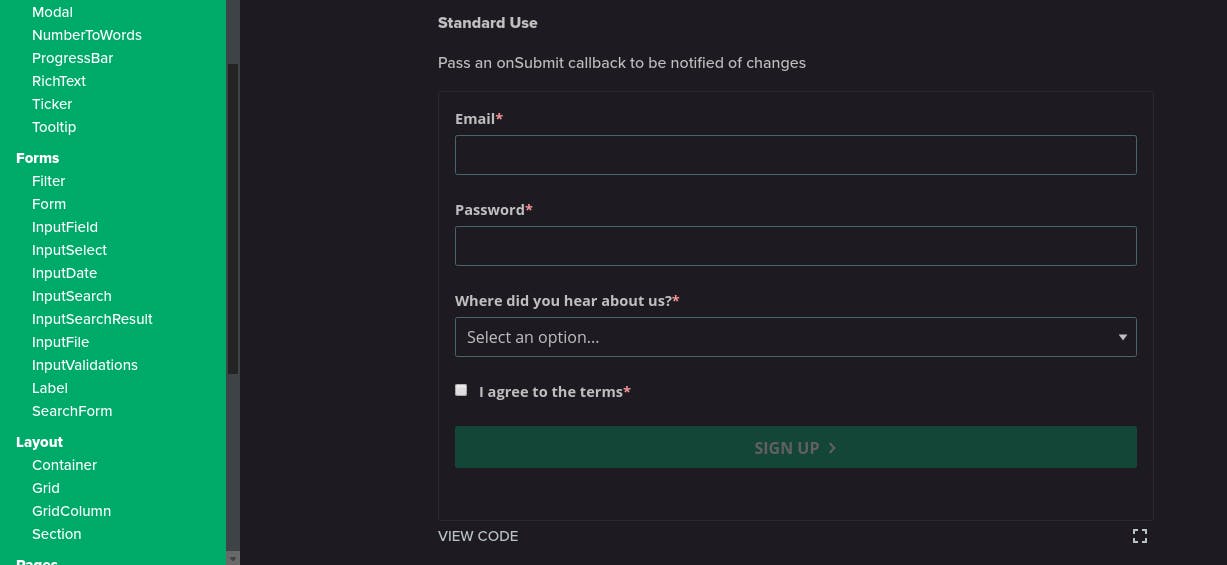
9. React Styleguideist
This tool also enables developers to create components independently and showcase components interactively in an isolated development but with a living style guide. You can also share components with your team, including designers and developers.
- Install Styleguidist
npm install --save-dev react-styleguidist
- Start a style guide dev server.
npx styleguidist server
- Build a production HTML version.
npx styleguidist
Learn more about React Styleguidist here
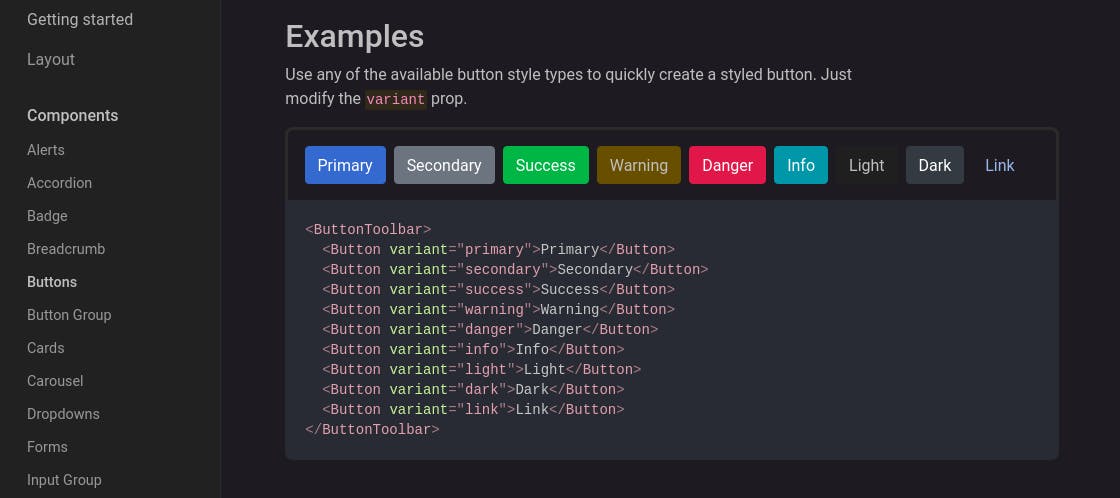
10. React Bootstrap
Bootstrap is the most popular front-end framework. If you're coming from the native HTML background, you should have used this a lot. Well, Bootstrap was rebuilt for React, awesome, right?
React-Bootstrap is a complete re-implementation of the Bootstrap components using React. It has no dependency on either bootstrap.js or jQuery. ~ Docs
It also allows you to pass state, props, and more.
- Install the package
npm install react-bootstrap bootstrap
- Import Bootstrap stylesheet in
src/index.jsorApp.js
import 'bootstrap/dist/css/bootstrap.min.css';
- Import individual components
import { Button } from 'react-bootstrap/Button';
import { Alert } from 'react-bootstrap/Alert';
- Reuse the component
<Button variant="primary">Primary</Button>
Learn more about React Bootstrap here
11. Styled Components
Styled Components allow you to use ES6 and CSS to style your apps without stress. This improves the developer experience of styling React component systems.
Styled Components allow automatic critical CSS, code splitting, no class name bugs, easier deletion of CSS, simple dynamic styling, extending styles, nesting, painless maintenance, and more.
- Install styled-components
npm install --save styled-components
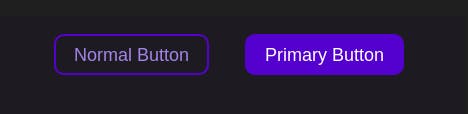
With styled-components, you're defining your styles and creating a normal React component, that has your styles attached to it because it uses tagged template literals to style your components.
import styled, { css } from 'styled-components'

const Button = styled.button`
  background: transparent;
  border-radius: 10px;
  border: 2px solid blue;
  color: blue;
  margin: 0.5em 1em;
  padding: 0.25em 1em;

  ${props => props.primary && css`
    background: blue;
    color: white;
  `}
`;

const Container = styled.div`
  text-align: center;
`

render(
  <Container>
    <Button>Normal Button</Button>
    <Button primary>Primary Button</Button>
  </Container>
);
Learn more about Styled Components here
12. CodeSandBox
CodeSandbox is an online code editor and prototyping tool that makes creating and sharing web apps faster. ~ Docs
Codesandbox enables you to start new React projects quickly and prototype rapidly. With CodeSandbox, you can create web apps, experiment with code, test ideas, and share creations easily.
13. React Testing Library
The React Testing Library is a very lightweight solution for testing React components. It provides light utility functions on top of react-dom and react-dom/test-utils, in a way that encourages better testing practices. ~ Docs
npm install --save-dev @testing-library/react
14. React Interview Questions and Answers
This contains a list of the top 500 ReactJS Interview Questions & Answers.
15. Awesome React
This is, in fact, the most important tool in this article as it comprises of all the tools I've mentioned above and more. Awesome React is a collection of awesome things regarding the React ecosystem (Resources, Tools, Community, Tutorials, Demos, Videos, Conference Talks, ReactNative, Redux, GraphQL, Apollo, and more.)
Conclusion
React has a community of millions of developers, and it continuously built by amazing developers across the globe. You can also check out these effective questions that can help you evaluate your mastery of React.js.
The Hashnode React Community is an online forum for discussion about best practices and application architecture, as well as the future of React.
Feel free to drop by and ask questions when you need help :).