How to Connect Google Colab to a Local Runtime

Google Colaboratory lets you build "Colab notebooks" on the browser by blending Python executable code with rich text (along with images, HTML, and LaTeX). It is one of the simplest ways to work with Python notebooks, with no configuration required, easy collaboration, and free access to GPUs and TPUs. Unfortunately, while Colab provides access to GPUs, these resources are limited and will eventually run out. For a monthly fee, you can upgrade to Colab Pro or Colab Pro+, which gives you access to more GPUs and memory resources. However, if you're running a minimal collaboratory notebook, you can utilize the alternative option; connecting Google Colab to a local Jupyter runtime to use your local CPU and file storage. In this article, I'll show you how to set up a Jupyter notebook and everything you need to know about connecting to Colab.
Prerequisites
- Basic knowledge of the command-line interface.
- A working computer with Python installed.
- A notebook created on a registered Google Colab account.
Step One
The first step is to install Jupyter notebook. I recommend you download and install Anaconda for your operating system of choice. This will also install Python, Jupyter Notebook, and other regularly used data engineering packages. Once Anaconda is installed, you automatically have Jupyter installed.
Alternatively, you can install Jupyter using PIP provided you have Python installed already using the command below:
pip3 install --upgrade pip
pip3 install jupyter
Upon a successful installation, you can launch Anaconda and start a Jupyter server using the GUI or use the command line.
Step Two
Install the Colab Jupyter HTTP-over-WebSocket extension that allows you to run Jupyter notebooks using a WebSocket to proxy HTTP traffic. You can achieve that using the command below:
pip install --upgrade jupyter_http_over_ws>=0.0.7
Next, enable the extension:
jupyter serverextension enable --py jupyter_http_over_ws
Step Three
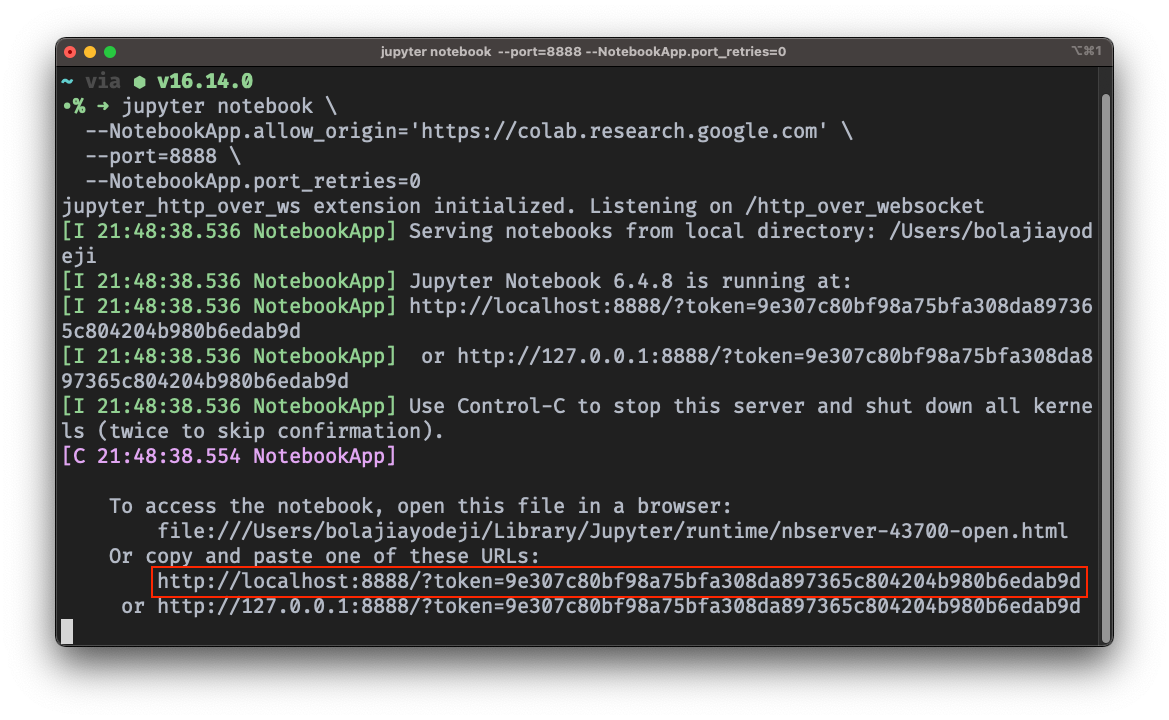
Start a new Jupyter server on port 8888, allowing origin to the Colab domain using the command below:
jupyter notebook \
  --NotebookApp.allow_origin='https://colab.research.google.com' \
  --port=8888 \
  --NotebookApp.port_retries=0
Once the server has started, it will print a backend URL alongside a token for authentication. Kindly copy the entire URL that starts with http://localhost ahead for the next step.
Step Four
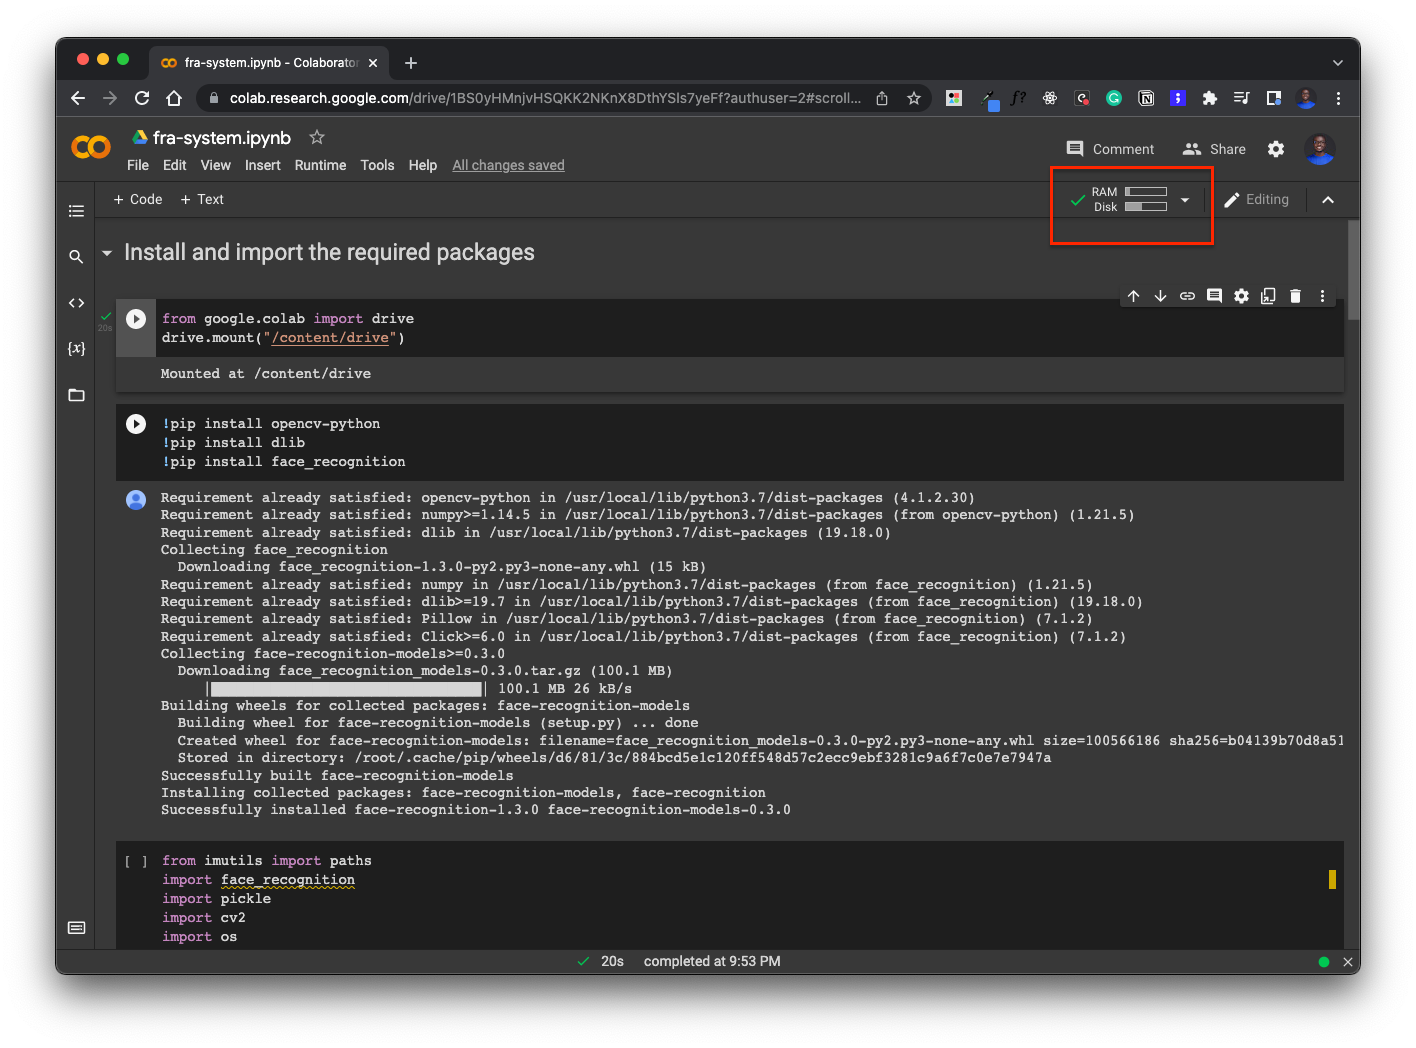
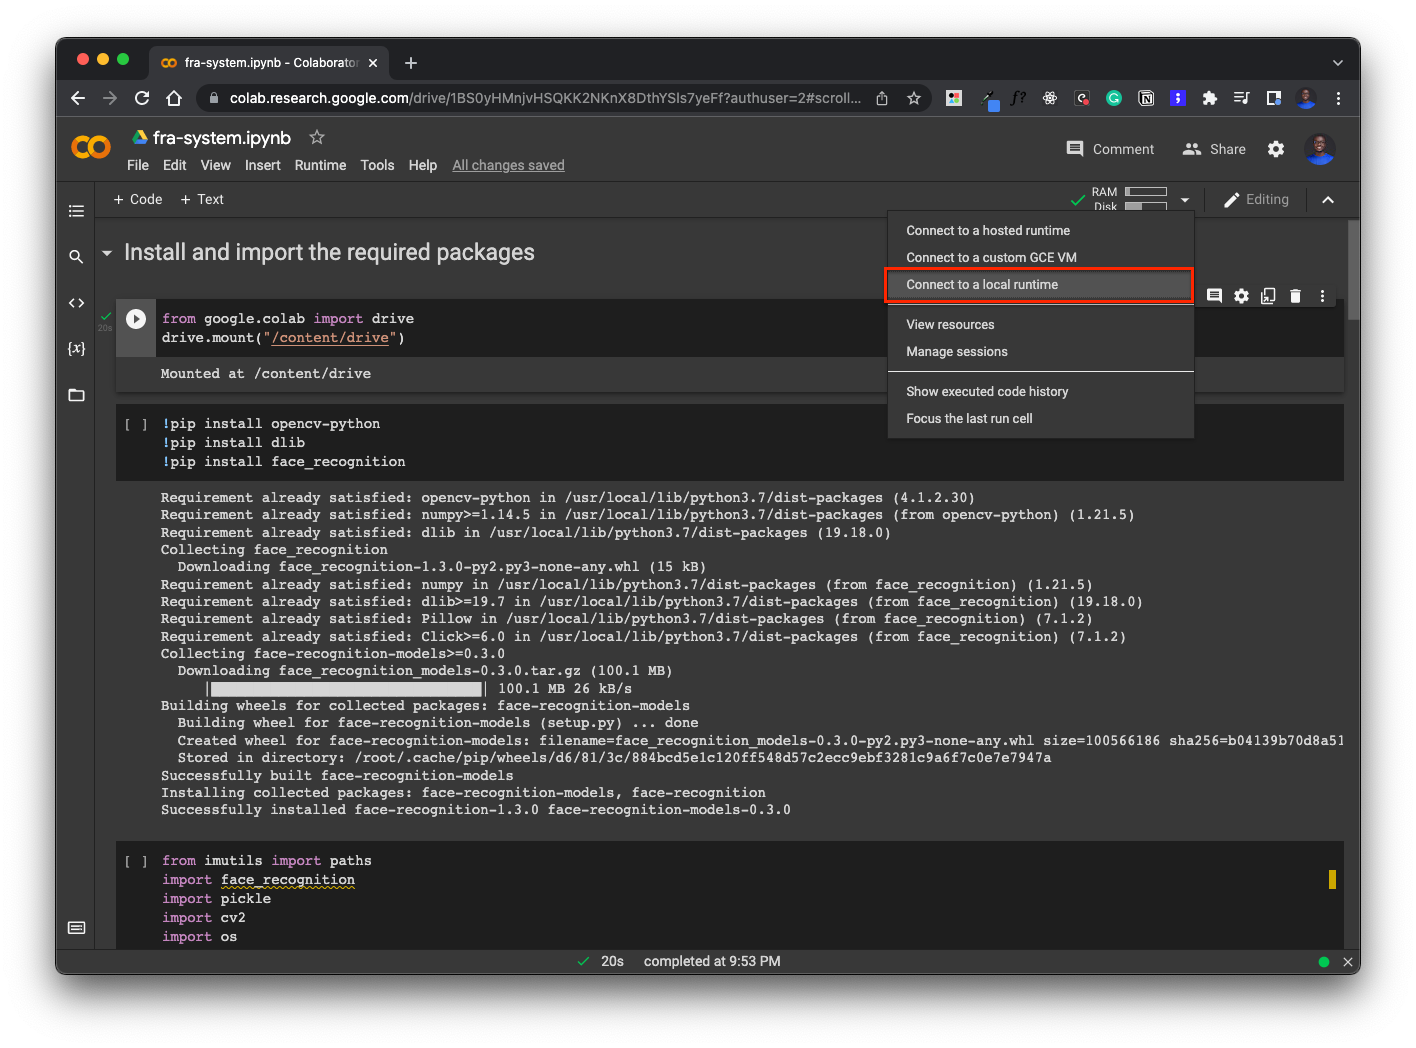
In your Google Colab notebook, click on the toggle button at the top right corner showing the RAM and Disk status bar and select the option "Connect a local runtime" as seen in the screenshots below.
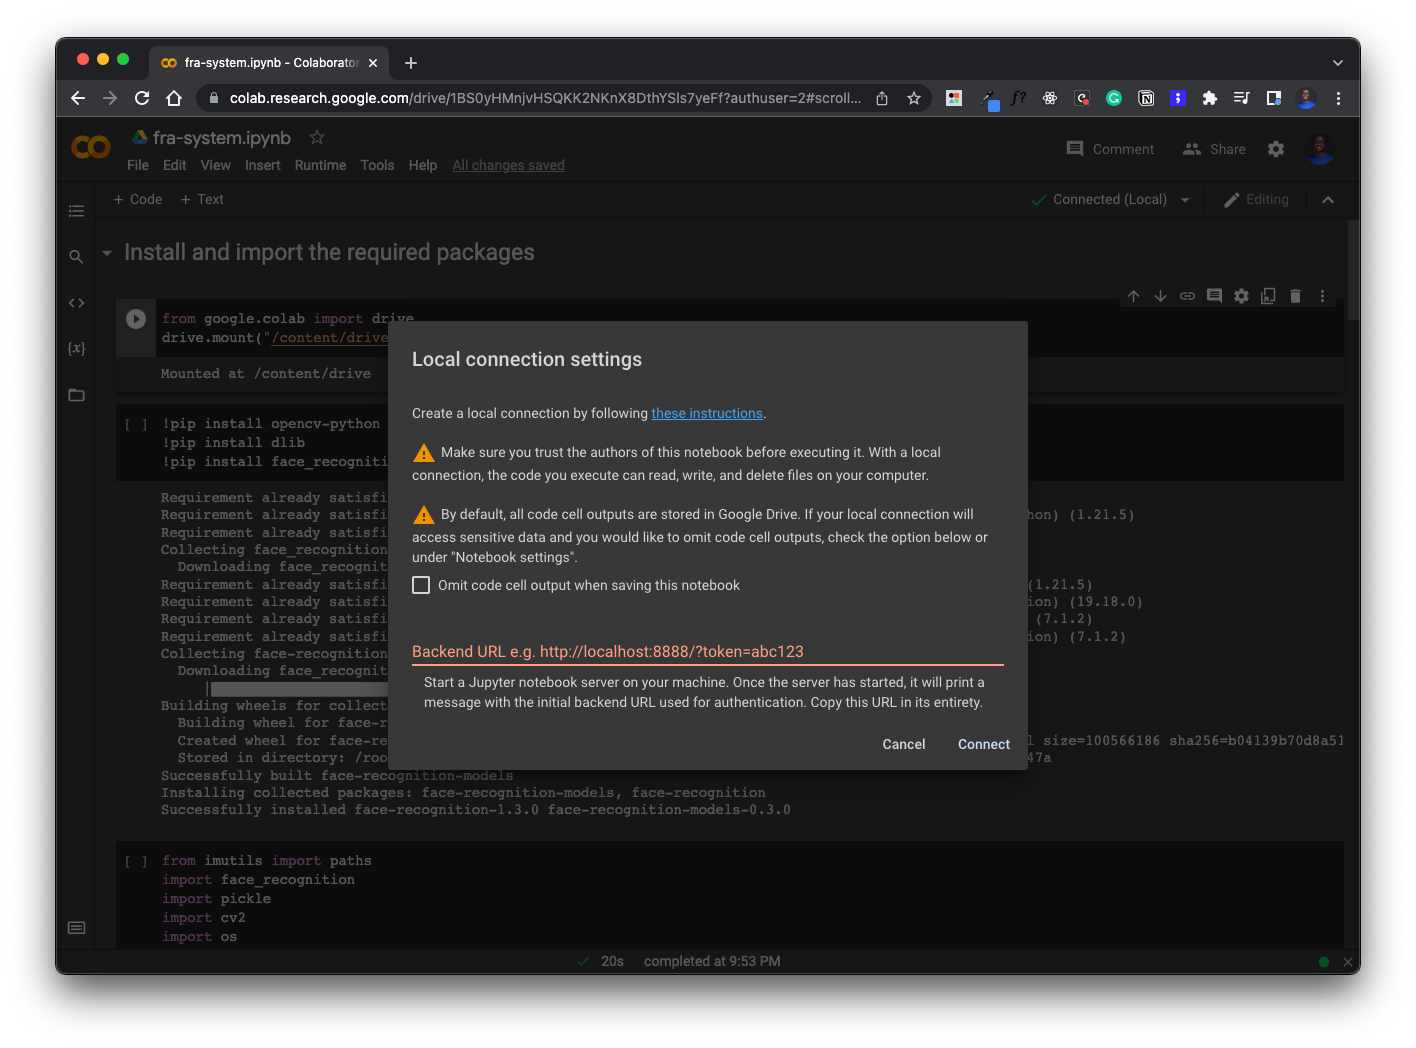
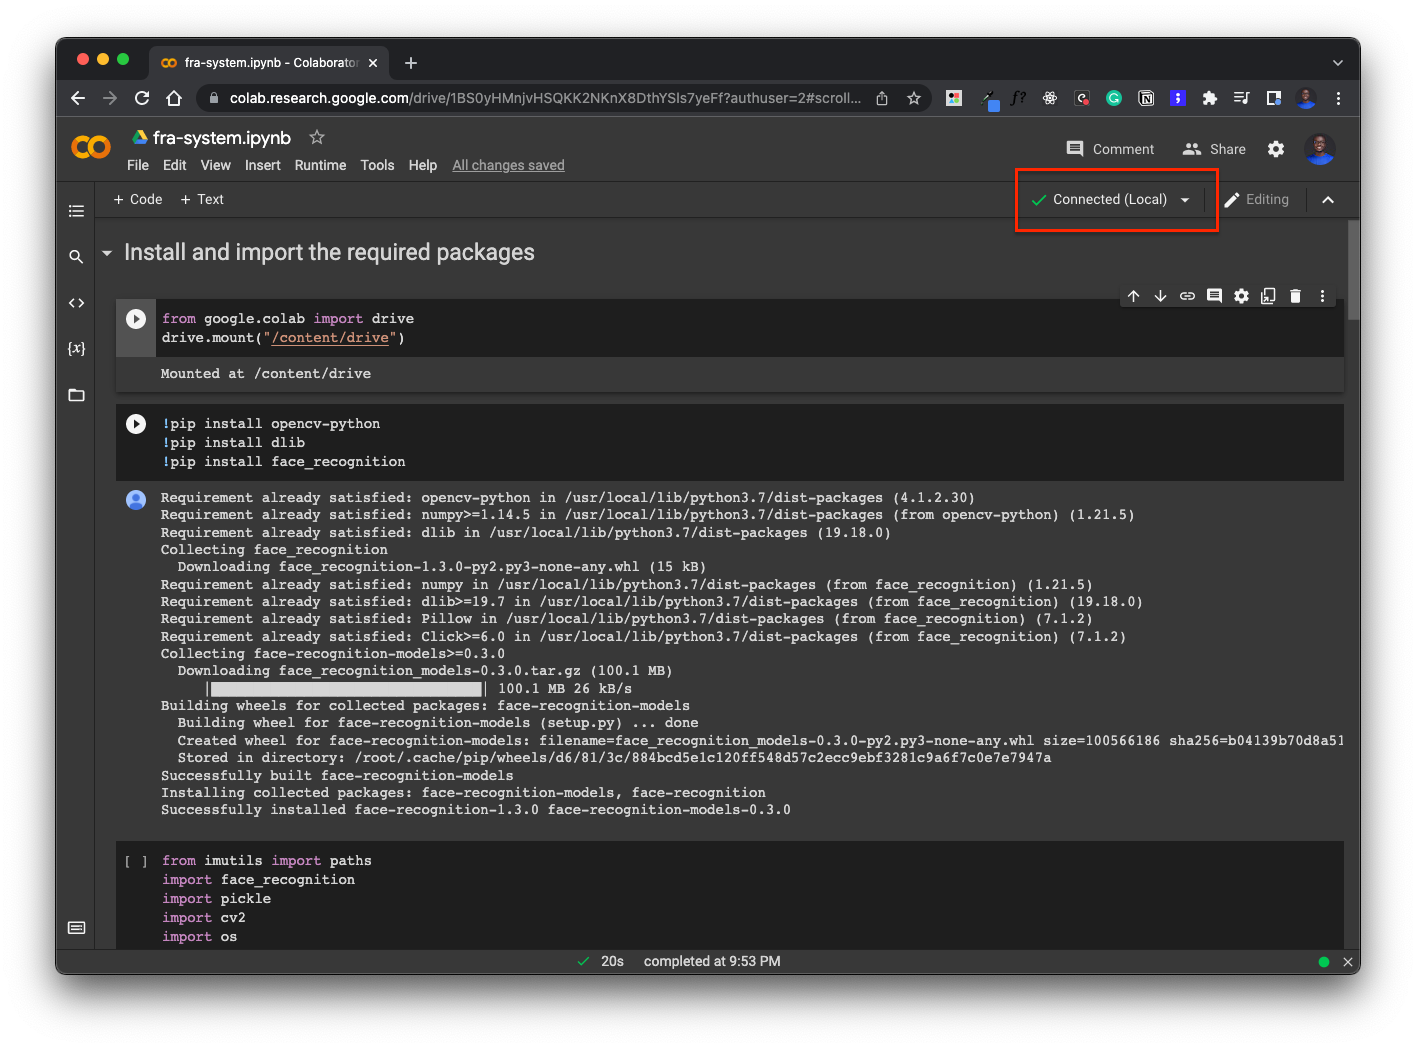
You'll then be asked to enter the backend URL you copied earlier. Enter it and click on the "Connect" button. Now you should be connected successfully to your local machine.
Conclusion
If you're running your own personal notebook, you can as well run them locally using Jupyter notebook. However, suppose you're working on a collaborative notebook or want to take advantage of additional Google Colab features like mounting your Google drive directly into the notebook. In that case, the local runtime setup can be useful when your GPU usage reaches its limit. To avoid security issues, make sure you trust the notebook before connecting locally.
I hope you found this helpful; cheers! 💙
About the author
undefined or mostly null.
Comments
Join the discussionYou can tell whether a review is professional from the first sentence. One of the most difficult aspects of a great dissertation writing services is providing unique, non-plagiarized material. The website will not rank well if the material is plagiarized. When it comes to selecting the top essay writing service reviews,
2022 Lamborghini Huracán attracts everyone's attention, but strange is the way he attacks the driver's senses
Data Science and Machine Learning
In this series, I will share introductory random articles related to Python, R, data science, and machine learning.